 Traditional French Cassoulet takes time. Lots of time. I’m guessing most people do not have the time to spend in the kitchen to make this French peasant dish. So, I took the highlights of cassoulet and sped up the process. Cassoulet recipes also vary across France, based on the region and the family making it. At its core is chicken, sausage, and beans. I’m using ingredients commonly found in the United States, but you can use other types of sausage if you want. Just note, that the sausage imparts flavor on the liquid. So, if you use andouille or chorizo, it will change the flavor profile of the dish quite a bit. Weeknight Cassoulet Serves 6
Heat a little oil in a (5-6 quart) Dutch oven or stock pot over medium heat. Add the bacon and cook until crispy. Remove bacon from the pan and set aside. Add the chicken to the hot grease and saute until brown on all sides. Add the sausage and cook for about 5 minutes. Add the onion, carrots, garlic, rosemary, and thyme. Mix to combine. Season lightly with salt and pepper. Saute until the onions soften, about 5-10 minutes. Add the stock and beans. Season with salt and pepper. Bring to a boil. Cover and reduce heat to low. Cook for 20-25 minutes. Add the cooked bacon. Adjust seasonings to taste. Serve with cooked rice, mashed potatoes, or buttered noodles.
0 Comments
Making yogurt at home is worth the time and effort. It simply tastes better especially if you use high quality milk. To make the best yogurt, you need an Instant Pot. The the mid-size Instant Pot. It holds a full gallon of milk. The video below details the process step-by-step. Here's the basic recipe and instructions: You need: 1 gallon whole milk and 1/4 cup full fat plain Greek yogurt
 My 15-year-old son, Miles, spends an inordinate amount of time watching videos on his phone. I guess he’s a typical teenager. Most of the videos he watches deal with gaming – like watching other people play video games like Minecraft. While I may find this rather droll to watch myself, he finds this rather riveting. Maybe I’m missing something here. But occasionally, he’ll come to me with a recipe he wants me to make simply because he watched a cooking channel on YouTube. He’s certainly not watching The Food Network and requesting anything from those cooks, but he does request things he sees made on the internet. Maybe the Food Network should take note of this… Anyway, each week I ask what everyone wants for dinner. This week, his suggestion, based on a YouTube video, was shakshuka. I’ve heard of shakshuka but never made it before. So… why not try it? Turns out, that yes, Miles has an eye for spotting good food online. The dish originates from Northern Africa where they mainly eat it for breakfast. It would make a great dish for brunch and we ate it for dinner. So, basically, you can have this dish at any time you want it. The simplicity of it is what makes it delicious – eggs poached in a spicy tomato sauce. That’s it. Shakshuka Adapted from the NY Times Serves 4-6
Preheat the oven to 375ºF. Heat the oil in an ovenproof skillet (12 inch diameter) over medium low heat. Add the onion, pepper, and garlic. Saute until the vegetables are soft, about 5-10 minutes. Lightly season with salt and pepper. Add the red pepper flakes, cumin, and paprika. Saute for another couple of minutes to bring out their flavors. Stir in the tomatoes and season with salt and pepper. Simmer until the tomatoes thicken slightly, about 10 minutes. Crack the eggs, one at a time over the tomatoes. Sprinkle with the feta cheese and season the top with salt and pepper. Bake until the eggs are set – 7-10 minutes for runny egg yolks, 10-15 minutes for firmer egg yolks. Sprinkle with chopped parsley to serve. Serve hot with fresh bread. If it’s served with dinner, add a fresh salad on the side. 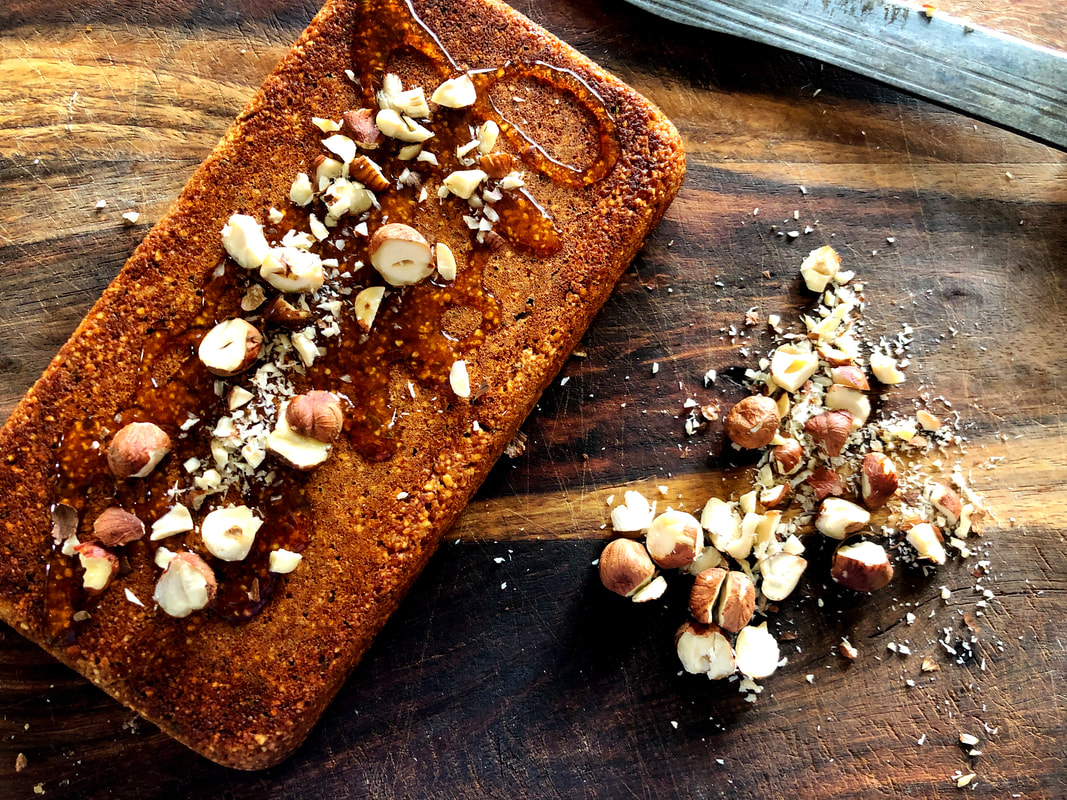 I’m a food nerd. I know everyone is surprised (shocked, really). So, when Caitlynn comes to me with a recipe for a 2000-year-old cake from ancient Rome, well, I’m intrigued. And since I seem to have more time on my hands these days due to the that pesky virus invading the planet, she and I spent an afternoon trying two different versions of this cake. I’ll be honest, this recipe is not mine (obviously, since I’m not an ancient Roman). We took a cue from this site: https://www.howtocookthat.net/public_html/2000-year-old-cake-recipe-ancient-rome/. If you watch through the video, you’ll see that the cook tried three different versions of the cake and ended up liking the one with yeast the most. Yeast in cake. This makes total sense as there weren’t many options for creating leavening in cakes back then and it got me thinking. I’m not convinced they would have had dried yeast back then. They likely would have had a sourdough starter. And they may have had wine with some fizziness, like Moscato. In the absence of a chemical leavening agent like baking soda or baking powder, perhaps they used a fizzy wine, along with a sourdough starter to make their cakes. Or maybe they didn’t use the starter at all and just used the wine. All this speculation makes me want to travel back in time to find out for sure. Me in ancient Rome? What a sight to behold! All this leads me to my version of the cake. I chose not to use yeast but to use Moscato Wine either by itself or with my trusty sourdough starter. And… since everyone is baking at home these days, finding whole wheat flour is impossible (really, people? All the flour?). In my hunt for whole wheat flour, I found the next best thing – whole farro, which happens to be an ancient grain. Yeah, it went old school real quick. Our verdict: the version with the Moscato was the winner. Fair warning -- the cake is not that sweet. It’s dense with savory notes and a hint of sweetness. It’s actually quite delicious with a glass of Moscato. I baked the cake in a 9x5 loaf pan but you could certainly bake this in a smaller cake or loaf pan. And you can make this cake however you see fit – all Moscato or using a blend of Moscato and sourdough starter, or maybe you want to use instant yeast with the Moscato. You can also use whole wheat flour if that’s what you have. In that case, can I borrow some? Anyway… Note the quantities for the recipe are in metric (grams, milliliters). If you have a scale, this will be perfect for you. Dolica Piperata Yield: 1 cake
Notes: ^We used a food processor to grind the wheat berries and almonds (separately). OR you can use whole wheat flour if you have it. *For sourdough use these quantities for the Moscato wine:
*With yeast:
Preheat the oven to 375ºF. Generously grease a small cake or loaf pan. In a small bowl, whisk together the ground wheat, almonds, rosemary, and cinnamon. Set aside. In another small bowl, whisk together the wine, honey, grape juice concentrate, and milk. Pour the wine mixture into the dry ingredients. Let sit for 15 minutes at room temperature. Bake for 20-35 minutes, depending on the depth of the pan or until the cake starts to pull away from the sides of the pan. In a 9x5 loaf pan, the cake baked for 23-25 minutes. Remove cake from pan. Drizzle with honey and sprinkle with hazelnuts. Serve at room temperature.  This recipe, akin to my bread or pizza dough recipes that reside in my head making it difficult to quantify, was recited to my colleagues and I by Colette (aka, Coco). When asked for the recipe, she said, "Oh, it's made of oats, millet, teff, egg whites, kefir, pumpkin seeds, nuts, sunflower seeds, a little oil." No quantities given. No other instruction. It's like all the ingredients just magically come together and voilà, you have waffles. I'm part of a culinary medicine program at Montana State University and my team was meeting with Colette, a local physician and the clinical director of the WWAMI program for MSU, regarding a series of workshops we are holding in the fall. Colette invited us over to her home for breakfast and served us these waffles. On the way back to campus, it was requested I try to remake the waffles and figure out Coco's recipe. It took me three attempts to come up with a recipe as close to the original as I could get. I'll be the first to admit that I'm not the biggest fan of gluten free foods. I like dabbling with gluten free recipes because I like the challenge of making them taste good or a least palatable (because, frankly, most gluten free products need help in the flavor world). I appreciate gluten free recipes like this one where the GF flours are of high nutritional quality. Used in this recipe, teff and millet provide excellent sources of dietary fiber and protein. As with most recipes, you can tailor this one to meet your own tastes or dietary needs. I offer quantities, but what you actually use is up to you. However, i suggest keeping the oats, millet, and teff in the recipe because of their nutritional properties. Additionally, the oats provide much needed structure to the finished product. I like to make a big bowl of batter and keep it in the refrigerator for the week. As the batter sits, it gets thicker because the oats soak up the moisture. This is perfectly fine. You can also choose to make all the waffles at once and reheat them over the week (or freeze them -- like Eggo® Waffles, but way better). These are now my go-to waffles and I find them to be a satisfying breakfast. When served with fresh berries, maple syrup, and a sausage link or two, you will have a delicious breakfast. Coco's Gluten Free Waffles
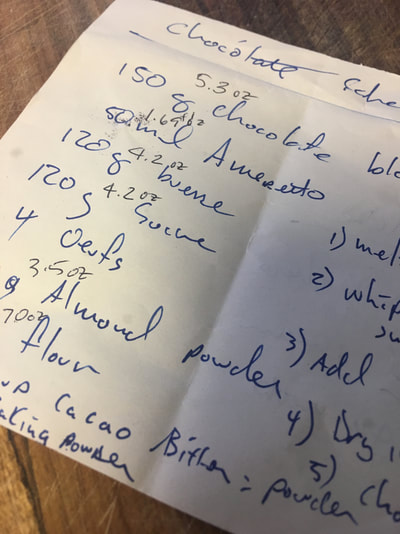
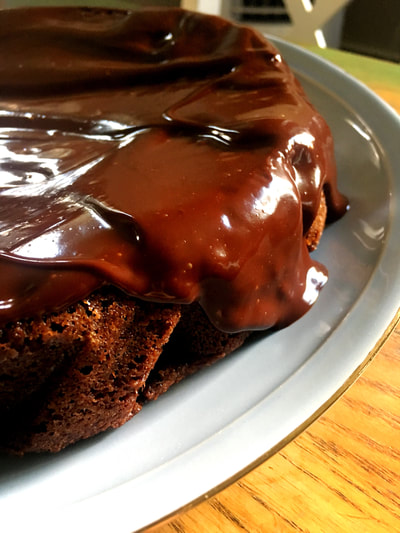
Place the oats, pumpkin seeds, sunflower seeds, and nuts in a food processor. Pulse several times until coarsely ground (not too finely ground -- enough to add texture to the waffles). Pour the seed mixture into a bowl. Add the millet, teff, baking powder, baking soda, salt, and cinnamon. Stir to combine. In a small bowl, whisk together the buttermilk, eggs, oil, and honey. Add egg mixture to the dry ingredients. Mix until combined. Set aside while the waffle iron heats up. The longer the batter sits, the thicker it gets (which is fine). Cook the waffles according to the waffle iron instructions. Enjoy the waffles with fresh berries and maple syrup. 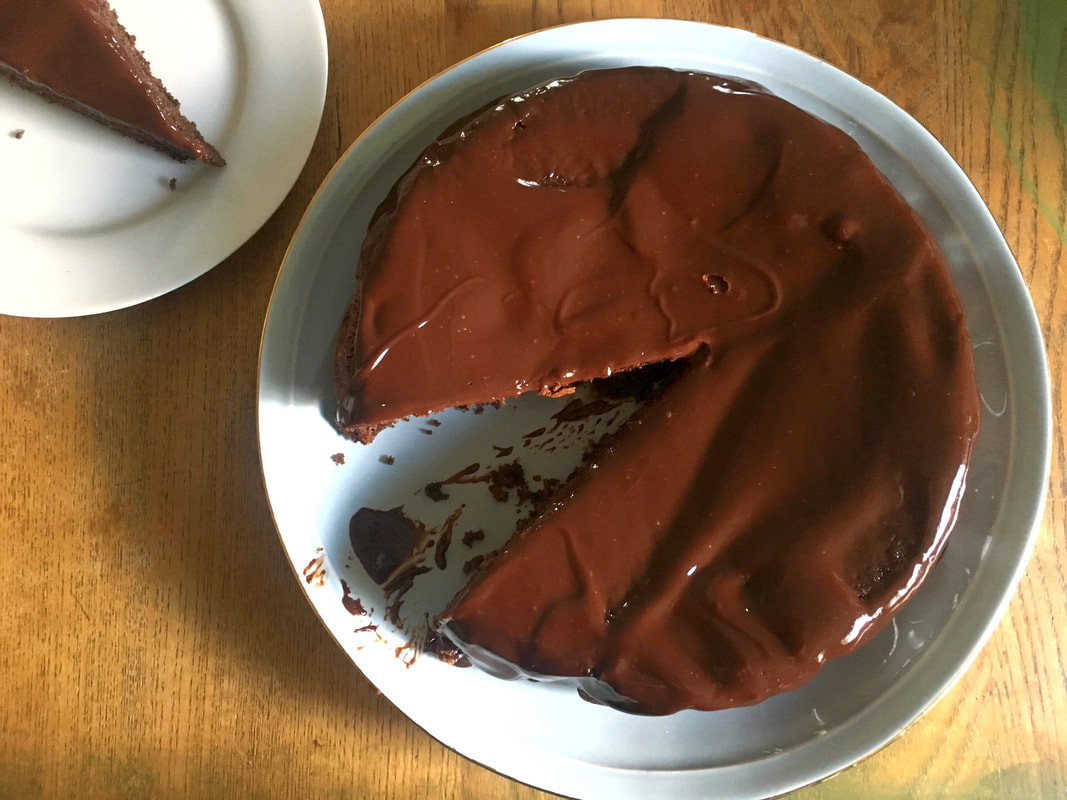 A few weeks ago, my husband met a chef who was trained in France. This chef brought a cake to a get together and my husband simply asked for the recipe to bring home to me. What I received was a recipe written most in French using grams (no cups or ounces) with minimal instructions. Even though I prefer to bake by weight anyway, most of the products sold in the US are according to the US system (ounces, pounds) and most recipes are written using standard measurements like cups. So, I not only had to translate the French into English, which I did without any problems, thanks to years of reading French recipes and knowing French cooking terms but I also had to adjust the "grams" to the more recognizable "ounces." This is a great cake to throw together. It's simple, straightforward and deliciously chocolatey. For the recipe, I did not covert the weighted ingredients into volume (cups). If you like to bake, this a good time for you to spend a few dollars on a scale and learn that baking by weight is much more accurate. I have both a digital scale and a standard scale with a dial. Either one will work. No measuring cups required, except to use as a scoop. Chocolate Cake Yield: 1 9-inch cake
Ganache
Lightly grease a 9-inch cake pan and line the bottom with parchment paper (grease the paper). Set aside. Preheat oven to 350ºF. In the top of a double boiler, melt the chocolate. Stir until smooth. Add the amaretto. Set aside. In the bowl of a stand mixer, cream together the butter and sugar until light and fluffy. Add the eggs one at a time, mixing well after each addition. In a small bowl, stir together the dry ingredients. Add the dry ingredients the egg mixture. Mix well. Pour in the melted chocolate and mix well to combine. Pour batter into the prepared pan. Bake for 35-40 minutes or until the cake begins to pull away from the sides of the pan. Remove from oven and cool completely. Invert cake onto a plate. Set aside while you make the ganache. To make the ganache, warm the cream over medium heat until it begins to steam (right before it boils). Remove the cream from the heat and add the chocolate. Stir until melted. Pour the ganache over the cake. Allow to set for 30 minutes before serving. Slice and serve. Great with either vanilla ice cream or whipped cream. Or heck, just have it by itself.  Celery root or celeriac is a gnarly looking vegetable that might be showing up at the farmers market these days. You may also find it sitting in the produce section of the grocery store waiting to be purchased. Don't be turned off by its appearance. It's a delicious root vegetable that should make its way onto your dinner table. Over the years, I have experimented with it in various recipes. In one recipe, I shred it raw and mix it with shredded apple for fresh and crisp salad that is a perfect stand-in for coleslaw. I've also mashed it into a puree and roasted it. It's one of those root vegetables that has many applications and uses in cooking. The flavor is similar to celery (hence the name) but it is not the root of a celery plant. Rather, celeriac is its own varietal. The flesh is creamy in color, once you get past the outer part of the root. A pairing knife is the best tool to cut through the outer skin of the bulb. For this recipe, I stopped at a farm stand to pick up a few vegetables for the week and I incorporated many of them into this recipe. You could just make the soup base (it's similar to leek and potato soup) but the kale and apple garnish adds a whole other level of flavor (sweet, spicy). Spicy Celery Root (Celeriac) Soup Soup
Garnish
In a large pot, heat the oil over medium heat. Add the garlic and leeks; sauté for 3-5 minutes or until softened. Season lightly with salt and pepper. Add the celery root, lentils, and stock. Bring to a boil over medium high heat. Reduce heat to low and simmer until the celery root is tender, about 30 minutes. While the soup is simmering, prepare the garnish. Heat the oil in a skillet over medium heat. Add the garlic and red pepper flakes; sauté for 1-2 minutes. Add the apples; sauté for 3-4 minutes until lightly browned and softened. Add the kale and thyme; season lightly with salt and pepper. Sauté until the kale begins to wilt slightly; about 2-4 minutes. Pour in the maple syrup and season lightly with salt and pepper. Set garnish aside until ready to serve. To finish the soup, puree the soup using an immersion blender, stand blender, or food processor. Puree until smooth. Adjust seasonings to taste. To serve, pour soup into the bowl and garnish with the kale apple mixture. Enjoy! 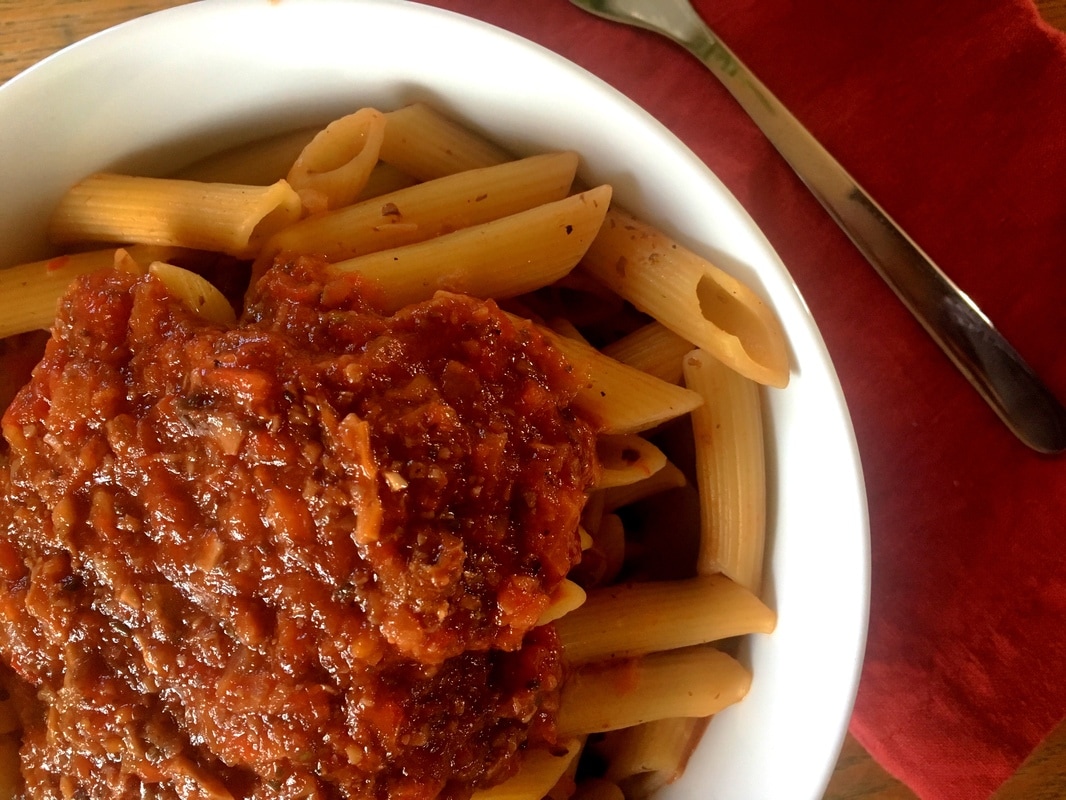 I know this seems sacrilegious -- to make bolognese without meat, but I just had to offer up a vegetarian version of this dish. I created a version that uses chicken thighs and mushrooms, which is a family favorite. However, I wanted to go one step further an omit the meat and poultry all together. Mushrooms are not my favorite thing to eat, but in a dish like this, they offer that meatiness and umami flavor that is greatly desired. Even though I know mushrooms are present in the sauce, they aren't hitting me over the head with their presence. This sauce requires about 2-3 hours of simmering time for the flavors to develop. You could make this in a crockpot set on low over 8 hours. It's delicious over pasta or polenta. And definitely serve with a glass of chianti and crusty bread. You won't miss the meat here. Trust me. Mushroom Bolognese
*For this recipe, I love to use a food processor to chop up the vegetables. You can pulse the onions and garlic together until finely chopped; same with the mushrooms. Place the dried mushrooms in a small bowl and pour the hot water over. All the mushrooms to soften, about 15-20 minutes. Drain and reserve the mushroom water and the mushrooms. Finely chop the rehydrated mushrooms. Set aside until ready to use. Heat the olive oil in a saucepan set over medium heat. Add the onion and garlic; sauté for 5-7 minutes. Add the rosemary and season lightly with salt and pepper; sauté for 1-2 minutes. Add the crimini and porcini mushrooms. Reduce heat slightly to medium low and sauté for 5 minutes. Add the tomato paste; cook for 3-4 minutes (helps bring out the flavor). Deglaze with the red wine; allow to reduce slightly. Pour in the tomatoes and rinse the can out with about a cup of water. Add the tomato water to the mixture. Stir in the mushroom water. Season lightly with salt and pepper. Reduce heat to low. Simmer for 2-3 hours. The sauce will reduce by about a third. Adjust seasonings to taste. Serve with pasta or polenta. 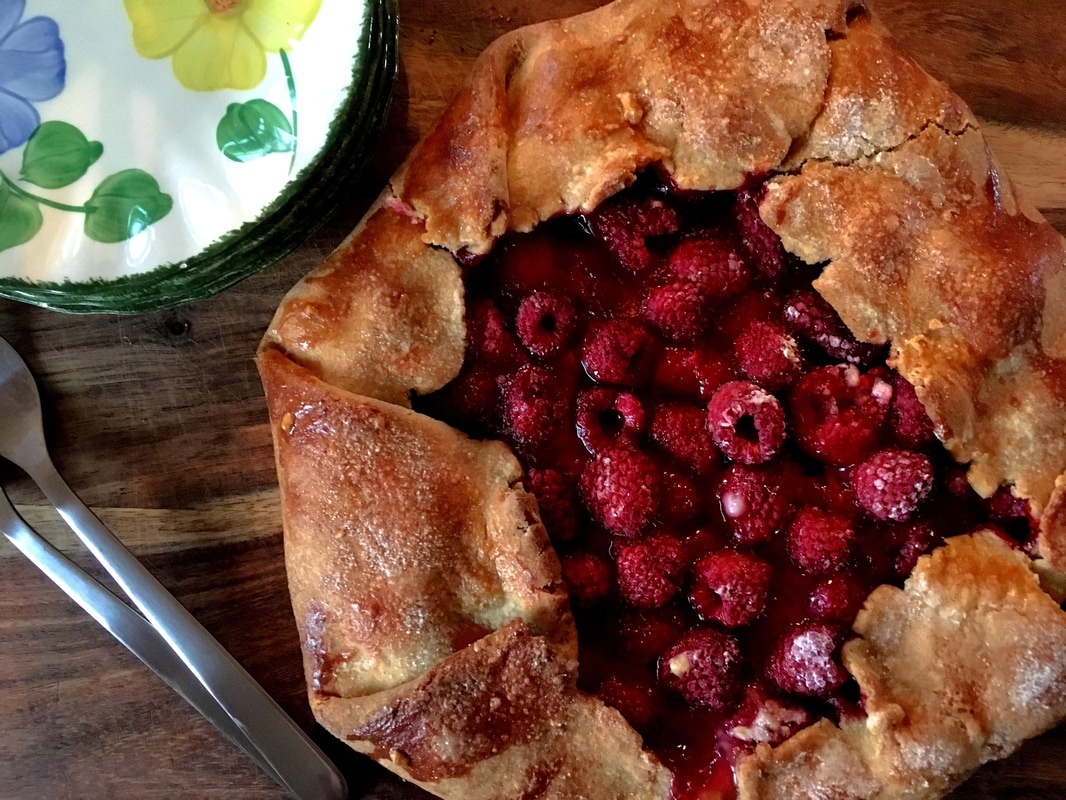 Simply put, I love pie. Fruit pies. Cream pies. Any kind of pie. I'd take pie over cake any day. A while back, I posted a recipe for an Apple Galette. Galettes are my favorite kind of "pie" because they are simple to make and usually contain less sugar and more fruit than a standard pie. The recipe below is a variation of that galette but it can be made with any fruit you have available. The crust is whole wheat but still tender and flaky. Really, it is. I don't suggest using frozen berries in this because of the excess moisture they contain. Fresh is best when making galettes. It lets the fruit really shine. Raspberry Galette with Whole Wheat Crust
**The spice (or herb used) will depend on the fruit you choose. Raspberries and cardamom go well together. Lavender and blueberries are a lovely match. Cinnamon goes with many fruits and berries. Or you can just leave the spice out. Preheat oven to 400ºF. Line a baking sheet with parchment paper. Roll the pie crust into a 12 to 14-inch circle. Transfer to the baking sheet. In a large bowl, toss together the fruit, sugar, salt, lemon juice, lemon zest, cornstarch, and cardamom. Mound the fruit mixture in the center of the crust, leaving a 1-2 inch border. Gently fold the pastry over the fruit, pleating it as you move around the crust. Brush pastry with the cream and sprinkle with sugar. Bake for 35-45 minutes or until the filling is bubbling and crust is golden brown. Cool for 20 minutes before serving. Serve slightly warm or at room temperature. Ice cream or sweetened whipped cream optional. Whole Wheat Pie Crust
In a the bowl of a food processor, mix together the whole wheat flour and salt. Add the butter and pulse 15-20 times until the mixture resembles coarse meal. In a liquid measuring cup, whisk together the honey, orange juice, water, and zest. With the motor running, pour wet ingredients through the feed tube. Pulse until the mixture starts to come together and is moistened. Place the dough on a lightly floured surface. Pat the dough together until it becomes a solid piece. Flatten into a disk. Wrap in plastic wrap and refrigerate for at least 1 hour. Can be made up to 2-3 days ahead of time. The best way I can get my children to eat their veggies is through soup. My daughter loves nearly any soup I put in front of her -- squash, leek and potato, and tomato soups. Whenever we eat at Panera Bread, she always orders Black Bean soup, providing it is on the menu that day.
Black Bean soup at Panera is thick and rich in bean flavor. It's been one soup I haven't been successful in copying. Maybe it's because I don't like my soup to be that thick. Or maybe they have some secret ingredient in it that I don't have access to. But it hasn't stopped me or my husband from trying to make a good black bean soup. You know, one that will pass our daughter's taste test. Currently, my husband is in charge of cooking for the kids. So, while I'm away, working in another town, my husband is the chief cook and bottle washer at home. He has named Friday, "Pizza Night," and Thursdays are "Taco Night." He's even gone so far as to make his own sourdough pizza crust. And he attempted to make black bean soup. It turns out, he needed a soup to with his "soup and sandwich night," whatever night he has designated that to be. The soup was a success. It's flavorful, thanks to the bacon and hits all the right notes. I made a few minor adjustments to the recipe, but it is a great all-around soup. Great with sandwiches or just a slice of crusty bread. Black Bean Soup
Garnishes: sour cream and avocado In a medium size stock pot or soup pot, cook the bacon over medium heat until crispy. Remove from the pan and chop into small pieces. Leaving the bacon grease in the pan over medium heat, add the onions, garlic, and serrano chili. Season lightly with salt and pepper. Cook until the onions are soft, about 5-8 minutes. Add the tomato paste and cook for another 2-3 minutes. Season with cumin and chili powder. Add 3 cans of the black beans and the vegetable stock. Reduce heat to simmer. Cook for 20 minutes. Using a hand blender (or food processor), puree the soup until semi smooth. Add the last can of black beans. Season lightly with salt and pepper. Cook for another 10-15 minutes. Adjust seasonings as needed. Serve with sour cream and sliced avocado. |
Archives
October 2022
Recipe Categories
All
|
Home |
About |
Resources |
About Marcy |
Contact |
Copyright © 2015



 RSS Feed
