
|
Making yogurt at home is worth the time and effort. It simply tastes better especially if you use high quality milk. To make the best yogurt, you need an Instant Pot. The the mid-size Instant Pot. It holds a full gallon of milk. The video below details the process step-by-step. Here's the basic recipe and instructions: You need: 1 gallon whole milk and 1/4 cup full fat plain Greek yogurt
0 Comments
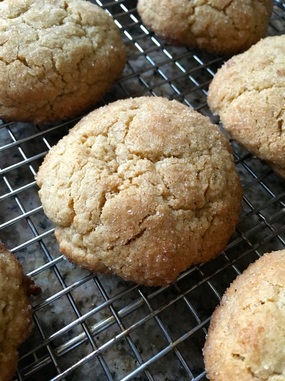 Snickerdoodles Snickerdoodles Ok, so some people like to bake. Some just like to cook. I happen to be one of those that enjoys doing both. Baking (especially bread) provides me a sense of accomplishment that I do not get from making a simple dish like spaghetti. Maybe it's because it does not take much for me to make a plate of pasta but with baking, I have to think in ratios and how the ingredients work together. It takes patience and I have to measure ingredients (most of the time). It's more precise than making meatloaf or soup.
However, if you are new to this whole "baking" thing, I have some tips for you: Baking is a science, more so than cooking. Treating it like a science will definitely improve your baking skills. Know your chemical leavening agents, which are acids and bases (Oh no! Chemistry!!):
Preheat the oven This seems like a no-brainer but it must be repeated. Preheat the oven prior to baking. This is especially important for cakes, muffins, or breads where it is important that the immediate heat of the hot oven starts the baking process right away (like getting those chemical reactions to occur rapidly). Room temperature ingredients Unless you are making pastries, you need room temperature ingredients. For instance, if you are making cakes, cookies, or muffins, let all the butter, eggs, and milk come to room temperature before mixing together. If the butter is at room temperature and you’ve carefully creamed it together with the sugar, adding cold eggs and milk will start to solidify the butter. Your end product will turn out greasy. Creaming fat/sugar Nearly every cookie or cake recipe calls for creaming together the butter and sugar. What does this even mean? Well, it means thoroughly mixing together the butter and sugar until it is one homogenized mixture, light, and fluffy. Muffins (and pancakes) Do not over mix muffin or pancake batter. Why? Over mixing the batter will make a tough, flat pancake and causing tunneling (air pockets) in muffins. Mix the wet and dry ingredients separately before combining. Add the wet ingredients to the dry and then stir the mixture until just combined. Some tiny lumps are ok. The batter should not be smooth. Master a simple cake recipe, cookie recipe, and muffin recipe like the one below. Below is my grandmother's snickerdoodle recipe and happens to be my kids' favorite cookie. I will be posting more cake, cookie, and muffin recipes over the next few months. Stay tuned! Snickerdoodles
Topping:
Preheat oven to 350ºF. Cream together the shortening, sugars, eggs, and cream. Add the vanilla. In a bowl, stir together the flour, baking soda, cream of tartar, and salt. Add to the butter mixture and mix thoroughly to combine well. The cookie dough will be quite stiff. In a small bowl, mix together the 1/2 cup sugar and teaspoon of cinnamon. Roll the dough into 1-inch balls and roll in the cinnamon and sugar. Place on a baking sheet and bake for 10-12 minutes or until lightly golden brown. Cool on a wire rack. *You can use white whole wheat flour. 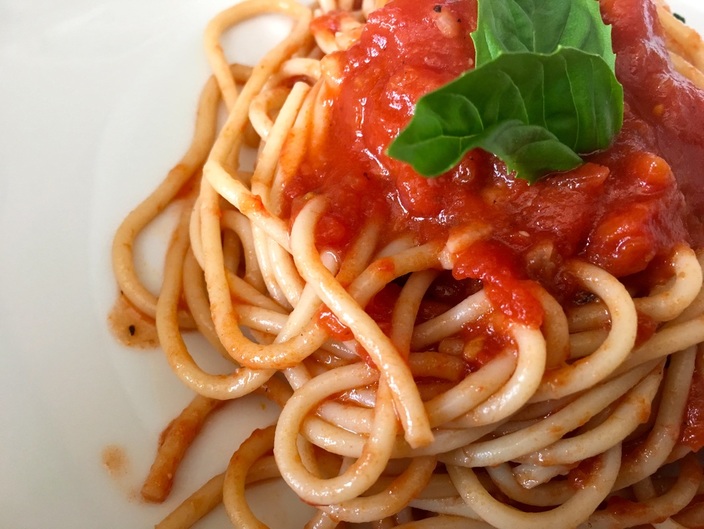 Ok, so this more than just boiling water. It's about making spaghetti with homemade marinara sauce. My assumption is, you probably already know how to boil water and cook pasta. However, there might be someone in the crowd who doesn't understand the process, so let me break it down for you. Here are some simple tips for boiling water and pasta
Pasta with Marinara Sauce Serves 3-4
Bring a pot of water to a boil. As you are waiting for the water to boil, begin making the sauce. Place the olive oil, red pepper flakes, and garlic in a cold sauté pan or skillet. Place the pan on the stove over medium heat. Doing this helps infuse the flavors of the red pepper flakes and garlic into the oil. Once the garlic begins to sizzle, add the tomato paste. Stir it around and cook for 1 minute. Add the red wine; cook for 1 minute. About half of the wine will cook off. Add the tomatoes and season with salt and pepper (about ½ teaspoon of each). Reduce heat to medium low and simmer for 10-15 minutes. Taste and adjust the seasonings. At this point, you have a choice to leave the sauce chunky or puree it for a smoother sauce. I chose to puree half of the sauce using a hand blender (do this in a deep bowl, to prevent wearing the sauce). You can also use a regular blender or food processor. Once I pureed the sauce, I returned it back to the pan and added the basil. Once the water begins to boil, add a hefty pinch of salt to the water and add the pasta. Cook pasta according to package directions, but reduce the cooking time by 1 minute. Drain the pasta, reserving a ½ cup pasta water. Add the pasta and pasta water to the sauce. Cook for 2-3 minutes over medium low heat. Serve with bread and parmesan cheese. Enjoy! I take cooking and baking for granted. I’ve been doing this for so long, that I usually don’t use recipes and I write many of my own recipes or usually just throw things together without thinking about it. But, how did I get to this place? Was I a natural in the kitchen?
Sort of but most importantly, I was blessed with an encouraging family. My grandmother taught me how to bake cookies but when it came to actually cooking a meal, it was a lot of trial and error. I’ve made my fair share of mistakes over the years. At the tender age of 14, I decided to bake my first loaf of bread - a French baguette using Julia Child’s recipe. You know, why not start at the top? Well, it was my first foray into baking yeast bread and it turned out like a baseball bat. A baguette bat, so-to-speak. Over the years, I practiced and learned. I went to culinary school. Practiced and learned some more. Worked in kitchens. Kept practicing and learning. And now here I am, a confident chef. But… still practicing and learning. Some things are easier to master than others, but you have to start somewhere. If you find cooking (or baking) intimidating, start small. Find an easy recipe and master it. Then, move on to another recipe and master that one. As you grow comfortable working in the kitchen, the easier it gets and the more confidence you will gain. You don’t have to be a “natural” for this whole cooking thing. Sure, some people are blessed with a natural ability to throw food together and create amazing meals. However, when it comes down to it, cooking is a skill. You need to master a few skills and then you can make nearly anything. You may need someone to show you the proper way to chop an onion, but you can get started on your own by experimenting with recipes. One of the most important things to do when you start cooking, is to remember to season your food. You need to train yourself to season food (and taste it) as it cooks, so you understand how flavors work together. Salt and pepper are your friends, so use them wisely. Utilizing proper seasoning techniques will help develop your palate and make you a better cook. The last thing I will say is to have fun with cooking. It should not be treated as a chore. Think of it as a way to connect with the food that is providing you nourishment. You are turning a simple recipe, like leek and potato soup, into a delicious and healthy meal that didn't break the bank or take all day to prepare. The reason we are fascinated by celebrity chefs and cooking shows is that they transform simple ingredients into amazing meals (or so we think). There is no reason you cannot do the same thing in your kitchen. This blog offers many basic recipes -- from pie to roasting chicken. Over the next few months, I will provide even more “basic” recipes, tips, and skills for you to master. 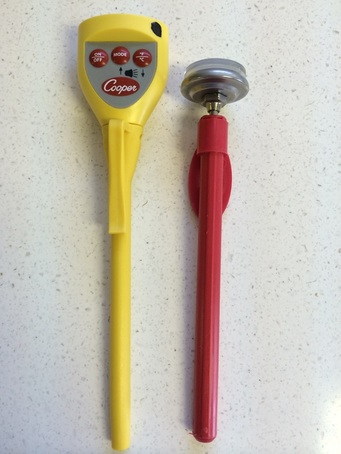 Instant-read thermometers Instant-read thermometers Long ago and far away, I was once a novice cook learning the ins and outs of working in a kitchen. Over the years, after watching endless hours of TV cooking shows on PBS and the Food Network and working as a chef, I have gotten very selective in which tools I actually use in the kitchen.
Until recently, the kitchens I've worked in (at home or in a job) were small and compact. I never had much storage space, let alone much counter space to work on. So, I had to be selective in the kitchen equipment I kept around. I found that I could make a great meal in any size kitchen and the bigger the kitchen I cooked in, meant more places for me to make a mess (and clean up later). My home kitchen now is laid out well, but I still only use maybe a third of it when I'm cooking. Over the past couple of years, I have gotten rid of many pieces of equipment that I do not find necessary and am now down to pieces that I actually use. If you are just starting out and learning how this whole cooking thing works, I compiled a list of equipment that you actually need to set up a basic kitchen. Of course, you can always add to it as you gain confidence in your cooking skills and expand your culinary repertoire, but this list will get you started. And ... I encourage you to look for some of these items in thrift stores, on eBay, or local garage sales because you might find what you need for a lot less money. Pots and Pans:
As a general rule, I do not use non-stick cookware. Instead, I use cast iron in place of non-stick. When it comes to the pots and pans, I will not promote any one brand over another. Look for pans that are stainless steel or anodized aluminum (or a combination of both). Utensils:
Electric Equipment:
Knives:
Baking:
Other:
Later on, you can add more equipment as you see fit. The next step would be to add a stand mixer, a hand blender (very handy tool), and a few more pots and pans as you see fit. Stocking a kitchen can be pricy, but if you have the right equipment and tools, many of these things should last a long time (or a lifetime in some cases). My most trusted piece of equipment is a food processor that I've had for nearly 20 years. I also have an odd attachment to my chef's knife, but that's common with many professional cooks. Or at least I hope it is. Anyway... I hope this list is helpful for those just starting out. Cooking can be fun and does not need to be a chore. Having the right equipment in place will help you succeed in making any recipe.  A group of wines I recently sampled. The best of the night? 2003 Spanish Rioja. Delicious. A group of wines I recently sampled. The best of the night? 2003 Spanish Rioja. Delicious. Cooking with alcohol is one of those things that seems a little daunting, especially if you are new to cooking in general. Alcohol brings flavor to a recipe by heightening the flavors of the other ingredients. However, before you start cooking with alcohol, you should know a few basic concepts.
Tips for Cooking with Wine: In the basic sense, wine is fermented grapes. However, there are several varieties of grapes, along with several ways to make wine from combining certain grapes to the actual fermentation process. I will not get into the ins and outs of wine because that information will fill a book (or several books). I will, however, give you the most basic information regarding wine and cooking.
Fortified wines:
Wine Pairing: I took a wine tasting class from a sommelier who told us that while there are rules for pairing wine with food, it does not always matter. He said to drink the wine you like with whatever food you make. That’s probably why I drink Pinot Noir with nearly everything. But… if you are really curious about the rules of wine and food pairings, check out Food and Wine’s article. Tips for Cooking with Beer: Brewing beer involves making a mash with grains (like barley), adding hops and yeast, and then allowing it to ferment. Hops is one of those ingredients that has taken over the world of microbrew. Every microbrewery makes pale ales or IPAs that are incredibly bitter and hoppy. I may be in the minority here but I would rather have a beer that is dark and full bodied and sans a lot of hops. You can successfully cook with beer but you need to be choosy as to what you use since some beer can get bitter when cooked.
For a good, simple guide to beer, check this out. Tips for Cooking with Spirits: Spirits include all those hard liquors that might be taking up room in your liquor cabinet. Aside from doing shots or making martinis, some spirits add that something extra to certain recipes and are well worth using in the kitchen. Whiskey or Bourbon – Made from fermenting grains like barley and then aged in barrels. Any good tasting Whiskey will make a great BBQ sauce or even a bourbon crème anglaise (white sauce for desserts like bread pudding). Vodka – made from distilling cereal grains or potatoes. Can be used in cooking light meals or sauces. Most popular recipe is Vodka Pasta Sauce http://www.foodnetwork.com/recipes/food-network-kitchens/penne-with-vodka-sauce-recipe.html Tequila – Made from the Agava plant grown in Mexico. Use tequila instead of white wine in fish dishes, especially dishes that are made with shell fish and are spicy. (Tequila Lime Scallops, anyone?) Brandy or Cognac – Made from distilling wine. Cognac is distilled in a particular region in France. Brandy is the same thing except made elsewhere around the world. I like to add a splash of brandy to a sauce at the very end of cooking. It adds that something "extra." There you have it. The basics of cooking with alcohol. Now, go forth and impress your friends and family by making Coq au Vin (recipe coming soon, I promise!).  One of my all-time favorite meals is roast chicken. In fact, if I had to pick my last supper, it would be roast chicken with ratatouille. Seriously good, comforting eats. Before I really started cooking, I was intimidated by a few basic recipes -- biscuits, pie crust, and roast chicken. Seems odd, right? Well, my mom may have been a good cook when I was a kid, but I don't ever remember her roasting a chicken or making pie or biscuits from scratch. Don't get me wrong, she could throw together a mean casserole and maybe pot roast but she was always in a hurry to get dinner made. So, when it was time for me to start learning how to cook some basic recipes, I turned to Julia Child (basic French), Marcella Hazan (basic Italian), and the Betty Crocker cookbook (basic everything). Seriously. Honestly, if I had to keep one cookbook, it would probably be Hazan's Essentials of Italian Cooking. It's a classic and one that every budding chef should have. Hazan has a recipe for lemon roast chicken that is one of the easiest recipes around. Over the years, I've used the same basic recipe but put my own spin on it. In the recipe, the chicken will cook in 1 hour. One piece of cookware that is essential for this is a cast iron pan. If you don't have a cast iron pan, go out and buy one. They are not expensive and will last a lifetime. Best non-stick pan out there. You can get away with using another oven safe pan but cast iron will retain the heat much better. Roast chicken is best served after it has rested for about 20 minutes after cooking. Serve with a side of vegetables -- your preference. You can make gravy from the pan juices, if you so please, but I am not providing instructions on that. Honestly, this chicken doesn't need gravy. Roast Chicken Serves 6
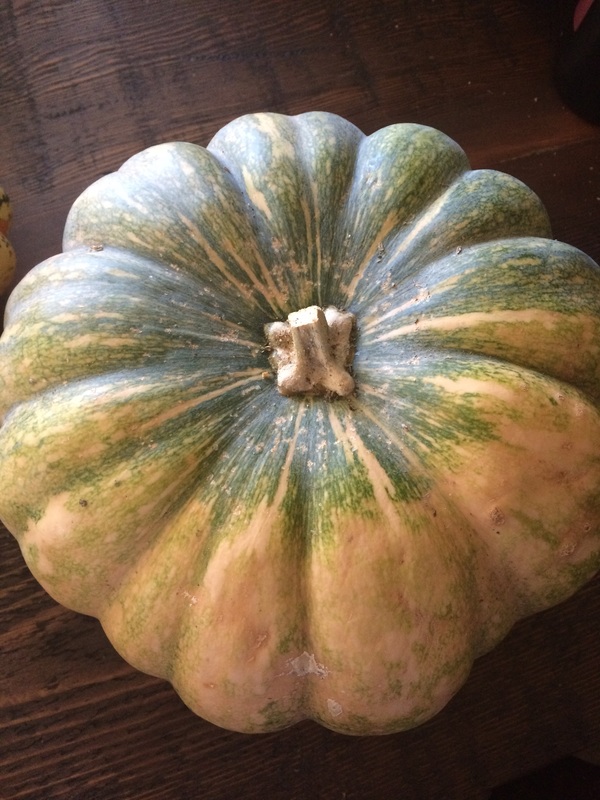
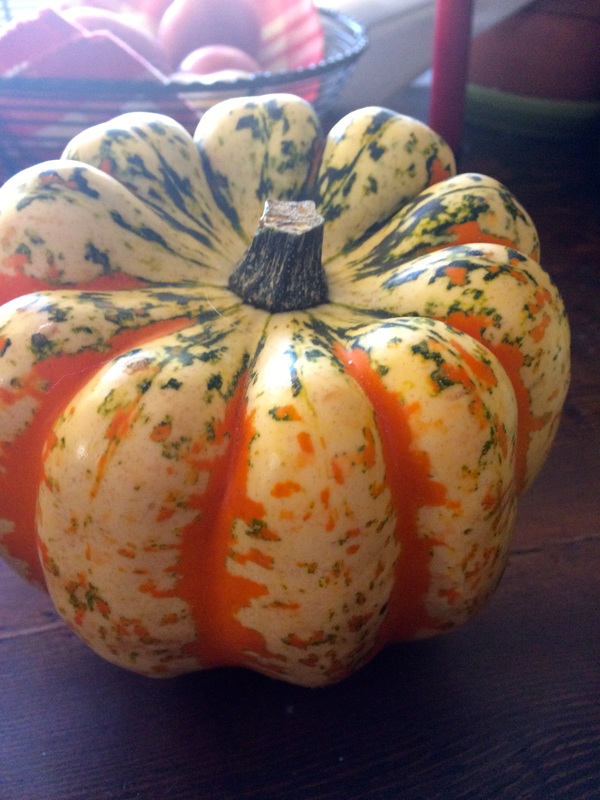
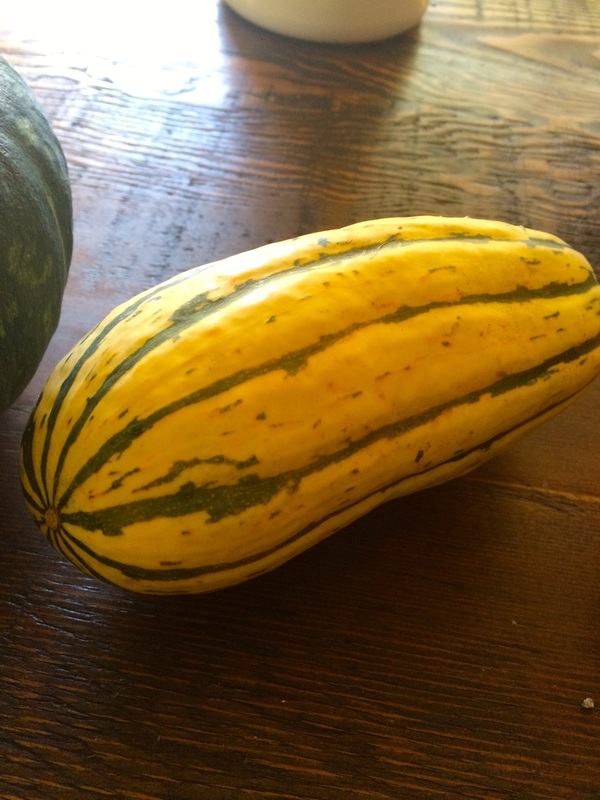
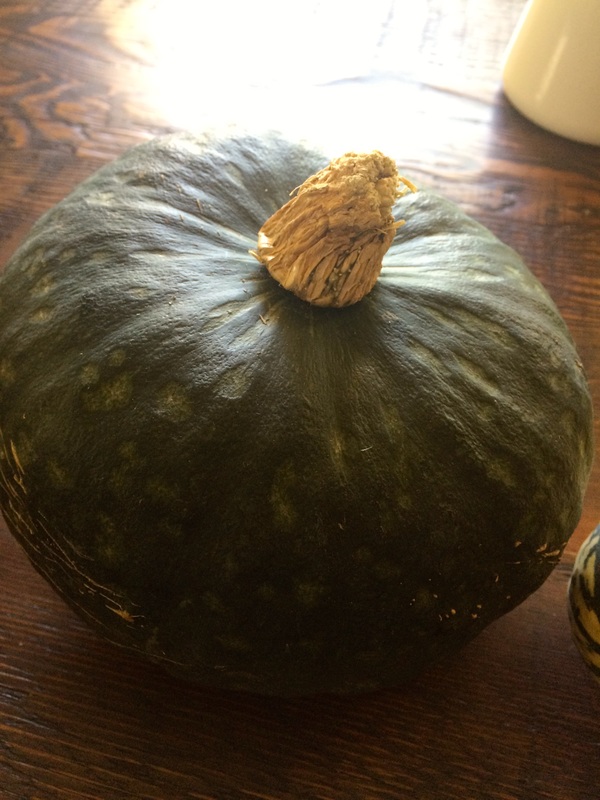
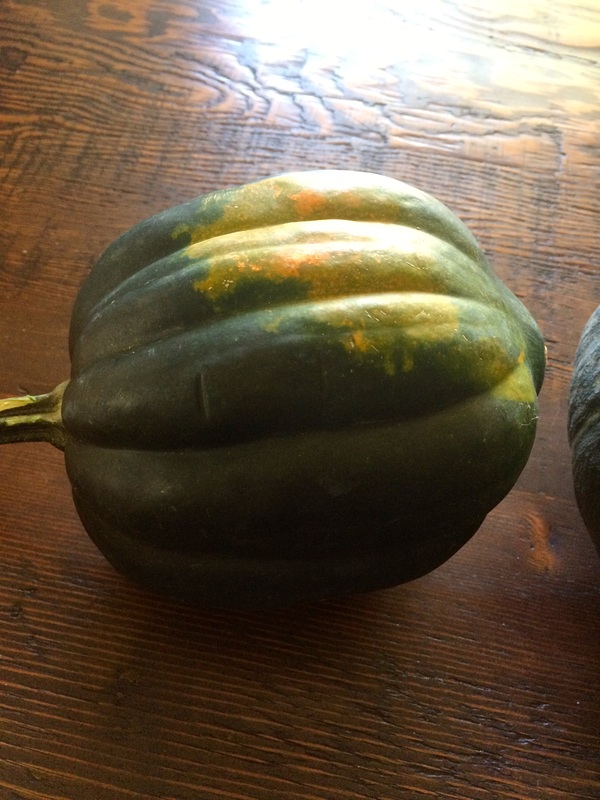
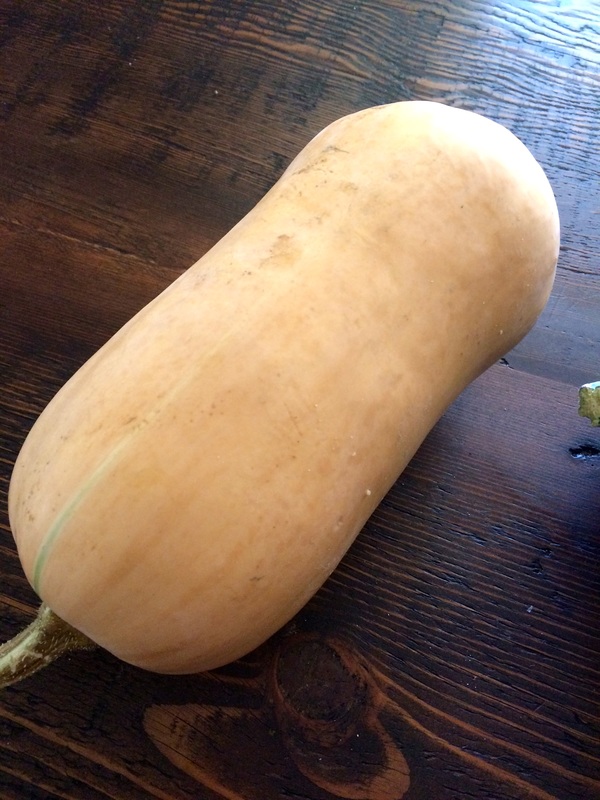
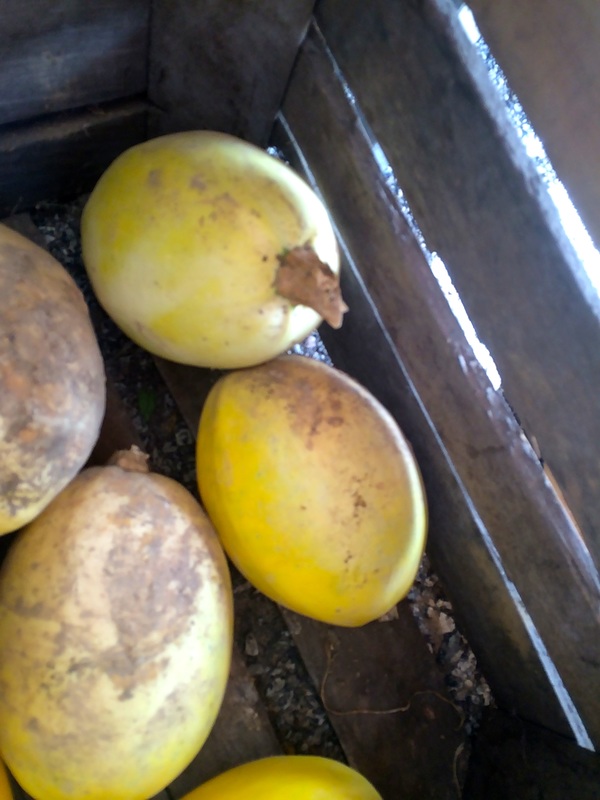
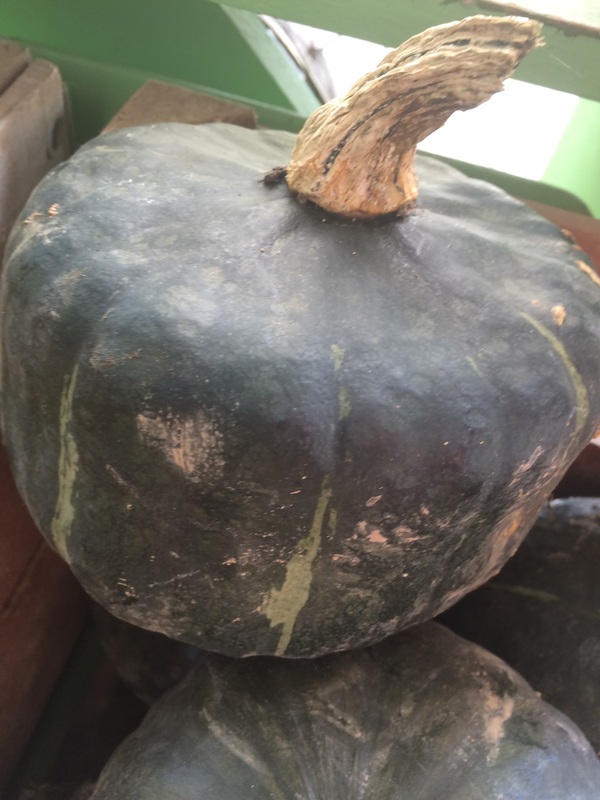
Preheat oven to 490ºF. Place your oven-proof pan in the hot oven for 20 minutes. While the pan is heating up in the oven, get your chicken prepped. In a small bowl, combine the olive oil, garlic, lemon zest, rosemary, salt, and pepper. Pat the chicken dry with paper towels. Tuck the wings under the breast. Using your fingers, make a pocket between the skin and breast. Spread the half of the olive oil mixture under the skin of the chicken so that it touches the meat directly. Spread the other half the olive oil mixture on the skin of the bird. Stuff the rosemary stems and the lemon wedges in the cavity of the bird. Tie the legs together with the butcher string; cut off excess string. Set aside until the pan is ready. When the pan has been heated, carefully remove the pan from the oven and place the chicken, breast side up in the hot pan. Put it back in the oven and roast for 35 minutes. Turn off the heat (resist the urge to open the oven) and leave the chicken in the oven for an additional 30 minutes. Test for doneness by inserting an instant read thermometer into the thickest part of the breast. When it reads 165ºF in the breast (170º in the thigh), the bird is done. (In case the bird is not cooked through, turn on the oven and roast at 350ºF until the chicken is at the proper temperature, about 10-15 minutes longer.) Remove from the oven and allow to rest for 20 minutes before slicing and serving. 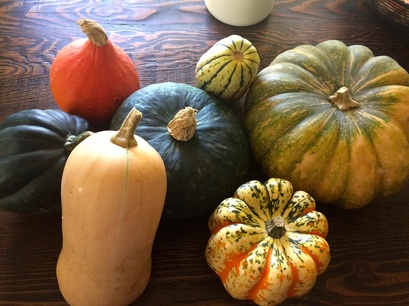 Varieties of Winter SquashThe world of winter squash is vast and full of interesting varieties. Not pictured above is blue hubbard or your standard pumpkin varieties. You will probably find most of these (except for the Musque de Provence pumpkin) at your local farmer's market. The French pumpkin was available from one of the farmers in my area. He only grew 6 plants, so he didn't have many to sell. He handed out a nice little description of the pumpkin. Below is a list of winter squash varieties and good uses for each. If you buy them now and store in a cool, dry area of the kitchen or pantry, the squash will last for several months. Musque de Provence Pumpkin: This is an heirloom pumpkin from southern France. The flesh has a distinctive hazelnut flavor. These are popular in France and sold by the wedge in French markets. Use in recipe that calls for butternut squash. Carnival Squash: About the same size of an acorn squash but with a more colorful exterior. The yellow flesh is sweet and mellow. It can used in any recipe calling for acorn squash. Red Kuri Squash: This is also called a red hubbard squash. It has a bright orange flesh that has a slightly nutty flavor. I used this in the Winter Squash Gnocchi recipe. Delicata Squash: This squash resembles summer squash varieties and you can even eat the skin if you so choose. It has the same consistency of a sweet potato when cooked but more earthy and rounded in flavor. You can slice it (with skin on) and roast in an oven. Kabocha Squash: This is a green kabocha squash. There are red kabocha varieties, too. It has a nutty, earthy flavor. Can be used in any recipe calling for butternut or acorn squash. Acorn Squash: Very popular squash this time of year with yellow flesh and mild flavor. Can be used in any squash recipes but is delicious in soups. Butternut Squash: Another very popular squash with a light orange flesh. The seeds of the squash are located in the bell (or bottom) of the squash. The neck is all flesh. It has a slightly sweet flavor and is a good all around squash. Spaghetti Squash: This yellow squash resembles spaghetti when cooked. The flesh gets stringy and looks like noodles. It's a good alternative to pasta and can be served with a nice marinara sauce. Buttercup squash: Looks like kabocha squash; mild in flavor. Great for any recipe calling for kabocha squash. So... there you go. Now, go out and buy some winter squash to use all season. I'll post many more recipes using these squash varieties. 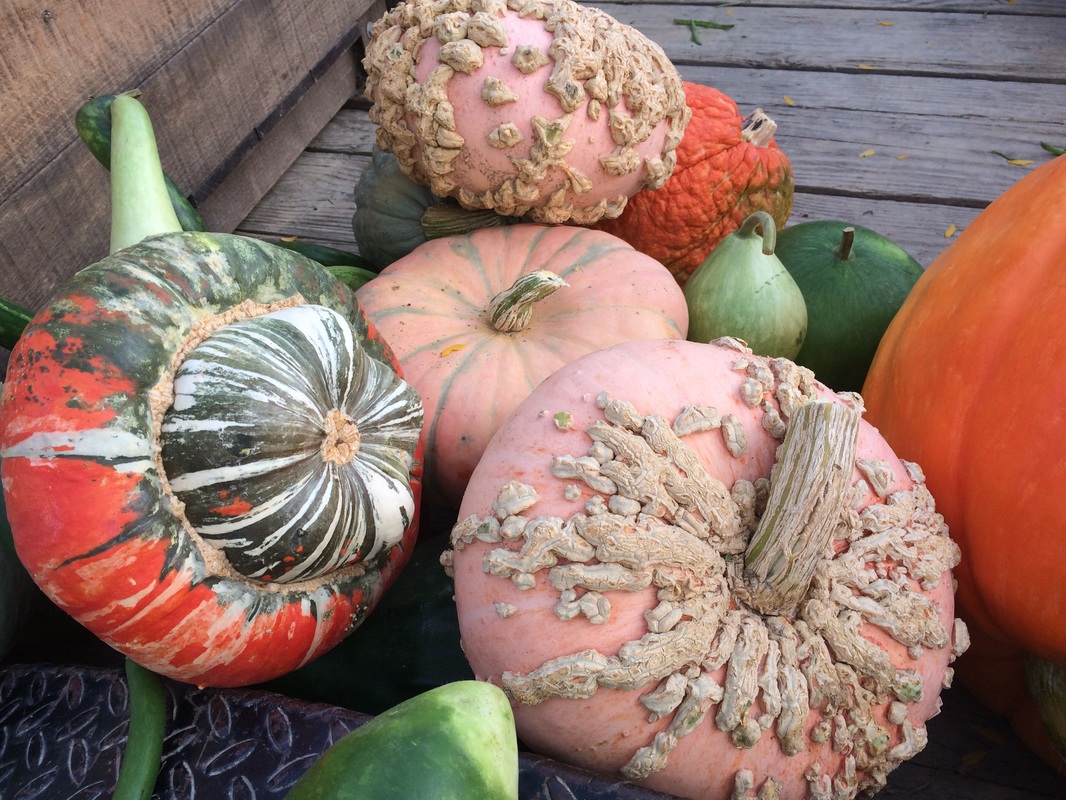 More pumpkins and squash  Cheddar and Chive Biscuits Making biscuits is similar to making pie crust -- you need cold butter to achieve flaky biscuits (just like with pie crust). Of course, the flakiest pie crusts and biscuits are made with shortening or lard but the best tasting ones are made with butter. If you want, you can substitute half of butter for lard (as a rule, I do not use shortening) for either biscuits or pie crust. These biscuits are made with white whole wheat flour, making them a little more dense. You can use all white flour, that's fine. You may need to decrease the amount of butter milk to 3/4 cup since whole wheat flour absorbs more moisture than white flour. Even though I added cheddar and chives to the recipe, you can either omit these items or add your own herb and cheese combination. Goat cheese and rosemary sounds like a good combination if you ask me and serve with roasted lamb chops. Seriously, that sounds really damn good. But I digress... It's time to step into the kitchen and make biscuits for a Sunday morning treat. Your family will love you even more. Cheddar and Chive Biscuits Yield: about 1 dozen
Preheat oven to 425ºF. In a bowl, mix together the flours, baking powder, baking soda, sugar, and salt. Add the cubed butter and with a pastry blender, cut the butter into the flour mixture until it resembles coarse meal. Stir in the buttermilk. Mix until dough starts to form. Add the cheese and chives; mix to combine. Form the dough into a ball and place on a lightly floured surface. Roll to about a 1/2 inch thick. Using a biscuit cutter, cut into shapes and place on a baking sheet. Reroll the dough until you use it all up. The last biscuit will look a little wonky but that's ok. They all don't have to be perfect. Bake for 10-15 minutes or until golden brown. Cool slightly on a wire rack. Biscuits are best served slightly warm with a pad of butter. How to Peel Tomatoes and Make Fresh Tomato Salsa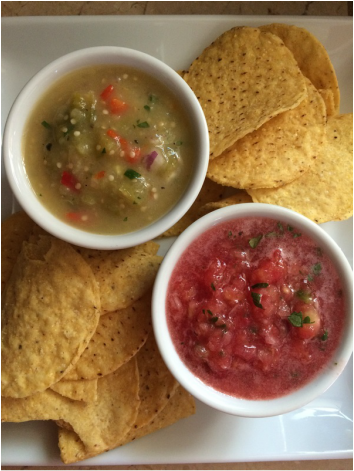 Salsa Verde (recipe forthcoming) and Fresh tomato salsa Salsa Verde (recipe forthcoming) and Fresh tomato salsa This is the first in a series of posts titled “The Basics” dedicated to teaching basic cooking techniques. It’s tomato season! Real tomatoes are available at a farmer’s market near you, so do not purchase those flavorless, mushy tomatoes at the grocery store. Just don’t do it. The ones sold in the store are picked when they are green and then forced to ripen while in transit to the nearest food distribution center. Ew. Gross. If you want a tomato that actually tastes like a tomato, you have to grow it yourself or buy from a farmer/grower. Or steal the ones from your neighbor’s garden. Don’t worry, I won’t tell. Use only the freshest, ripest tomatoes for this recipe. Any tomato variety will work, although I love using heirloom varieties the most (very meaty and full of flavor). Roma tomatoes can be very juicy, so I like to reserve these for tomato sauce. But any garden variety of tomato (beef steak, etc) will work for salsa. To start off, you need to learn to peel the potatoes. Don’t worry, it’s easy. You can use this same method for peeling peaches (a delicious peach pie recipe is coming to this blog very soon). How to Peel Tomatoes:
How to make Fresh Tomato Salsa:
I like to use a blender for this, but you can chop everything up by hand for a chunkier salsa or use a food processor. The quantities listed in the recipe are estimates and can be adjusted for your own tastes.
In a blender, add the onions, garlic, jalapenos, cilantro, and half of the tomatoes. Blend for about 20 seconds or until the vegetables are finely chopped. Pour into a bowl. Blend the rest of tomatoes if desired or roughly chop them up if you want a chunkier consistency. Stir in the lime juice and season to taste with salt and pepper. Refrigerate for about 1 hour before serving to allow the flavors to develop. |
New Book!Shining Star 
 Archives
October 2022
Recipe Categories
All
|

 RSS Feed
Home |
About |
Resources |
About Marcy |
Contact |
Copyright © 2015