
 I've been baking a lot lately. I didn't intend for this to happen, but with all the delicious fresh fruit hanging out at the farmers market, tarts, pies, and cakes have been entering my mind lately. I see fresh, ripe peaches and before you know it, I'm making a tart.
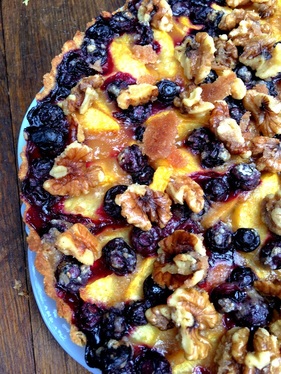
I love pie, but tart is a perfect way to show off fresh fruit like peaches. Pies can be heavy and sugar-laden. Tarts are lighter and typically contain less sugar, making them a perfect end to any summer meal. This tart in particular utilizes both fresh blueberries and peaches. You can purchase store-bought crust, or make your own. I offer a simple recipe below. The star of the show is the fruit, so pick ripe peaches (ones that are sweet and juicy) and big, plump blueberries. Peach and Blueberry Tart with Candied Walnuts Makes 11-inch tart Tart Crust:
Tart:
Candied Walnuts:
Preheat oven to 425ºF. Make the Tart Crust: In a mixing bowl, stir together both flours, salt, and sugar. Stir in the olive oil and milk. Mix until just combined. Transfer dough to an 11-inch tart pan with removable bottom. Press the dough into the pan covering the bottom and sides of the pan. Fill in any holes with excess dough. Make the Tart: Combine the peaches, blueberries, sugar, flour, orange zest, and salt in a large mixing bowl. Pour the mixture into the crust. You can try to decoratively arrange the peaches and blueberries around the crust or just leave it more free-form. Dot the tart with the butter. Bake for 35-45 minutes or until golden brown and bubbly. Sprinkle with candied walnuts. Cool completely. Serve with whipped cream or vanilla ice cream. Make the Candied Walnuts: Melt the butter in a skillet set over medium heat. Add the walnuts, sugar, and cinnamon. Stir and cook for 5 minutes or until the sugar is melted and the walnuts are coated in the mixture. Spread the walnuts onto a baking sheet. Cool completely before breaking apart.
0 Comments
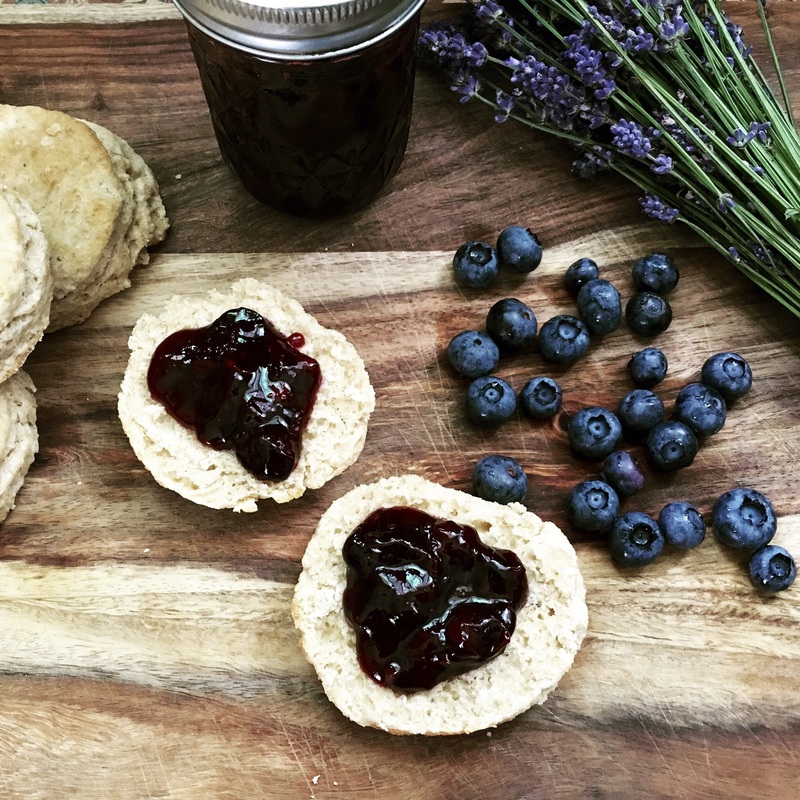 Blueberries are making their debut at my local farmers market and I just could not resist picking up a flat of these scrumptious little berries. While I could have made a blueberry buckle or cobbler, I decided to make jam. But not just any jam. Blueberry Lavender Jam because incidentally, fresh lavender also popped up at the farmer's market recently, and it made perfect sense to add a little something extra to my jam. If you have never worked with fresh or dried lavender, you need to know a couple of things. First, you need to find "culinary grade" lavender. There are a few varieties of lavender but you want the one that will taste the best with food. It's a safe bet that if you find dried lavender in the spice section of the store, then it's culinary grade. If you find fresh lavender, ask the grower or store if it is for culinary purposes. Second, a little bit of lavender goes a long way. It's a very floral herb and will dominate the flavors of a recipe if you use too much. So, for this recipe, I used 1 teaspoon of fresh lavender and it was enough to give it that light floral flavor but not be overpowering. If using dried lavender, reduce it to 1/2 teaspoon for this recipe. A quick note about canning: I did not can the jam in the normal way (boiling the filled jars, etc). I chose to make a freezer or refrigerator jam. I filled plastic containers (found in the canning section) and will freeze most of my jam so we can enjoy it through winter. If you want to can the jam, please follow instructions on the box of pectin you are using or go to the Ball website for more information. Lastly, this recipe is considered a low-sugar jam recipe, so you need to use the appropriate pectin for it. You can find pectin in most supermarkets and low sugar pectin is typically available everywhere. 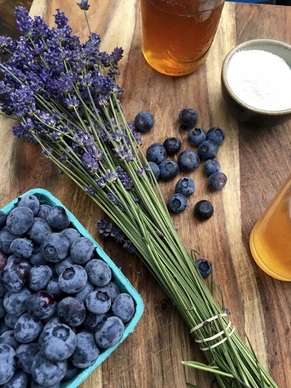 Blueberry Lavender Jam
Makes about 6 cups
Before you get started on the jam, wash and sanitize the plastic canning containers, funnel, and ladle you will be using to fill the jars. Set aside until ready to use. Place the blueberries, juice concentrate, pectin, and lavender in a 4 quart saucepan. Stir to combine and place over medium heat. Bring to a boil, stirring constantly, until thickened and the boiling mixture cannot be stirred down, about 5-10 minutes. Depending on the power of your stove, you may need to lower the temperature to medium-low to prevent burning. Once the mixture has thickened, stir in the honey. Bring to a boil for 1 minute. Remove from the heat. Fill the plastic "jars" to the designated fill line or about 1/4 inch from the top. Securely fasten the lids to the top of the containers. Cool to room temperature and let it sit on the counter for 24 hours to set up. Refrigerate the jam for up to 3 weeks or freeze for up to 6 months. |
 Archives
October 2022
Recipe Categories
All
|
 RSS Feed
Home |
About |
Resources |
About Marcy |
Contact |
Copyright © 2015