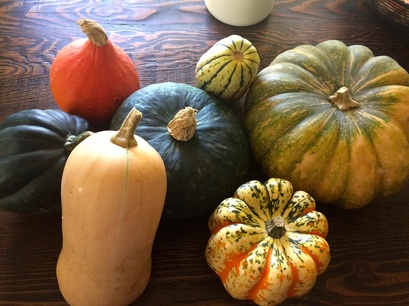
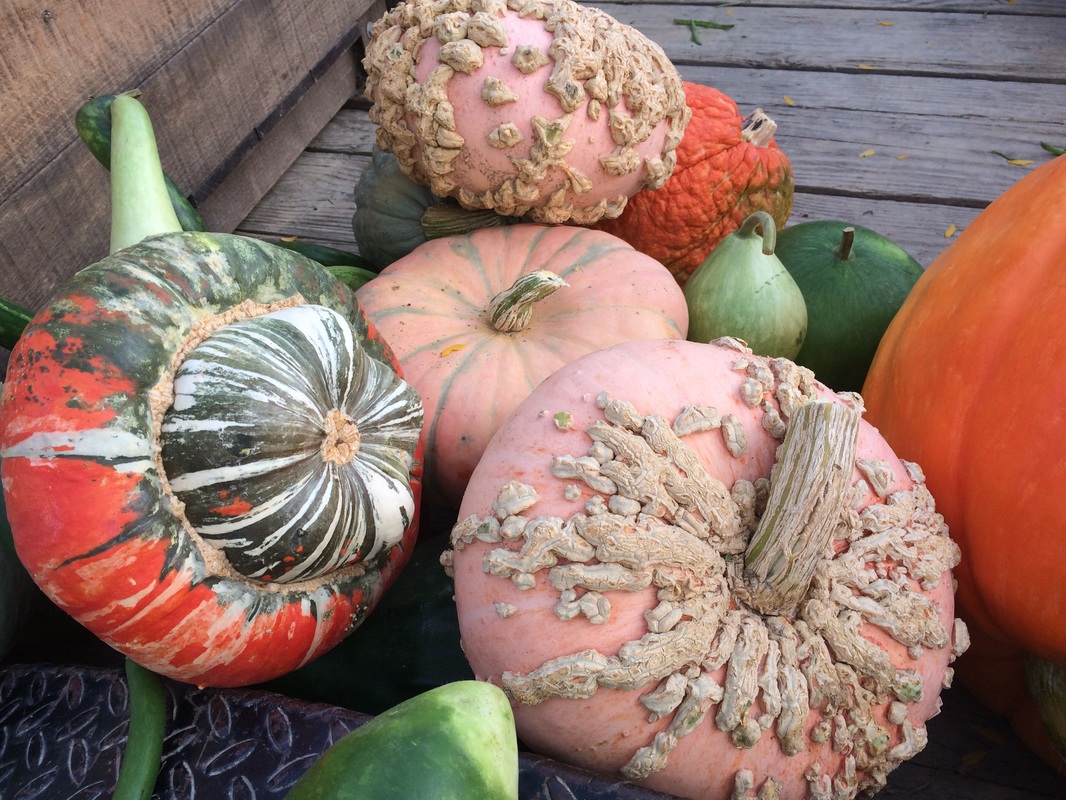
Varieties of Winter SquashThe world of winter squash is vast and full of interesting varieties. Not pictured above is blue hubbard or your standard pumpkin varieties.
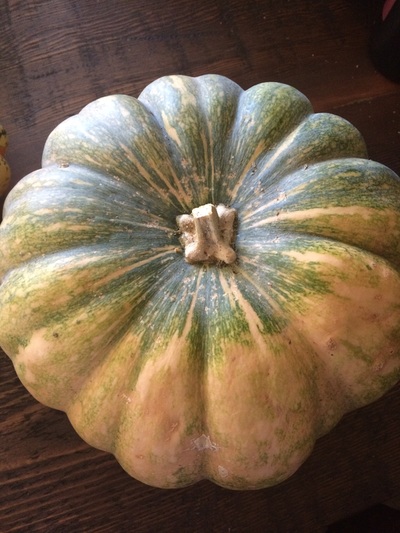
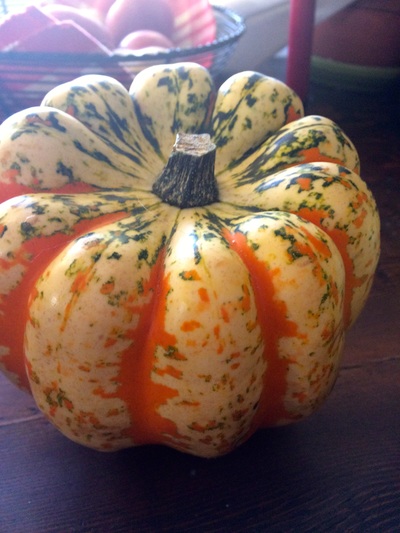
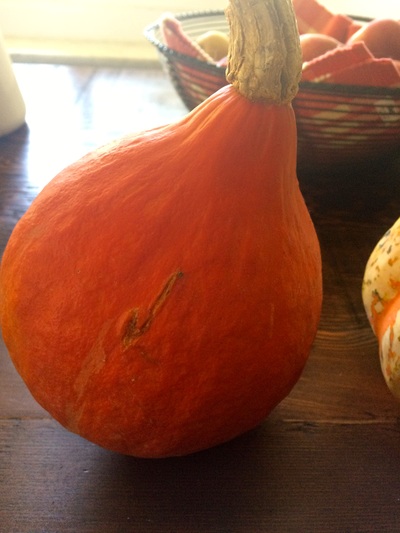
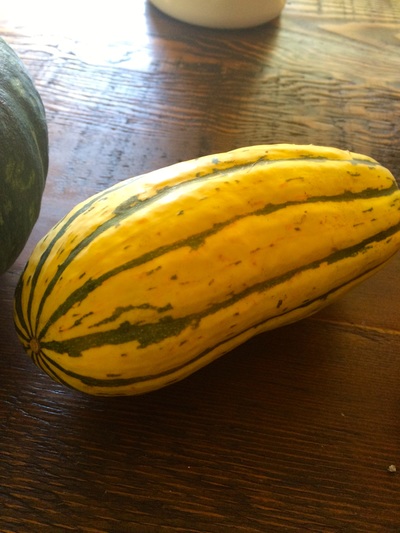
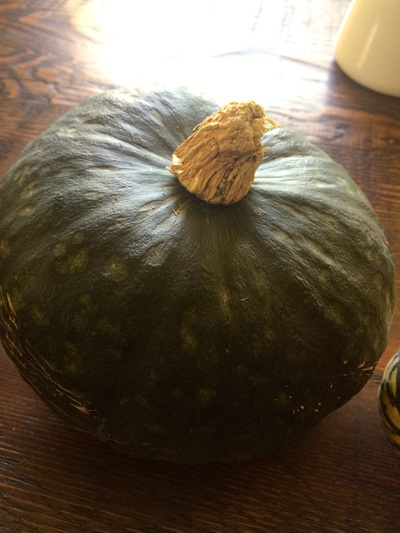
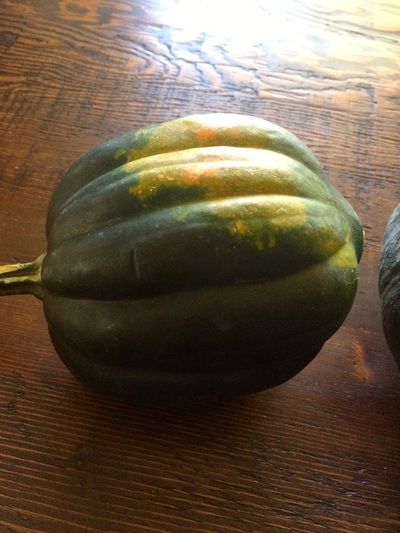
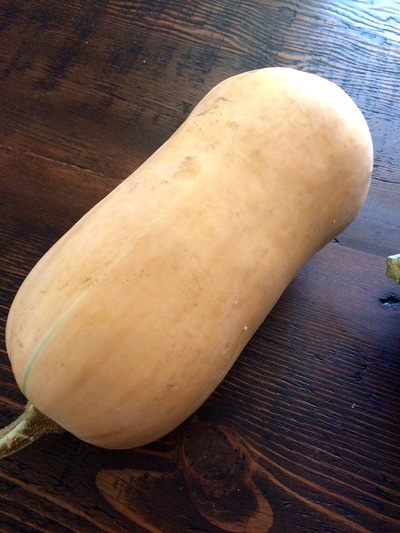
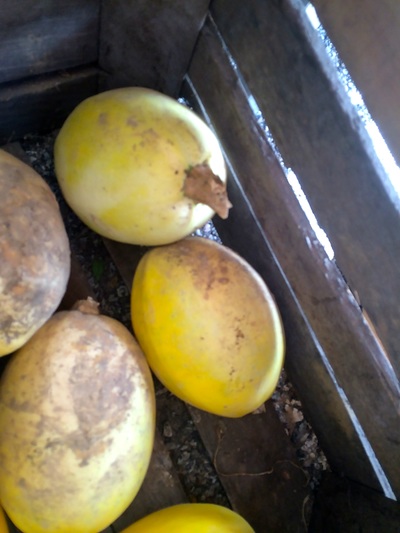
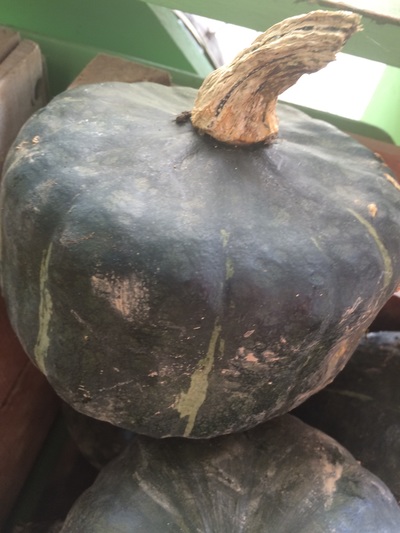
You will probably find most of these (except for the Musque de Provence pumpkin) at your local farmer's market. The French pumpkin was available from one of the farmers in my area. He only grew 6 plants, so he didn't have many to sell. He handed out a nice little description of the pumpkin. Below is a list of winter squash varieties and good uses for each. If you buy them now and store in a cool, dry area of the kitchen or pantry, the squash will last for several months. Musque de Provence Pumpkin: This is an heirloom pumpkin from southern France. The flesh has a distinctive hazelnut flavor. These are popular in France and sold by the wedge in French markets. Use in recipe that calls for butternut squash. Carnival Squash: About the same size of an acorn squash but with a more colorful exterior. The yellow flesh is sweet and mellow. It can used in any recipe calling for acorn squash. Red Kuri Squash: This is also called a red hubbard squash. It has a bright orange flesh that has a slightly nutty flavor. I used this in the Winter Squash Gnocchi recipe. Delicata Squash: This squash resembles summer squash varieties and you can even eat the skin if you so choose. It has the same consistency of a sweet potato when cooked but more earthy and rounded in flavor. You can slice it (with skin on) and roast in an oven. Kabocha Squash: This is a green kabocha squash. There are red kabocha varieties, too. It has a nutty, earthy flavor. Can be used in any recipe calling for butternut or acorn squash. Acorn Squash: Very popular squash this time of year with yellow flesh and mild flavor. Can be used in any squash recipes but is delicious in soups. Butternut Squash: Another very popular squash with a light orange flesh. The seeds of the squash are located in the bell (or bottom) of the squash. The neck is all flesh. It has a slightly sweet flavor and is a good all around squash. Spaghetti Squash: This yellow squash resembles spaghetti when cooked. The flesh gets stringy and looks like noodles. It's a good alternative to pasta and can be served with a nice marinara sauce. Buttercup squash: Looks like kabocha squash; mild in flavor. Great for any recipe calling for kabocha squash. So... there you go. Now, go out and buy some winter squash to use all season. I'll post many more recipes using these squash varieties.
1 Comment
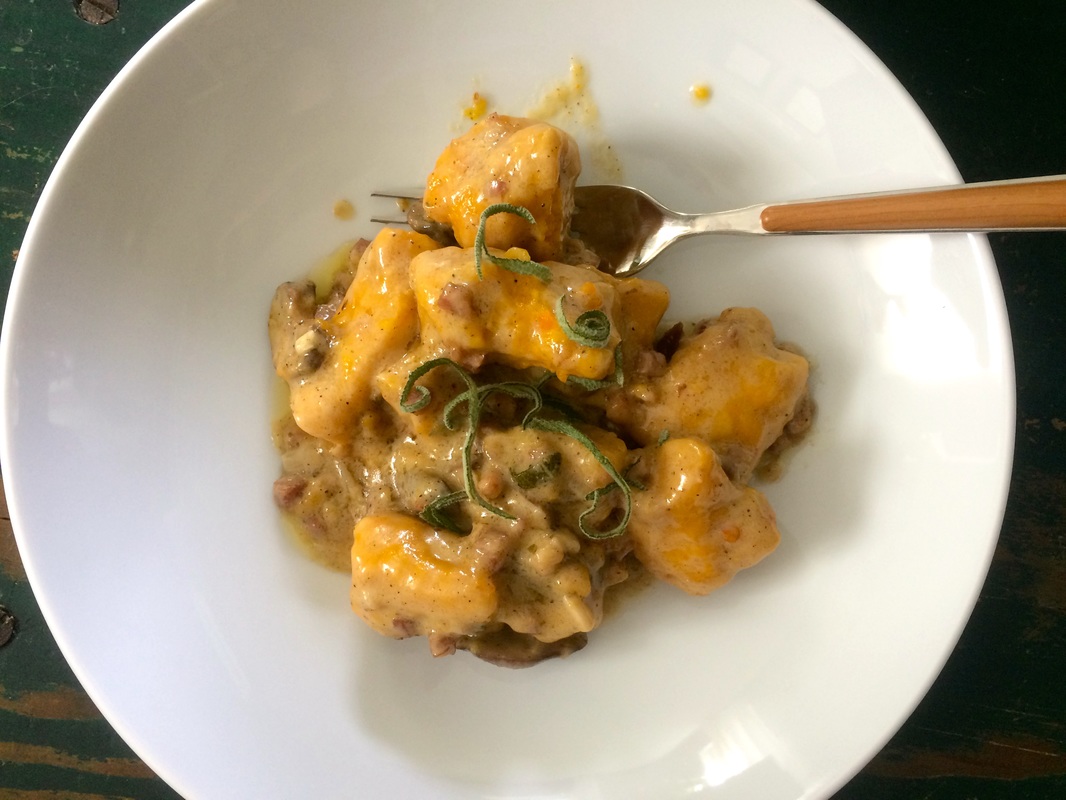
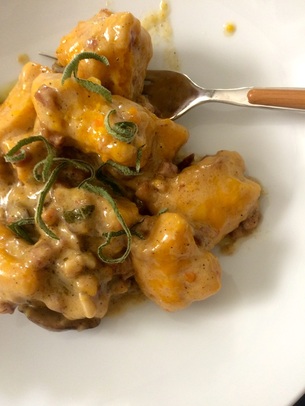 The reason I call this winter squash gnocchi as opposed to pumpkin or butternut squash gnocchi is because I don't want to pigeon hole this recipe into using certain types of winter squash. And quite frankly, I'm tired of everything pumpkin. There I said it. I'm not a big fan of pumpkin to begin with and everywhere you look, you see pumpkin this and pumpkin that. Geez. Must everything be pumpkin flavored between September and November? Where did this stem from? Is there a pumpkin lobby I didn't know about? But I digress... this is about gnocchi and making it with other types of winter squash available at the farmers market or grocery store. I wrote a post regarding the many types of winter squash that is being published this week. That way, you can get educated regarding the world of winter squash. So, a note about gnocchi... If you've made pasta from scratch, then you can make gnocchi. All it is an Italian dumpling that is typically made with potatoes. So for this version, instead of potatoes, I used winter squash that was roasted in the oven about 1-2 days before I made the gnocchi. Also, it's important to get the sauce finished prior to putting the gnocchi dough together because once you make the dough, you cut them into dumplings and cook them in salted boiling water. The cooking process is very quick, about 3 minutes and then you throw them into the sauce. Or you can enlist the help of a friend or two (or family members) to help make the dish. One person on sauce; another person making gnocchi. Make sense? Good. Let's get started. Winter Squash Gnocchi Serves 4-6 Gnocchi
Sauce
Roast the winter squash: Preheat oven to 375ºF. Cut the squash in half and scoop out the seeds. Brush a baking sheet with a little olive or canola oil. Place the squash cut side down on the sheet. Bake for 30-40 minutes or until soft and tender. Remove from oven and cool completely before scooping out the flesh. This can be done 1-2 days ahead of time; keep squash in the refrigerator until ready to use. Photos of roasting the squash are at the end of the post. Make the sauce: Heat the olive oil and butter over medium heat. Add the pepper flakes, shallots, garlic, and pancetta; saute for 4-5 minutes. The pancetta will get slightly crispy. Add the sliced mushrooms and sage; saute for 4-5 minutes. Pour in the stock. Reduce slightly, about 10 minutes. Add the cream; bring to a boil and cook for 5 minutes. Season with salt and pepper. Stir in the grated cheese. Keep the sauce warm, stirring occasionally. Make the gnocchi: Make sure you have a pot of water ready to go for cooking the gnocchi (boiling and salted). If you haven't done so already, scoop out the flesh from the cooled squash. Mash or puree the cooked squash until smooth. Thoroughly mix together the squash with the eggs, parmesan cheese, and goat cheese. Add 1 cup of flour, salt, and pepper. Mix until a dough begins to form. If the dough seems too sticky (it should be soft but not sticky), add more flour. You may need 1/2-3/4 cup more flour depending on how much moisture the squash was holding. For me, I only used about 1 1/4 cups of flour but you might need closer to 2 cups, depending on the squash you are using. Knead for about 2-3 minutes or until the dough is no longer sticky. Do not overwork the dough or it will turn out tough. Cut the dough into 4 pieces. Roll each piece into a rope about 18-24 inches long. Cut into 1-inch pieces. Roll each piece down the tines of a fork to create grooves in the gnocchi. Boil the gnocchi in batches in the salted, boiling water. When the gnocchi float, they're done; about 2-3 minutes. Drain and place cooked gnocchi into the sauce. Cook the gnocchi in the sauce for 3-4 minutes before serving. Serve with crusty bread and extra parmesan cheese. Cheddar and Chive Biscuits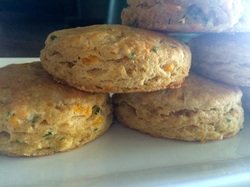 Making biscuits is similar to making pie crust -- you need cold butter to achieve flaky biscuits (just like with pie crust). Of course, the flakiest pie crusts and biscuits are made with shortening or lard but the best tasting ones are made with butter. If you want, you can substitute half of butter for lard (as a rule, I do not use shortening) for either biscuits or pie crust. These biscuits are made with white whole wheat flour, making them a little more dense. You can use all white flour, that's fine. You may need to decrease the amount of butter milk to 3/4 cup since whole wheat flour absorbs more moisture than white flour. Even though I added cheddar and chives to the recipe, you can either omit these items or add your own herb and cheese combination. Goat cheese and rosemary sounds like a good combination if you ask me and serve with roasted lamb chops. Seriously, that sounds really damn good. But I digress... It's time to step into the kitchen and make biscuits for a Sunday morning treat. Your family will love you even more. Cheddar and Chive Biscuits Yield: about 1 dozen
Preheat oven to 425ºF. In a bowl, mix together the flours, baking powder, baking soda, sugar, and salt. Add the cubed butter and with a pastry blender, cut the butter into the flour mixture until it resembles coarse meal. Stir in the buttermilk. Mix until dough starts to form. Add the cheese and chives; mix to combine. Form the dough into a ball and place on a lightly floured surface. Roll to about a 1/2 inch thick. Using a biscuit cutter, cut into shapes and place on a baking sheet. Reroll the dough until you use it all up. The last biscuit will look a little wonky but that's ok. They all don't have to be perfect. Bake for 10-15 minutes or until golden brown. Cool slightly on a wire rack. Biscuits are best served slightly warm with a pad of butter. 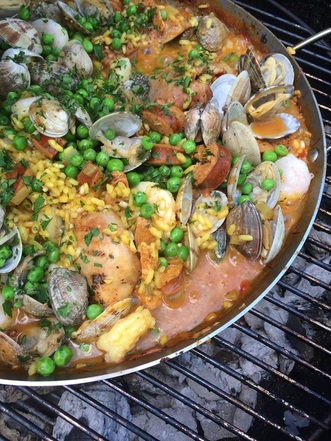 Spanish Paella. I'm not sure what to say about paella other than it's one of the most awesome dishes to prepare on the grill, providing you have a grill (charcoal is preferable) and a paella pan that will withstand the heat. There are many variations of paella. Some are made with chorizo; some are not. Honestly, it all boils down to preference. I'm offering my preferred way of making paella. A basic paella recipe is made with a short grain rice (like arborio or bomba*), chicken, seafood, and saffron. You need saffron or else it won't be paella. Check out the Spice House and Penzey's Spices for saffron. Then you need a large shallow pan. There are several places to buy paella pans -- all cooking stores will carry a few different brands that vary in price. If you are going to grill your paella, look for a pan that will withstand the high temperature of the grill -- like something made with cast iron or anodized steel. I used Mauviel 14-inch paella pan. Paella is a great dish made for a large crowd. If you like to entertain friends and family, always have an arsenal of great dishes you can make easily and that are sure to please. Add this recipe to your stack of dinner party recipes. *Bomba rice is a short grain rice that the Spanish typically use in their paella. Arborio rice is a short grain rice from Italy that is easier to find in most grocery stores. Paella Serves 6-8
Season the chicken with the paprika, 1 teaspoon of salt, and 1/2 teaspoon black pepper. Refrigerate for at least 1 hour or up 1 day. Preheat the grill. (This recipe can be made inside on the stove -- use medium to medium high heat.) Heat the stock in a small saucepan with the saffron. The saffron will infuse the stock. Keep warm. Heat the olive oil in the paella pan on the grill. Brown the chicken on all sides in the hot oil. Remove from the pan. Continue to cook the chicken on the grill as you sauté the vegetables. Add the onions, garlic, and parsley. Sauté until soft, about 3-5 minutes; season lightly with salt and pepper. Add the chorizo sausage; sauté for another 3-5 minutes. Add the rice; stir to coat with the oil and vegetables. Add the white wine and tomatoes; cook until mixture reduces, about 5 minutes. Add 4 cups of stock. Bring to a boil. Add the chicken to the pan. Cook until the rice and chicken are cooked through; about 20-25 minutes. Season with salt and pepper. Add the seafood; cook until clams/mussels open and the shrimp turns pink; about 5-10 minutes. Add the peas at the last minute. Serve with bread and wine. Now it's time to feast. 2 Muffin Recipes: Apple Carrot and Blueberry Muffins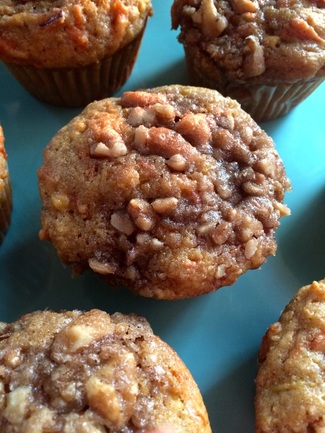 Apple Carrot Muffins Apple Carrot Muffins Been to Starbucks or Panera Bread lately? Seen those giant muffins hanging out in the display case? Is it me or have all baked goods increased in size? Well, instead of purchasing the mass produced giant muffins, you can make them easily at home. You just need to know the basics of muffin baking which is rather easy. So you are probably wondering, why does it matter muffins are made? As it turns out there is a science behind baking – cakes, pies, cookies, quick breads, and yeast breads. Muffins fall into the quick bread category. Quick breads are made with chemical leaveners like baking soda or baking powder for rising. Some even use steam and air (biscuits and popovers) to rise as well. The science of baking includes how the batter is mixed together, what chemical leaveners are used, and the baking method. When it comes to muffins, there’s a method to the mixing of the batter. Why? Well, it prevents overmixing. Overmixing the batter leads to tunneling (holes/pockets in the muffin and pointed top) and overdeveloping the gluten where instead of a delicate crumb, you create a tough texture. You want a muffin with a nice domed top and delicate, moist texture. Incidentally, the muffin method can be used for pancakes, too. In fact, this is the way you should be making pancakes if you want stacks of fluffy pancakes waiting to be drenched in maple syrup. Muffin method:
So, to get you excited about muffins, here are two of my favorite muffin recipes. I'll post more in the weeks to come. Apple Carrot Muffins Yield: 12 muffins
Topping or filling:
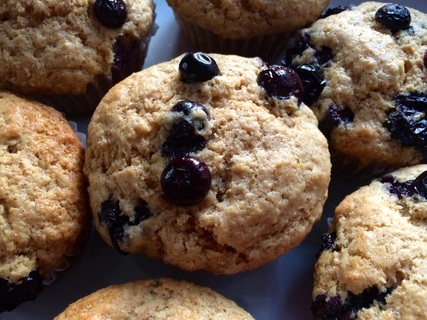
Preheat oven to 350ºF. Line muffin tin with cupcake papers (or forego the cupcake papers and grease the pan well). In a bowl, sift together the flour, sugar, baking powder, baking soda, salt, and cinnamon. In another bowl, whisk together the eggs, Greek Yogurt, olive oil, butter milk, carrots, and apple. Add the wet ingredients to the dry ingredients. Stir until just combined. Remember, the batter should contain some tiny lumps and it should not be smooth. In a small bowl, mix together the butter, walnuts, and brown sugar. Fill the muffin tins ¾ full with batter. Top each with the walnut mixture (you could add this mixture into the center of each muffin instead of on top). Bake for 20-25 minutes. Check for doneness with a toothpick inserted into the center – should come out clean when muffins are done. Remove from pan and cool on wire rack. Blueberry Muffins Yield: about 18 muffins
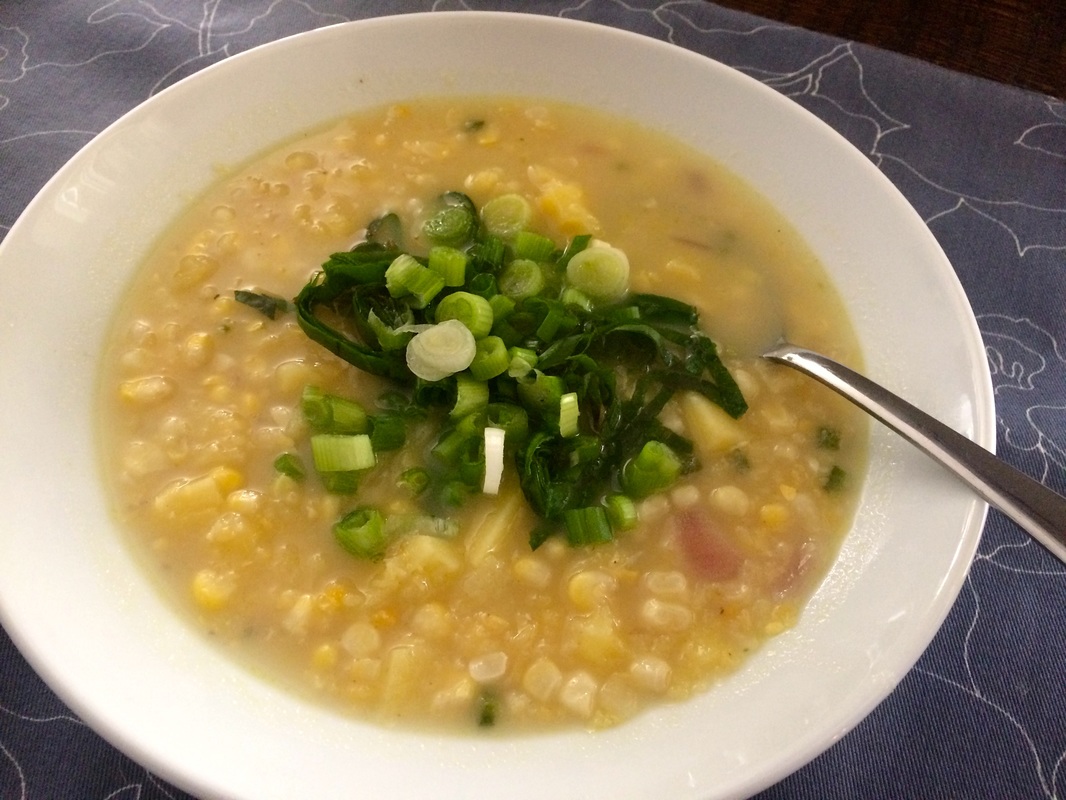
Preheat oven to 400ºF. Grease 2 medium muffin tins (or you can make mini-muffins or extra-large muffins). In a mixing bowl, whisk together the flour, sugar, baking powder and salt. In a separate bowl, whisk together the milk, eggs, oil, and lemon zest. Pour milk mixture in the flour mixture and mix until just combined (leaving small lumps in the batter is ok -- do not overmix). Carefully fold in the blueberries. Spoon batter into muffin cups to 3/4 full. Bake for 15-20 minutes (mini-muffins won't take as long and the extra-large muffins will take longer -- watch your oven) until lightly golden. Cool in pan for 5 minutes and then remove and place on a rack. Leaving muffins in the tins will cause them to get soggy. 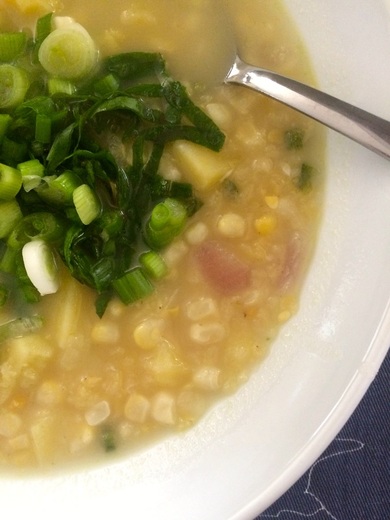 Corn season is winding down (bummer!) but potatoes are starting to pop up at the farmer's market. This is a quick and easy soup that is good any day of the week, especially as fall weather sets in and evenings get cooler. Corn and Potato Chowder Serves 6
Heat the olive oil over medium heat in a large soup pot. Add the onion, garlic, and jalapeño. Cook until onions soften, about 3-5 minutes. Season lightly with salt and pepper. Add the flour and stir to make a roux; cook for 1-2 minutes. Add 8 cups of stock; stir to combine. Add the potatoes, corn, and lentils. Cook until the potatoes are tender, about 20-25 minutes. Mash the soup with a potato masher -- you aren't making a smooth soup; it should be chunky and slightly thick. Add more stock if the soup seems too thick. Add the half and half. Cook for 5 minutes more. Season to taste with salt and pepper. Garnish with the chard and scallions. Serve with crusty bread. |
New Book!Shining Star Archives
October 2022
Recipe Categories
All
|
Home |
About |
Resources |
About Marcy |
Contact |
Copyright © 2015



 RSS Feed
