
 Ok, so this more than just boiling water. It's about making spaghetti with homemade marinara sauce. My assumption is, you probably already know how to boil water and cook pasta. However, there might be someone in the crowd who doesn't understand the process, so let me break it down for you. Here are some simple tips for boiling water and pasta
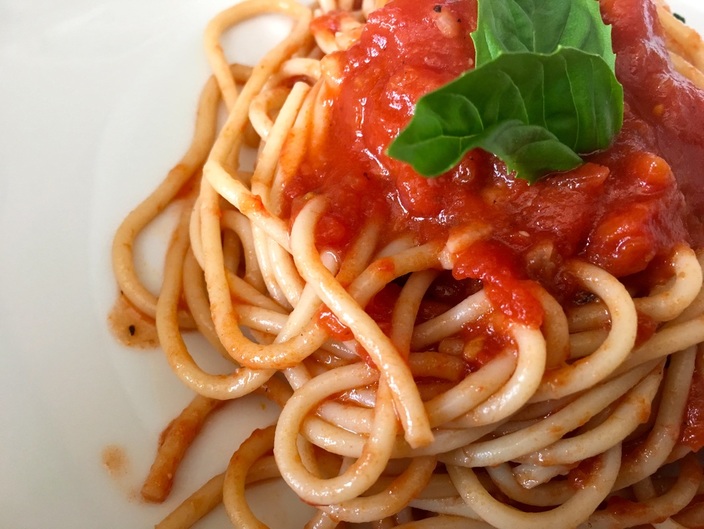
Pasta with Marinara Sauce Serves 3-4
Bring a pot of water to a boil. As you are waiting for the water to boil, begin making the sauce. Place the olive oil, red pepper flakes, and garlic in a cold sauté pan or skillet. Place the pan on the stove over medium heat. Doing this helps infuse the flavors of the red pepper flakes and garlic into the oil. Once the garlic begins to sizzle, add the tomato paste. Stir it around and cook for 1 minute. Add the red wine; cook for 1 minute. About half of the wine will cook off. Add the tomatoes and season with salt and pepper (about ½ teaspoon of each). Reduce heat to medium low and simmer for 10-15 minutes. Taste and adjust the seasonings. At this point, you have a choice to leave the sauce chunky or puree it for a smoother sauce. I chose to puree half of the sauce using a hand blender (do this in a deep bowl, to prevent wearing the sauce). You can also use a regular blender or food processor. Once I pureed the sauce, I returned it back to the pan and added the basil. Once the water begins to boil, add a hefty pinch of salt to the water and add the pasta. Cook pasta according to package directions, but reduce the cooking time by 1 minute. Drain the pasta, reserving a ½ cup pasta water. Add the pasta and pasta water to the sauce. Cook for 2-3 minutes over medium low heat. Serve with bread and parmesan cheese. Enjoy!
0 Comments
I take cooking and baking for granted. I’ve been doing this for so long, that I usually don’t use recipes and I write many of my own recipes or usually just throw things together without thinking about it. But, how did I get to this place? Was I a natural in the kitchen?
Sort of but most importantly, I was blessed with an encouraging family. My grandmother taught me how to bake cookies but when it came to actually cooking a meal, it was a lot of trial and error. I’ve made my fair share of mistakes over the years. At the tender age of 14, I decided to bake my first loaf of bread - a French baguette using Julia Child’s recipe. You know, why not start at the top? Well, it was my first foray into baking yeast bread and it turned out like a baseball bat. A baguette bat, so-to-speak. Over the years, I practiced and learned. I went to culinary school. Practiced and learned some more. Worked in kitchens. Kept practicing and learning. And now here I am, a confident chef. But… still practicing and learning. Some things are easier to master than others, but you have to start somewhere. If you find cooking (or baking) intimidating, start small. Find an easy recipe and master it. Then, move on to another recipe and master that one. As you grow comfortable working in the kitchen, the easier it gets and the more confidence you will gain. You don’t have to be a “natural” for this whole cooking thing. Sure, some people are blessed with a natural ability to throw food together and create amazing meals. However, when it comes down to it, cooking is a skill. You need to master a few skills and then you can make nearly anything. You may need someone to show you the proper way to chop an onion, but you can get started on your own by experimenting with recipes. One of the most important things to do when you start cooking, is to remember to season your food. You need to train yourself to season food (and taste it) as it cooks, so you understand how flavors work together. Salt and pepper are your friends, so use them wisely. Utilizing proper seasoning techniques will help develop your palate and make you a better cook. The last thing I will say is to have fun with cooking. It should not be treated as a chore. Think of it as a way to connect with the food that is providing you nourishment. You are turning a simple recipe, like leek and potato soup, into a delicious and healthy meal that didn't break the bank or take all day to prepare. The reason we are fascinated by celebrity chefs and cooking shows is that they transform simple ingredients into amazing meals (or so we think). There is no reason you cannot do the same thing in your kitchen. This blog offers many basic recipes -- from pie to roasting chicken. Over the next few months, I will provide even more “basic” recipes, tips, and skills for you to master.  Instant-read thermometers Instant-read thermometers Long ago and far away, I was once a novice cook learning the ins and outs of working in a kitchen. Over the years, after watching endless hours of TV cooking shows on PBS and the Food Network and working as a chef, I have gotten very selective in which tools I actually use in the kitchen.
Until recently, the kitchens I've worked in (at home or in a job) were small and compact. I never had much storage space, let alone much counter space to work on. So, I had to be selective in the kitchen equipment I kept around. I found that I could make a great meal in any size kitchen and the bigger the kitchen I cooked in, meant more places for me to make a mess (and clean up later). My home kitchen now is laid out well, but I still only use maybe a third of it when I'm cooking. Over the past couple of years, I have gotten rid of many pieces of equipment that I do not find necessary and am now down to pieces that I actually use. If you are just starting out and learning how this whole cooking thing works, I compiled a list of equipment that you actually need to set up a basic kitchen. Of course, you can always add to it as you gain confidence in your cooking skills and expand your culinary repertoire, but this list will get you started. And ... I encourage you to look for some of these items in thrift stores, on eBay, or local garage sales because you might find what you need for a lot less money. Pots and Pans:
As a general rule, I do not use non-stick cookware. Instead, I use cast iron in place of non-stick. When it comes to the pots and pans, I will not promote any one brand over another. Look for pans that are stainless steel or anodized aluminum (or a combination of both). Utensils:
Electric Equipment:
Knives:
Baking:
Other:
Later on, you can add more equipment as you see fit. The next step would be to add a stand mixer, a hand blender (very handy tool), and a few more pots and pans as you see fit. Stocking a kitchen can be pricy, but if you have the right equipment and tools, many of these things should last a long time (or a lifetime in some cases). My most trusted piece of equipment is a food processor that I've had for nearly 20 years. I also have an odd attachment to my chef's knife, but that's common with many professional cooks. Or at least I hope it is. Anyway... I hope this list is helpful for those just starting out. Cooking can be fun and does not need to be a chore. Having the right equipment in place will help you succeed in making any recipe. 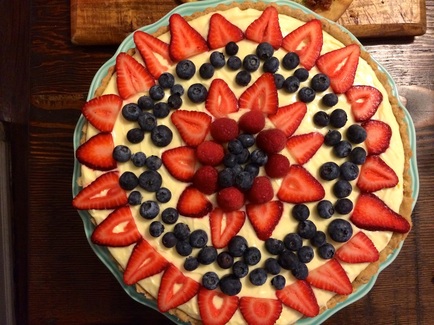 If you are looking to entertain some of your closest, dearest friends at some point this spring, you may want to try out this dessert. It's sweet, tart, and beautiful to look at. I mean, who wouldn't want to eat it?
Tart crust is more forgiving than pie pastry. Meaning, if it rips or tears while you are rolling it out, you can fill in the holes with extra pastry dough and no one will know. The pastry dough is soft and pliable and it might be a little frustrating to work with, but it works well in the end and holds up nicely (which is what you want). Now, if you don't want to make your own crust, you can always purchase one at the store. Don't worry, I won't rat you out. The recipe is done in steps --first, make the lemon curd, then the tart pastry and then put it all together. The lemon curd and tart pastry can be made up to two days ahead of time (keep in the refrigerator). Also, I used an 11-inch tart pan for this. If you have a smaller tart pan, you will have leftover lemon curd cream (oh no!) to use for something else. I'm sure you'll put it to good use. Or you can just eat it. Whichever. Fresh Berry Lemon Tart Yield: one 11-inch tart Lemon Curd
Remove the zest from the lemons using a vegetable peeler. This will give you nice long strands of zest. Be sure to remove just the yellow part and not the white (the pith). Place the sugar and zest in a food processor. Pulse the processor several times to break up the lemon zest. Add the butter to the sugar mixture. Process until combined. Add the lemon juice, eggs, egg yolks, and salt. Process to combine. Pour the mixture into a 2-quart saucepan set over medium low heat. Cook, stirring constantly, until thickened (the mixture should register 170ºF on a thermometer when it is cooked), about 10 minutes. Remove from the heat and pour into a glass bowl. Allow it to cool for 20 minutes on the counter and then cover with plastic wrap and refrigerate for at least 2 hours. This can be made up to 2 days ahead of time. It will continue to set as it cools. Tart Pastry
You can make this by hand with a pastry blender or with a food processor. By processor: Combine the flour, almond meal, sugar, and salt in the bowl of a processor. Add the butter and pulse until the mixture resembles coarse meal. With the motor running, pour the water through the lid and pulse until the pastry forms a ball in the bowl of the processor. The pastry maybe a little on the wet or soft side. That's ok. Brush your hands with flour and gather the pasty in a ball. Press into a disk and wrap in plastic wrap. Place in the refrigerator for at least 1 hour. This can be made up to 2 days ahead of time. Fresh Berry Tart
Preheat the oven to 350ºF. Place the tart pan in a baking sheet (this will help keep it steady as you move it to/from the oven). Roll out the tart pastry on a well-floured surface. Sprinkle the top of the pastry with flour, too. It should be rolled out to about a 12-inch circle. If the pastry is tearing and being unmanageable, that's ok. Gather up the pastry and press it into the bottom and sides of the tart pan (cutting off any excess), filling in any gaps or holes with leftover pastry dough. Once the pastry is covering the inside of the tart pan, prick the bottom with a fork. Line the pastry with foil - make sure it meets the edge of pastry and fill the foil with pie weights, dried beans, or dry rice (I use beans). Be sure you fill the foil to the edges of the pan. This will help prevent the pastry from shrinking down. Bake for 10-12 minutes. Remove the foil and beans (or pie weights). Bake for an additional 12-13 minutes or until golden brown. Remove from the oven and cool completely. In a bowl, whip together the heavy cream and mascarpone cheese until the mixture forms soft peaks. Add the powdered sugar. Place the lemon curd in a large bowl. Stir it up to loosen the curd. Add about a 1/4 of the cream mixture to the lemon curd and mix well. Fold in the remaining cream mixture, being sure not to over mix. Pour the mixture into the tart shell and smooth off the top. Refrigerate the tart for at least 1 hour before decorating the top with berries. When ready, decorate the top with berries and cut into pieces to serve. 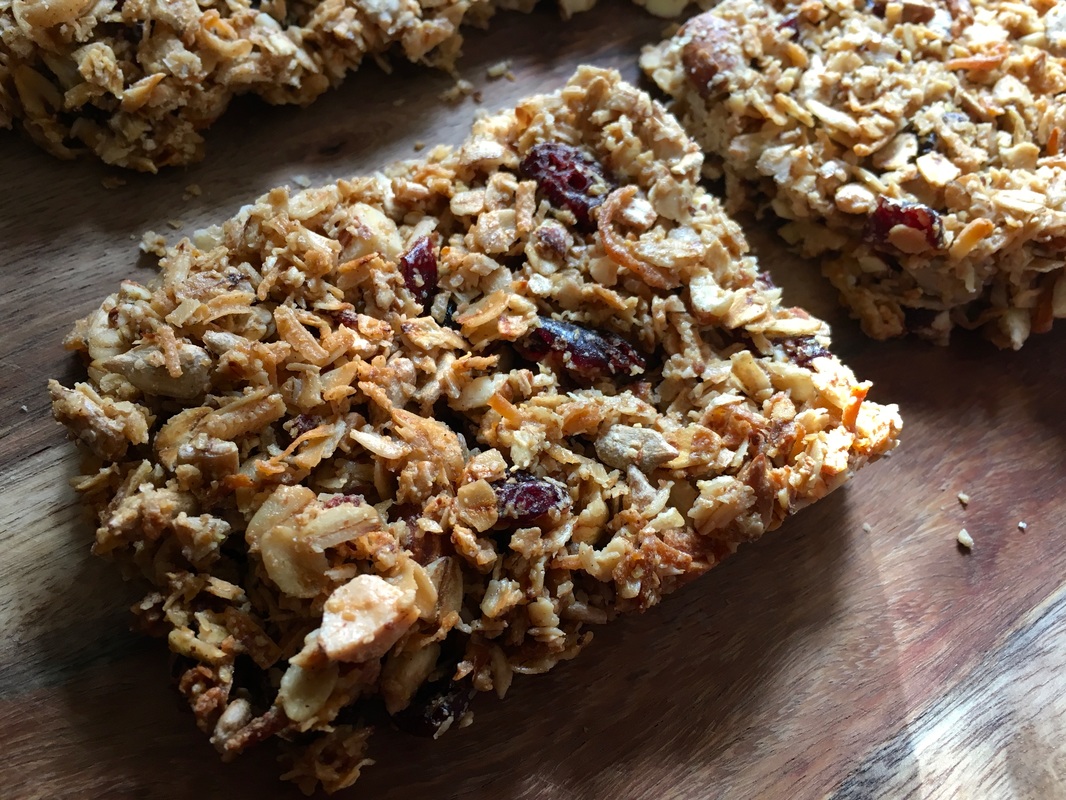 There are plenty of granola bars on the market, but there is no reason you cannot make your own and take control of the ingredients. This recipe can be adjusted to fit your tastes -- do not feel the pressure to make this exactly the way I wrote it.
I used maple syrup (because syrup is my favorite, like Elf), but you can use honey or even agave syrup instead. If you use honey, be sure to heat it in the microwave for 30 seconds before using. This helps it bind the oats and other ingredients together. These bars have a tendency to get crumbly when baked too long. If you want a softer granola bar, bake it for less time (20-25 minutes). Coconut Granola Bars Yield: 1 9x13 pan (about 12 bars)
*If using honey, microwave it on high for 30 seconds right before using. Preheat oven to 325ºF. Line a 9 x 13-inch baking pan with parchment paper. Lightly oil the parchment paper. Set aside. Place the rolled oats in a bowl and toss with the 2 tablespoons of oil. Spread the oats onto a baking sheet. Bake for 20 minutes, stirring halfway through. Remove from the oven and put the oats into the bowl of a food processor. Reduce the oven temperature to 300ºF. Add the coconut, nuts, dried fruit, sunflower seeds, flax seed, cinnamon, and salt to the oats. Pulse 10-15 times to chop up and mix the ingredients together. Pour into a mixing bowl. Stir in the maple syrup (or warmed honey) and vanilla. Mix well to thoroughly coat the mixture with the syrup. Spread the mixture into the the prepared baking pan. Bake for 20-25 minutes. While still warm, cut the mixture into bars. Allow to cool completely. Store in airtight container for up to 1 week. |
New Book!Shining Star 
 Archives
October 2022
Recipe Categories
All
|
 RSS Feed
Home |
About |
Resources |
About Marcy |
Contact |
Copyright © 2015