|
The best way I can get my children to eat their veggies is through soup. My daughter loves nearly any soup I put in front of her -- squash, leek and potato, and tomato soups. Whenever we eat at Panera Bread, she always orders Black Bean soup, providing it is on the menu that day.
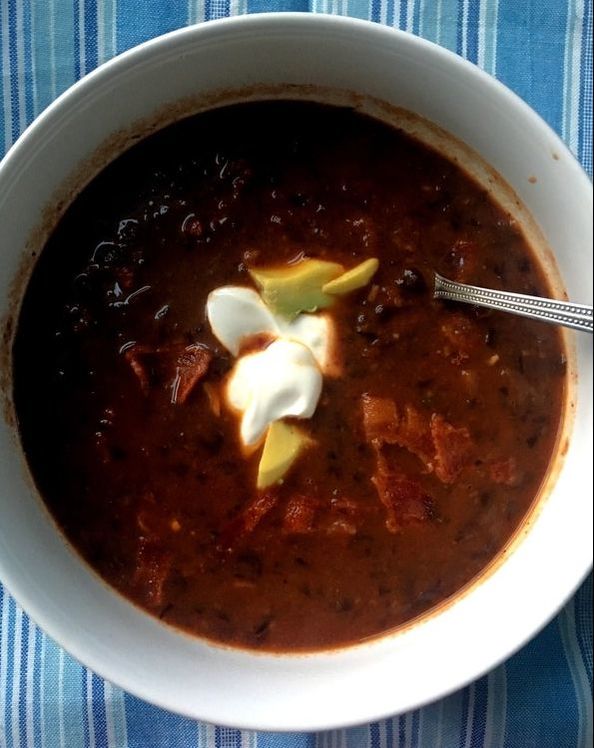
Black Bean soup at Panera is thick and rich in bean flavor. It's been one soup I haven't been successful in copying. Maybe it's because I don't like my soup to be that thick. Or maybe they have some secret ingredient in it that I don't have access to. But it hasn't stopped me or my husband from trying to make a good black bean soup. You know, one that will pass our daughter's taste test. Currently, my husband is in charge of cooking for the kids. So, while I'm away, working in another town, my husband is the chief cook and bottle washer at home. He has named Friday, "Pizza Night," and Thursdays are "Taco Night." He's even gone so far as to make his own sourdough pizza crust. And he attempted to make black bean soup. It turns out, he needed a soup to with his "soup and sandwich night," whatever night he has designated that to be. The soup was a success. It's flavorful, thanks to the bacon and hits all the right notes. I made a few minor adjustments to the recipe, but it is a great all-around soup. Great with sandwiches or just a slice of crusty bread. Black Bean Soup
Garnishes: sour cream and avocado In a medium size stock pot or soup pot, cook the bacon over medium heat until crispy. Remove from the pan and chop into small pieces. Leaving the bacon grease in the pan over medium heat, add the onions, garlic, and serrano chili. Season lightly with salt and pepper. Cook until the onions are soft, about 5-8 minutes. Add the tomato paste and cook for another 2-3 minutes. Season with cumin and chili powder. Add 3 cans of the black beans and the vegetable stock. Reduce heat to simmer. Cook for 20 minutes. Using a hand blender (or food processor), puree the soup until semi smooth. Add the last can of black beans. Season lightly with salt and pepper. Cook for another 10-15 minutes. Adjust seasonings as needed. Serve with sour cream and sliced avocado.
1 Comment
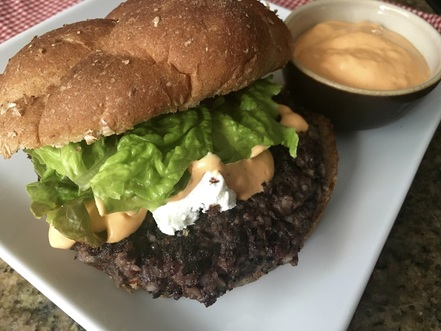 While I love a good beef burger, sometimes I want to be a bit healthier, so I go with black bean burgers. Plus, my kids would rather have black bean burgers, as odd as that may sound. In fact, they request these more often than not. The recipe calls for cooked forbidden rice, which is a black rice that can be found in most supermarkets with a bulk food or organic section. If I know I'm making these burgers during the week, I make sure to serve the rice with another meal and make a little extra to save for the burgers. However, you do not need to use forbidden rice in the recipe. There are many different types of rice that can be substituted. My only suggestion is to choose a whole grain rice (brown rice, etc). In a pinch, cooked quinoa could be substituted as well. And... as with all my recipes, this one can be tailored to meet your family's tastes. My family loves spicy food, which explains why I always use chili peppers whenever possible. If your family prefers mild flavors, you can omit the chipotle peppers and add whichever seasonings you want. Black Bean Burgers Makes 4 burgers
Place the onions, garlic, and chipotle peppers in a food processor. Pulse a couple of times to finely chop the pieces. Add the black beans, rice, salt, pepper, and cumin. Pulse several times to puree the mixture. How smooth you want the mixture is up to you. I prefer the burger to have a little texture, so I only pulse a few times to make it semi-smooth. Scrape the mixture into a bowl and stir in the bread crumbs. Heat the olive oil in a non stick skillet over medium heat. Form the bean mixture into patties. Cook on each side for 2-4 minutes or until lightly browned. Add cheese if desired. Serve on toasted buns with typical burger fixings. 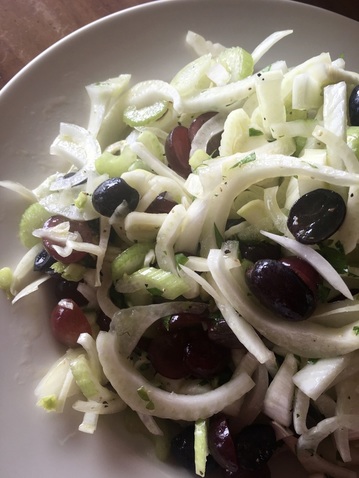 If you are looking for a good salad that is easy to make and great for a cookout, then look no further. Made with fresh, crisp fennel, this salad has a slight anise flavor (from the fennel) playing against the sweetness of the grapes. The salad can be served with any grilled meat or seafood. It's a lovely alternative to the standard garden salad. You can find fennel at the supermarket but I encourage you to look for it at your local farmer's market. That way, you are sure to get the crispiest, freshest fennel. Fennel and Grape Salad Serves 4-6
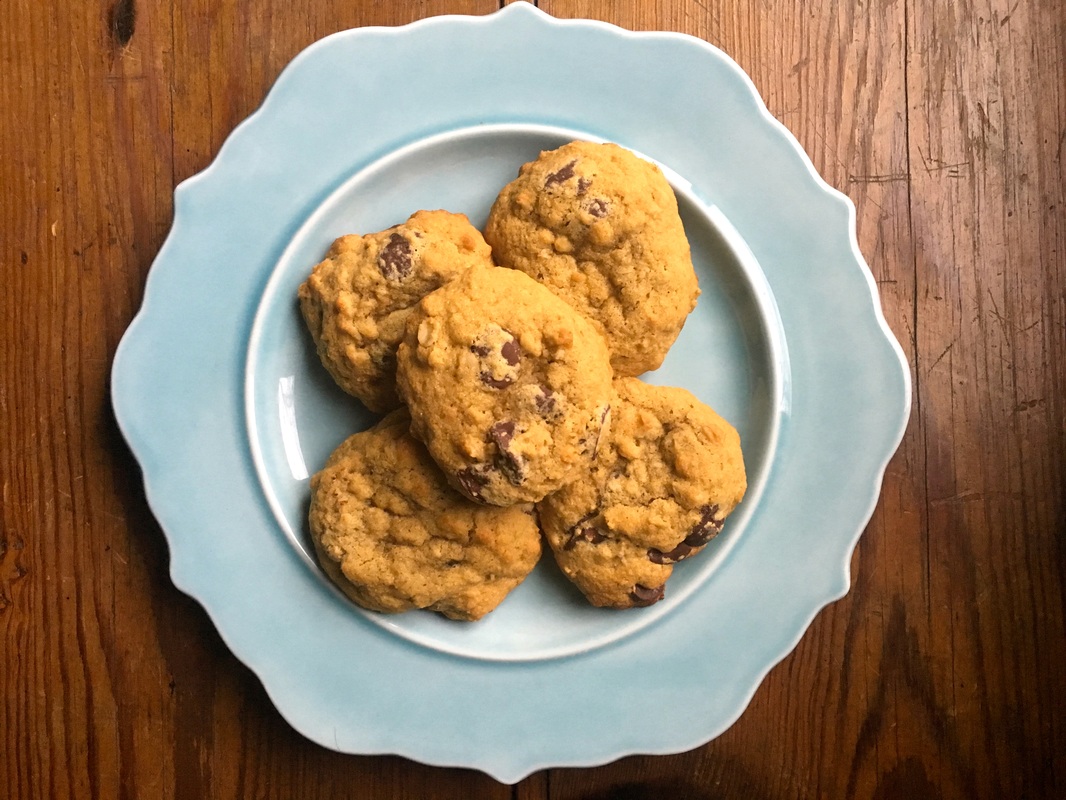
In a large bowl, toss together the fennel, grapes, celery, onion, and parsley. In a small bowl, whisk together the lemon juice, garlic, mustard, salt, and pepper. Drizzle in the olive oil while whisking. Pour vinaigrette over the salad and toss together to mix well. The salad can be made up to 1 day ahead of time. Keep refrigerated until read to serve. 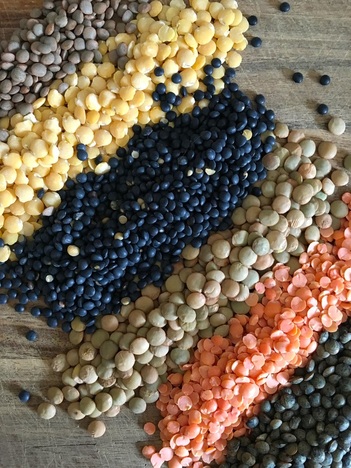 Lentils: Pantry Gems available on iBooks So, I wrote a cookbook. Not just any cookbook. This one has one main theme: Lentils. Yep, lentils. I know what you are thinking. Just lentils? You aren't including the other pulses? Why oh why would you devote a whole cookbook to lentils? Well, why not? I'm mean, really. They are an inexpensive form of plant protein. They are full of fiber and very nutritious. Honestly, we should all be eating more lentils (and other pulses). But this just isn't a cookbook with a bunch of soup an stew recipes. No, I actually bake with lentils. And sprout them. Brine them. Put them in salads. Cake. Cookies. And discuss them in detail -- give you the full nitty gritty about this little legume that is found in cuisines around the world. If you are looking for ways to incorporate more vegetarian cuisine or recipes into your repertoire, then you need this book. I amassed over 40 recipes featuring lentils. But I still have more recipes and ideas for them, so perhaps there will be a part 2 in the future. Maybe I'll even bring in some of their pulse cousins, like chickpeas. To get you started, here is a great cookie recipe that I make often for my kiddos. Oatmeal Chocolate Chip Cookies Makes 2-3 dozen cookies
Place the lentils in a saucepan. Cover with water by 2 inches. Bring to a boil. Cover and reduce heat to low. Simmer until soft, about 20-25 minutes. Drain off the liquid. Let the lentils cool for 10-15 minutes. Place them in a food processor and pulse until smooth. Save 3/4 cup of the lentil puree for the recipe. Any remaining puree can be refrigerated (for up to 4 days) or frozen (for up to 6 months) for later use. Preheat oven to 350ºF. In a small bowl, whisk together the flour, oats, baking soda, and salt. Set aside. In a mixing bowl, cream together the butter, brown sugar, and granulated sugar until light and fluffy. Add the eggs and vanilla. Mix well to combine. Stir in the lentil puree. Add the flour mixture and mix until well combined. Drop by spoonfuls onto a baking sheet. Bake for 10-13 minutes. Remove from pan and cool cookies on a wire rack. Be sure to share. 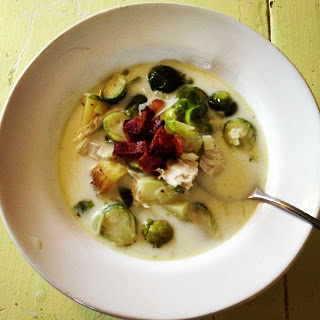 I'm guessing you probably wouldn't put brussels sprouts in a soup. In fact, I was never a big fan of brussels sprouts until I realized that they didn't need to be boiled to death and doused in vinegar (the way my mom served them). All they needed was to be made correctly and served with bacon. Because bacon makes everything taste better. Including brussels sprouts. Bacon is the gateway drug for vegans and vegetarians. So, here we have a hearty brussels sprout soup. I had leftover chicken and potatoes to use up, but you can make this with raw chicken and potatoes. It will just need some extra cooking time. Hearty Brussels Sprout Soup Serves 6
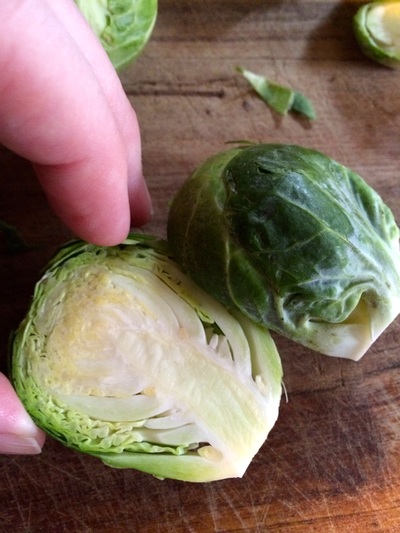
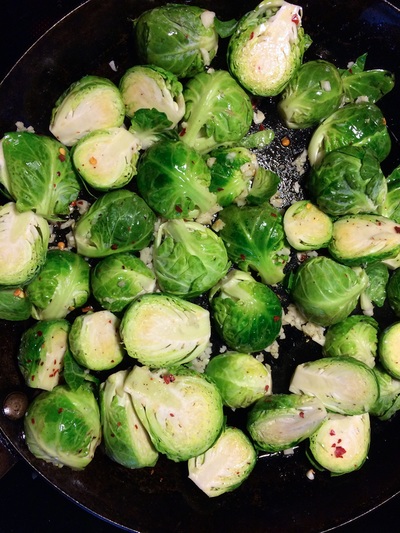
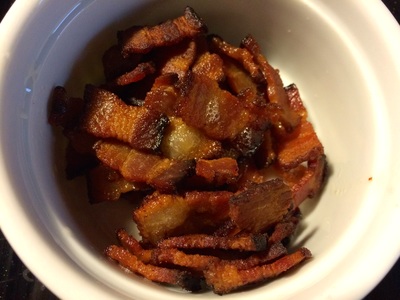
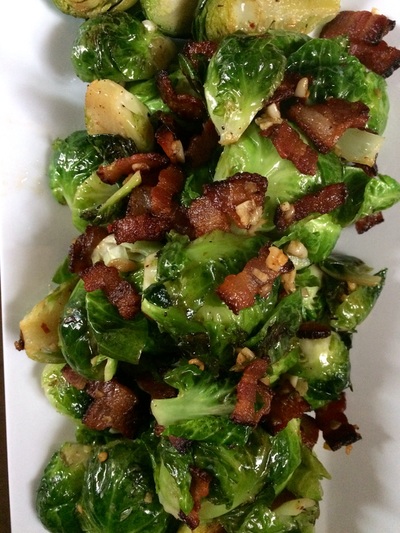
In a stock pot or Dutch oven, heat the olive oil over medium heat. Add the bacon and render down until crispy. Remove bacon from the pan. Set bacon aside. Add the shallots and garlic to the hot oil. Saute for 2-3 minutes. Add the brussels sprouts. Saute for 4-5 minutes. Season lightly with salt and pepper. Add the potatoes, chicken, and stock. Reduce heat to medium low and cook the soup until the potatoes are fork tender (for raw potatoes, about 15 minutes). Stir in the cream. Adjust seasonings with salt and pepper. Serve topped with the bacon bits. 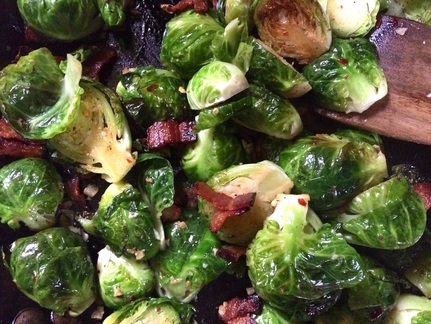 Who would have thought that Brussel Sprouts would be the vegetable of choice by my daughter? Not me that’s for sure. I made them for dinner one day and she was very excited – “Yea! Brussel Sprouts!” I was a little surprised at her excitement for this tiny cabbage but I went with it. Getting your kids to eat any vegetables (or anything healthy for that matter) can be a chore, but after years of leading by example, my daughter has finally caught on that veggies can taste good. Perhaps it’s the way I make them. I don’t know. Well, they do contain bacon and bacon makes everything taste good. Bacon is the gateway drug for vegans and vegetarians to start eating meat again. It’s that powerful. If you are looking for a good side dish for your holiday table, look no further than this recipe. The sprouts are roasted with a little bacon and garlic. Add a little balsamic vinegar at the end if you so please but that isn’t necessary. The best thing about this recipe, is that you can either cook them on the stove or in the oven. So... you have a choice! Both cooking methods are below. Brussel Sprouts Serves 4-5
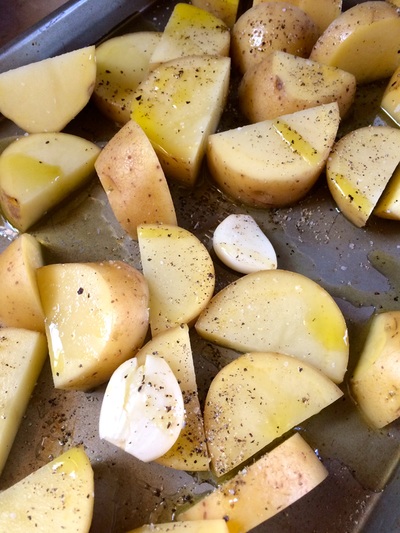
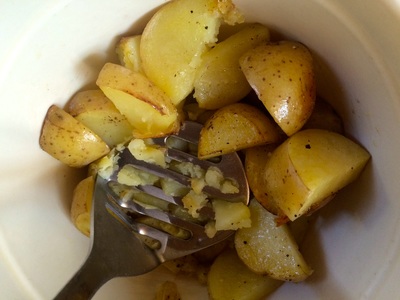
OVEN METHOD: Preheat the oven to 375ºF. In an oven proof saute pan, render the bacon over medium heat until brown and crispy. Remove bacon from the pan. Set aside (don’t eat it!). Add the brussel sprouts to the pan; toss in the bacon fat. Season lightly with salt and pepper. Place in the oven and bake for 15 minutes. Remove from the oven and add the garlic and red pepper flakes. Bake for another 15 minutes or until the sprouts are fork tender. Remove from oven. Toss with the bacon. Season to taste with salt and pepper. Serve. STOVE TOP METHOD: In a saute pan, render the bacon over medium heat until brown and crispy. Remove bacon from the pan. Set aside (don’t eat it!). Add the brussel sprouts, garlic, and red pepper flakes to the pan; toss in the bacon fat. Season lightly with salt and pepper. Over medium heat, brown the sprouts on one side for 5 minutes. Lower the heat to medium low, add 1-2 tablespoons water, and cover; cook for 10-15 minutes or until the sprouts are fork tender. Add the bacon at the end of cooking process. Serve. Add a touch of balsamic vinegar at the end if desired. 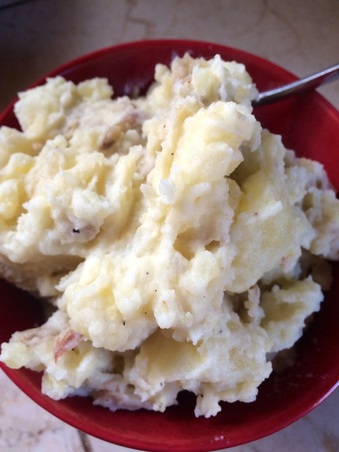 Mashed potatoes tend to be a favorite side dish this time of year with the holidays lurking around the corner. When it comes to mashed potatoes, there are two camps of people. In the first camp are those who want mashed potatoes that are light and fluffy and sans lumps. But then there those in the second camp who really don't care about lumps in the potatoes. We just want to make mashed potatoes as painless as possible. I tend to be in this camp. Look, I cook a lot. I can make perfect mashed potatoes if I really want to. But I don't. I have other things to worry about. My mashed potatoes will taste great but will contain lumps and skins. As a dietitian, I feel it is important to note that the skins contain most of the vitamins, minerals, and a touch of fiber. So eat the skins. They're good for you. Here you have Roasted Smashed Potatoes. No peeling. No boiling. All you do is roast the potatoes until fork tender, then mash them up (skins and all) with butter, milk, and sour cream. I sound like an infomercial. Sorry. Roasted Smashed Potatoes Serves 4
Preheat the oven to 350ºF. Toss the potatoes and garlic in the olive oil. Season lightly with salt and pepper. Spread mixture onto a sheet pan. Roast in the oven for 30-40 minutes or until the potatoes are fork tender. Place the cooked potatoes in a bowl. Let them sit for 5 minutes or so to allow some of the steam to come off. Add the butter and sour cream. With a potato masher, mash the butter and sour cream into the potatoes and garlic. Stir in the milk until desired consistency. Season to taste with salt and pepper. Serve. 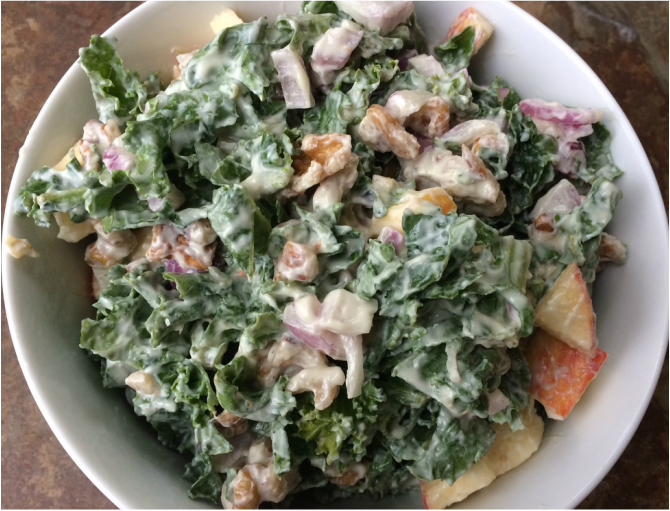 Looking for more ways to incorporate kale into your diet? I'm sure some of you are, but perhaps there's a few of you sitting there asking, "What's the deal with all the kale?" Well, it just so happens that kale is good for you. Shocking, I know. It's one of those dark green vegetables that seems to be poking its head everywhere. Kale chips. Kale soup. Kale smoothies. Now, Kale Slaw. And why not? Sure, cabbage is good for you but if you want even more vitamins and minerals, opt for kale. And ... I made this slaw even healthier by using yogurt instead of mayo. I created this recipe back in February during my dietetic internship where it was served in the hospital cafeteria along side Smoked Brisket Posole and Cherry Cobbler (don't worry... recipes will follow). The result? People liked it. Really. You see, kale can be good, especially if put it with strong tasting foods like apples and onions. I won't make anything that I will not eat first. Not only did the folks at the hospital like it, it also passed the test with my husband who is not the biggest fan of kale. So... there you have it. Kale Slaw. Try it. You might like it. Kale Apple Slaw Serves 6 Dressing:
Slaw:
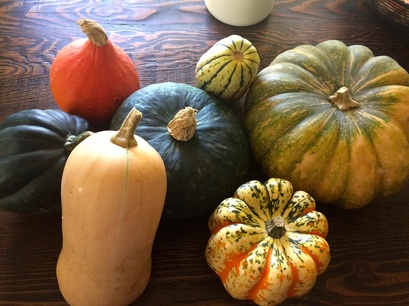
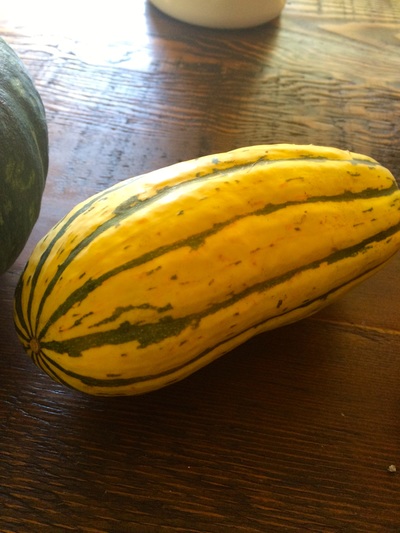
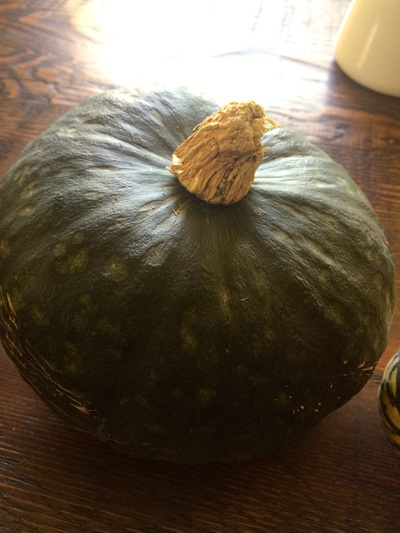
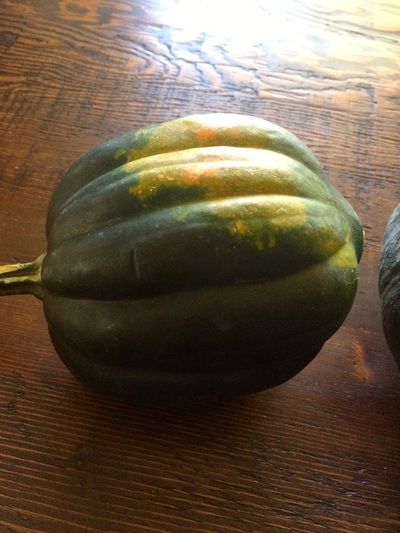
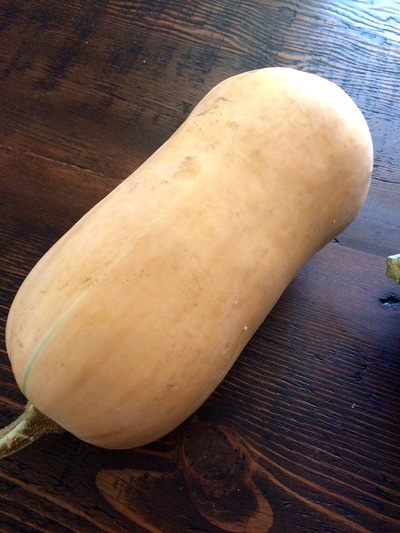
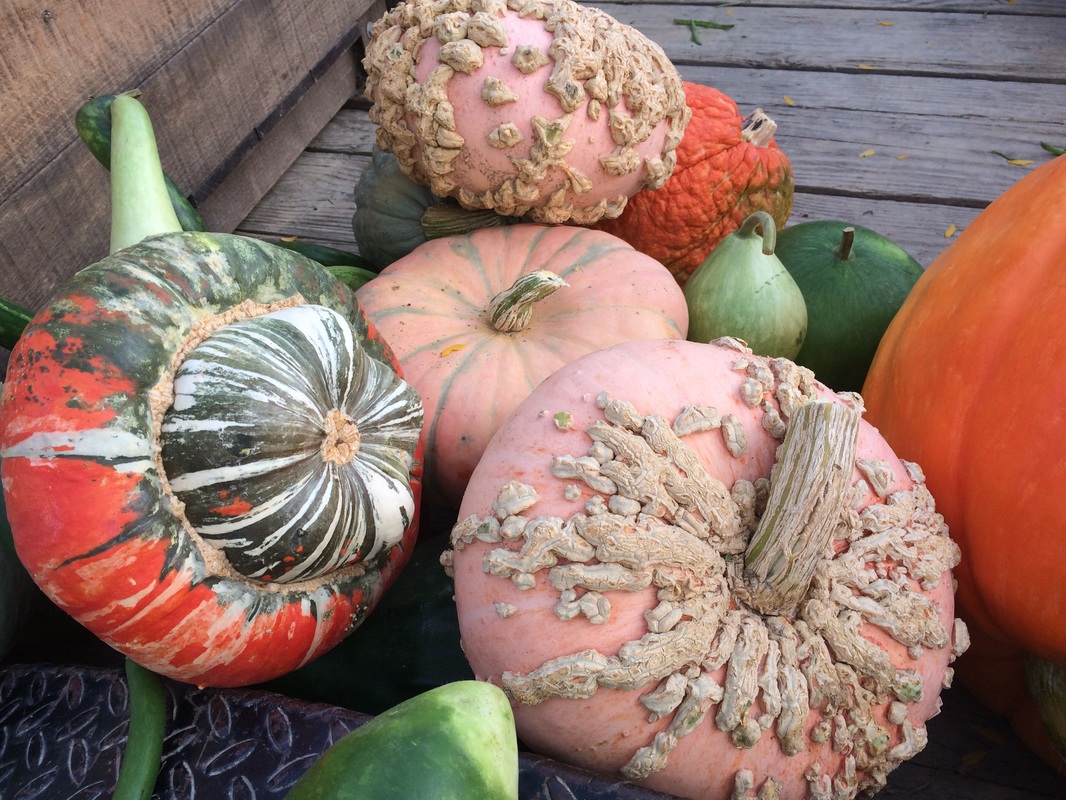
In a bowl, whisk together the yogurt, honey, sugar, cider vinegar, mustard, and olive oil. Season to taste with the salt and pepper. Refrigerate until ready to use. In a large bowl, toss together the kale, red onion, apple, and walnuts. Add the dressing and toss to coat the mixture well. Refrigerate for at least 30 minutes before serving. Can be made 1 day ahead (actually it tastes better the next day). Serve cold. Varieties of Winter SquashThe world of winter squash is vast and full of interesting varieties. Not pictured above is blue hubbard or your standard pumpkin varieties.
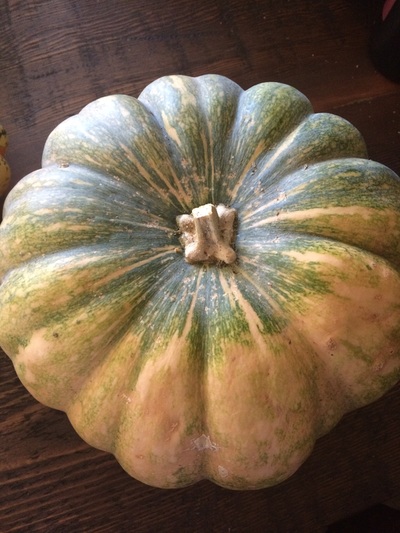
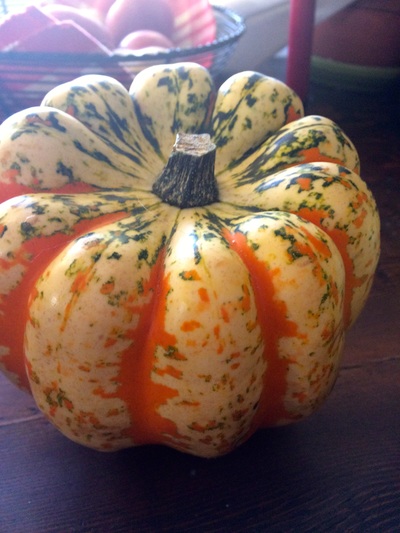
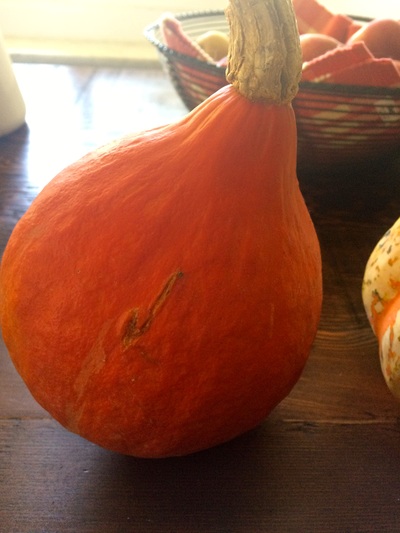
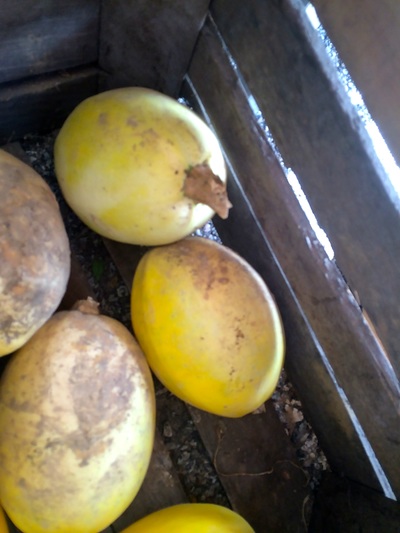
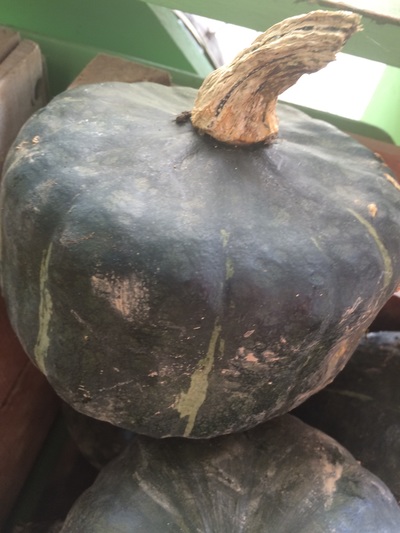
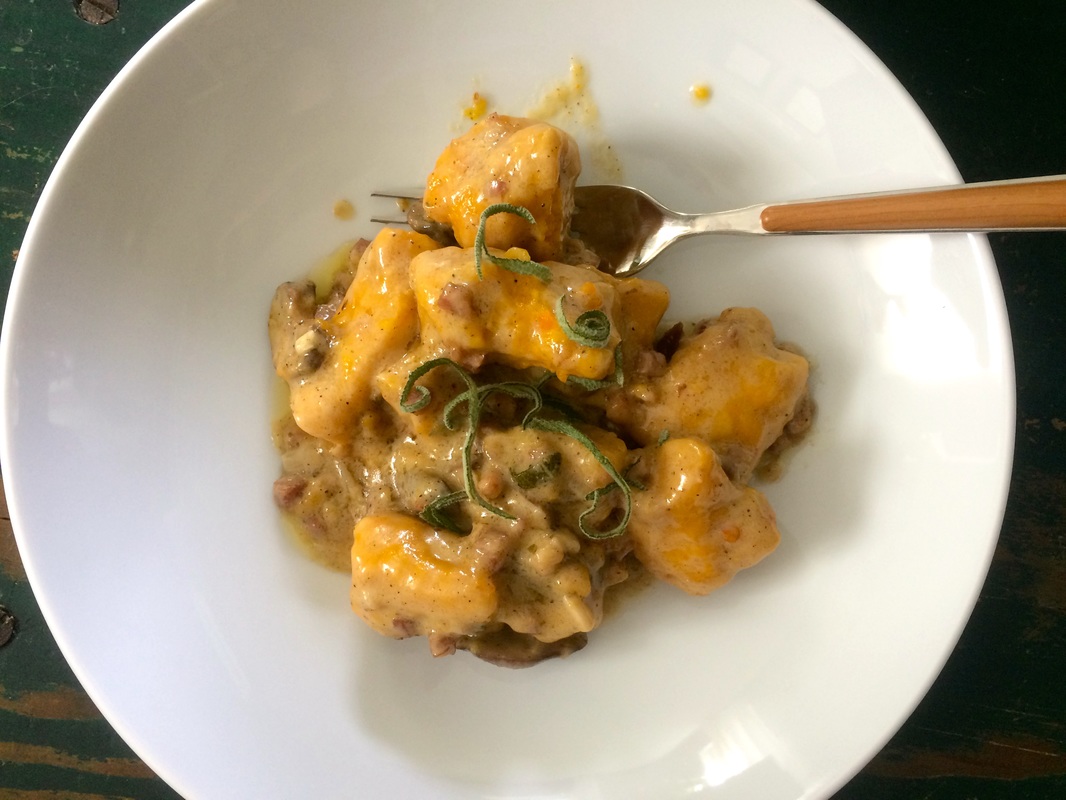
You will probably find most of these (except for the Musque de Provence pumpkin) at your local farmer's market. The French pumpkin was available from one of the farmers in my area. He only grew 6 plants, so he didn't have many to sell. He handed out a nice little description of the pumpkin. Below is a list of winter squash varieties and good uses for each. If you buy them now and store in a cool, dry area of the kitchen or pantry, the squash will last for several months. Musque de Provence Pumpkin: This is an heirloom pumpkin from southern France. The flesh has a distinctive hazelnut flavor. These are popular in France and sold by the wedge in French markets. Use in recipe that calls for butternut squash. Carnival Squash: About the same size of an acorn squash but with a more colorful exterior. The yellow flesh is sweet and mellow. It can used in any recipe calling for acorn squash. Red Kuri Squash: This is also called a red hubbard squash. It has a bright orange flesh that has a slightly nutty flavor. I used this in the Winter Squash Gnocchi recipe. Delicata Squash: This squash resembles summer squash varieties and you can even eat the skin if you so choose. It has the same consistency of a sweet potato when cooked but more earthy and rounded in flavor. You can slice it (with skin on) and roast in an oven. Kabocha Squash: This is a green kabocha squash. There are red kabocha varieties, too. It has a nutty, earthy flavor. Can be used in any recipe calling for butternut or acorn squash. Acorn Squash: Very popular squash this time of year with yellow flesh and mild flavor. Can be used in any squash recipes but is delicious in soups. Butternut Squash: Another very popular squash with a light orange flesh. The seeds of the squash are located in the bell (or bottom) of the squash. The neck is all flesh. It has a slightly sweet flavor and is a good all around squash. Spaghetti Squash: This yellow squash resembles spaghetti when cooked. The flesh gets stringy and looks like noodles. It's a good alternative to pasta and can be served with a nice marinara sauce. Buttercup squash: Looks like kabocha squash; mild in flavor. Great for any recipe calling for kabocha squash. So... there you go. Now, go out and buy some winter squash to use all season. I'll post many more recipes using these squash varieties. 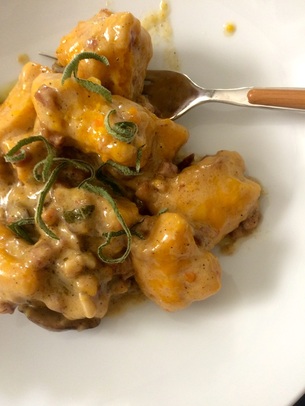 The reason I call this winter squash gnocchi as opposed to pumpkin or butternut squash gnocchi is because I don't want to pigeon hole this recipe into using certain types of winter squash. And quite frankly, I'm tired of everything pumpkin. There I said it. I'm not a big fan of pumpkin to begin with and everywhere you look, you see pumpkin this and pumpkin that. Geez. Must everything be pumpkin flavored between September and November? Where did this stem from? Is there a pumpkin lobby I didn't know about? But I digress... this is about gnocchi and making it with other types of winter squash available at the farmers market or grocery store. I wrote a post regarding the many types of winter squash that is being published this week. That way, you can get educated regarding the world of winter squash. So, a note about gnocchi... If you've made pasta from scratch, then you can make gnocchi. All it is an Italian dumpling that is typically made with potatoes. So for this version, instead of potatoes, I used winter squash that was roasted in the oven about 1-2 days before I made the gnocchi. Also, it's important to get the sauce finished prior to putting the gnocchi dough together because once you make the dough, you cut them into dumplings and cook them in salted boiling water. The cooking process is very quick, about 3 minutes and then you throw them into the sauce. Or you can enlist the help of a friend or two (or family members) to help make the dish. One person on sauce; another person making gnocchi. Make sense? Good. Let's get started. Winter Squash Gnocchi Serves 4-6 Gnocchi
Sauce
Roast the winter squash: Preheat oven to 375ºF. Cut the squash in half and scoop out the seeds. Brush a baking sheet with a little olive or canola oil. Place the squash cut side down on the sheet. Bake for 30-40 minutes or until soft and tender. Remove from oven and cool completely before scooping out the flesh. This can be done 1-2 days ahead of time; keep squash in the refrigerator until ready to use. Photos of roasting the squash are at the end of the post. Make the sauce: Heat the olive oil and butter over medium heat. Add the pepper flakes, shallots, garlic, and pancetta; saute for 4-5 minutes. The pancetta will get slightly crispy. Add the sliced mushrooms and sage; saute for 4-5 minutes. Pour in the stock. Reduce slightly, about 10 minutes. Add the cream; bring to a boil and cook for 5 minutes. Season with salt and pepper. Stir in the grated cheese. Keep the sauce warm, stirring occasionally. Make the gnocchi: Make sure you have a pot of water ready to go for cooking the gnocchi (boiling and salted). If you haven't done so already, scoop out the flesh from the cooled squash. Mash or puree the cooked squash until smooth. Thoroughly mix together the squash with the eggs, parmesan cheese, and goat cheese. Add 1 cup of flour, salt, and pepper. Mix until a dough begins to form. If the dough seems too sticky (it should be soft but not sticky), add more flour. You may need 1/2-3/4 cup more flour depending on how much moisture the squash was holding. For me, I only used about 1 1/4 cups of flour but you might need closer to 2 cups, depending on the squash you are using. Knead for about 2-3 minutes or until the dough is no longer sticky. Do not overwork the dough or it will turn out tough. Cut the dough into 4 pieces. Roll each piece into a rope about 18-24 inches long. Cut into 1-inch pieces. Roll each piece down the tines of a fork to create grooves in the gnocchi. Boil the gnocchi in batches in the salted, boiling water. When the gnocchi float, they're done; about 2-3 minutes. Drain and place cooked gnocchi into the sauce. Cook the gnocchi in the sauce for 3-4 minutes before serving. Serve with crusty bread and extra parmesan cheese. |
New Book!Shining Star Archives
October 2022
Recipe Categories
All
|
Home |
About |
Resources |
About Marcy |
Contact |
Copyright © 2015



 RSS Feed
