
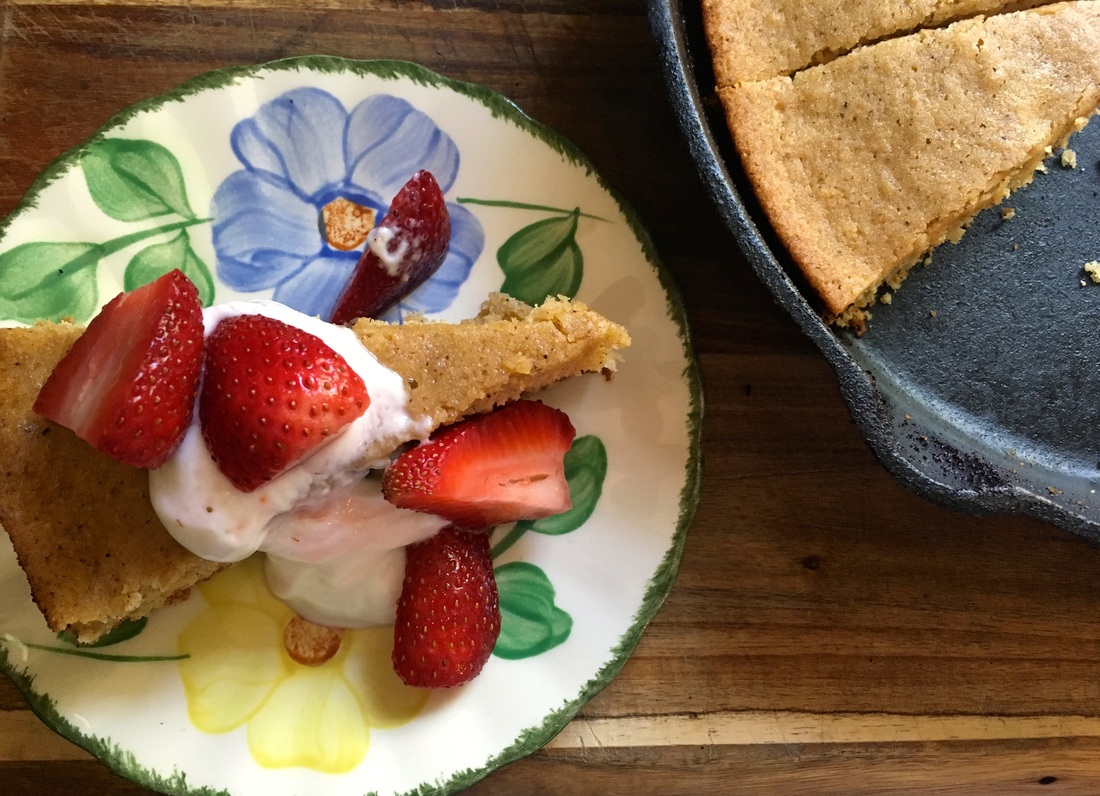
 Right now, I'm addicted to anything containing brown butter. Why? Brown butter is just sooooo good, adding a nutty flavor to any recipe. Recently, I made Brown Butter Blondies, which were quickly devoured by my family. While I could have made blondies again, I decided to bake a cake. We had strawberries hanging around just waiting to be served with cake. And who doesn't like cake with strawberries?
This is a simple recipe to put together. However, you need a 10-inch cast iron pan for best results. You can make this recipe without the cast iron skillet, but it just won't be the same. Well, ok, it will still turn out fine, but the pan adds a little something extra to the appeal. Just be sure to grease the pan you are using to bake the cake. Also, I served the cake with lemon Greek yogurt* but you can serve it with whipped cream. Whichever you choose. Brown Butter Cake Yield: 1 10-inch cake
Preheat oven to 350ºF. In a 10-inch cast iron skillet, melt the butter over medium heat. Continue to cook the butter until it turns amber in color. Pour the butter into a mixing bowl. Refrigerate for about 15 minutes while you gather the rest of the ingredients. Set the cast iron pan aside (do not wipe it out). Add the eggs, yogurt, brown sugar, and sugar to the melted butter. Stir to combine well. Add the lemon zest. Stir in the flour, baking powder, and salt. Stir to combine well. Pour batter into the cast iron skillet. Bake for 25-30 minutes or until the cake starts to pull away from the side of the pan and a toothpick inserted in the center comes out clean. Cool cake. Serve with fresh strawberries and sweetened whipped cream or Greek yogurt.* *Lemon Greek Yogurt 1 cup plain Greek yogurt 2 teaspoons fresh lemon juice 1 tablespoon honey 1-2 teaspoons sugar (optional) Stir ingredients together. Refrigerate until ready to use.
0 Comments
 It's spring and it's time for us to dust off the grill and start cooking outside! There isn't a better way to break in your grill than to cook up some hamburgers.
Now, I like a good beef (grass-fed, of course) burger, but my family does not always want to eat red meat, leaving me to become creative in which meat I cook. So, I like to use chicken thighs whenever possible. They grind up well and have a lot of flavor (way more than breast meat). To grind up chicken thighs, you will need to use either a food processor or a meat grinder (like the attachment for a KitchenAid Mixer). Otherwise, you will be chopping up chicken thighs with a knife, which will be time consuming. Chipotle peppers in adobo sauce can be found in the Mexican food section of the grocery store. They add a nice smokey flavor to the burgers along with a little bit of heat. Chipotle Chicken Burgers Makes 4-6 burgers
Place the chicken thighs in a food processor. Pulse several times to roughly chop up the meat. Add the garlic, onion, chipotle peppers, salt, and pepper. Pulse several times until blended and the meat is chopped up. If using a meat grinder, run the chicken through the coarse blade. Then mix it with finely chopped garlic, onions, chipotle peppers, salt, and pepper. Form meat into patties. Cook on a grill or on the stove, about 4-5 minutes per side, or until the internal temperature of the burger reaches 165ºF. Add cheese if desired. Serve on a toasted bun with all the regular burger fixings. 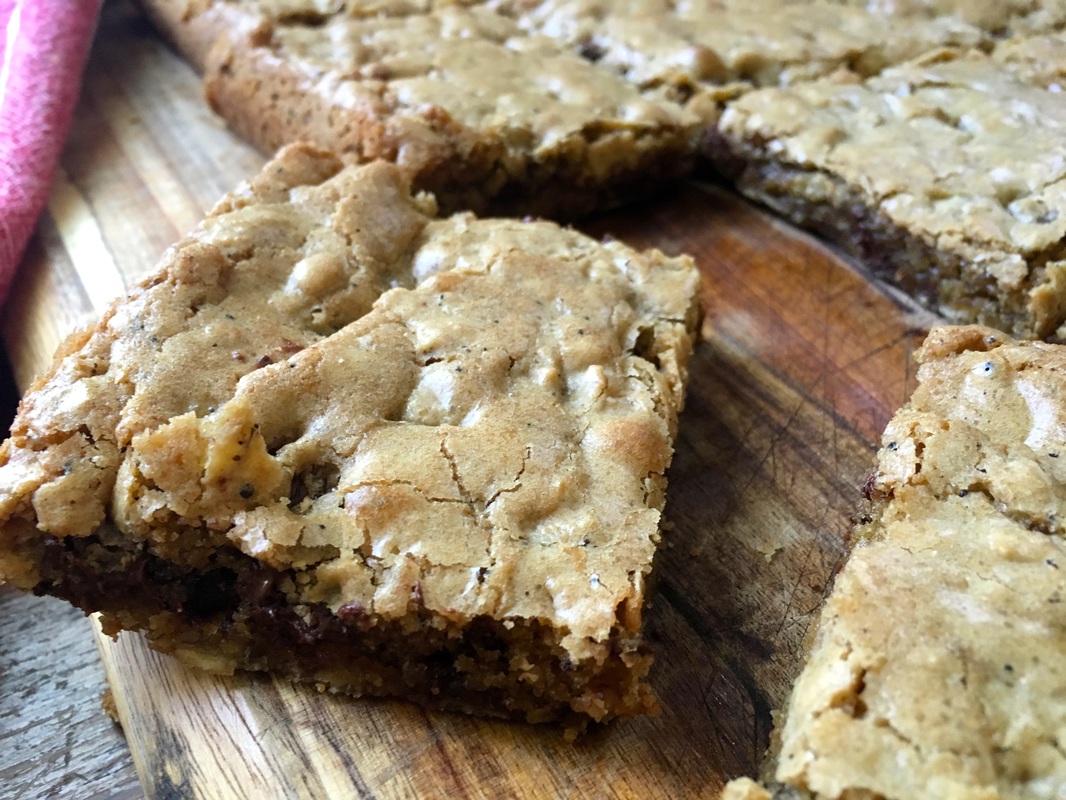 My kids often find me in the kitchen pulling out bowls and measuring cups and ask "What 'cha making, Mama?" After I tell them, they wait around the kitchen waiting for whatever I'm making to be done. It's like being on a cooking show or perhaps on Chopped. I feel a sense of urgency as they stare at me while I stir ingredients together.
Sometimes I get the urge to just bake something. Most of the time I enlist the help of my daughter, who has decided that she now wants to learn how to cook/bake at the age of 14. But the other day, I decided to head off on my own and bake something delicious for the family. After spending the last few months baking with lentils, I felt my family needed a break from the little legume (we've eaten soooo many!). So, why not make brownies? However, I didn't have any cocoa powder, but chocolate chips were staring at me in the pantry. Blondies it is. Brown butter blondies. Browning the butter adds a nuttier flavor to the blondies and is definitely worth the extra step. Brown Butter Blondies Yield: 1 13 x 9 inch pan (about 12 blondies)
Preheat oven to 350ºF. Generously grease a 13x9 inch baking pan. Set aside. In a saucepan, melt the butter over medium heat. Cook the butter until browned, amber in color. Pour into a glass bowl and allow to cool for 15 minutes. In a mixing bowl, combine the butter, sugar, eggs, and vanilla. Stir in the flour, oats, baking powder, and salt. Mix until well combined. Fold in the chocolate chips. Spread batter into the prepared pan. Bake for 20-25 minutes or until lightly golden brown. Cool on a wire rack. Cut into squares. Be sure to share. 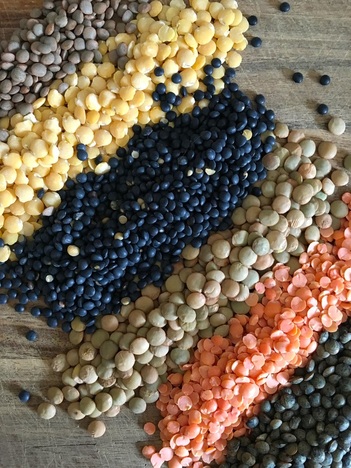 Lentils: Pantry Gems available on iBooks So, I wrote a cookbook. Not just any cookbook. This one has one main theme: Lentils. Yep, lentils. I know what you are thinking. Just lentils? You aren't including the other pulses? Why oh why would you devote a whole cookbook to lentils? Well, why not? I'm mean, really. They are an inexpensive form of plant protein. They are full of fiber and very nutritious. Honestly, we should all be eating more lentils (and other pulses). But this just isn't a cookbook with a bunch of soup an stew recipes. No, I actually bake with lentils. And sprout them. Brine them. Put them in salads. Cake. Cookies. And discuss them in detail -- give you the full nitty gritty about this little legume that is found in cuisines around the world. If you are looking for ways to incorporate more vegetarian cuisine or recipes into your repertoire, then you need this book. I amassed over 40 recipes featuring lentils. But I still have more recipes and ideas for them, so perhaps there will be a part 2 in the future. Maybe I'll even bring in some of their pulse cousins, like chickpeas. To get you started, here is a great cookie recipe that I make often for my kiddos. Oatmeal Chocolate Chip Cookies Makes 2-3 dozen cookies
Place the lentils in a saucepan. Cover with water by 2 inches. Bring to a boil. Cover and reduce heat to low. Simmer until soft, about 20-25 minutes. Drain off the liquid. Let the lentils cool for 10-15 minutes. Place them in a food processor and pulse until smooth. Save 3/4 cup of the lentil puree for the recipe. Any remaining puree can be refrigerated (for up to 4 days) or frozen (for up to 6 months) for later use. Preheat oven to 350ºF. In a small bowl, whisk together the flour, oats, baking soda, and salt. Set aside. In a mixing bowl, cream together the butter, brown sugar, and granulated sugar until light and fluffy. Add the eggs and vanilla. Mix well to combine. Stir in the lentil puree. Add the flour mixture and mix until well combined. Drop by spoonfuls onto a baking sheet. Bake for 10-13 minutes. Remove from pan and cool cookies on a wire rack. Be sure to share. 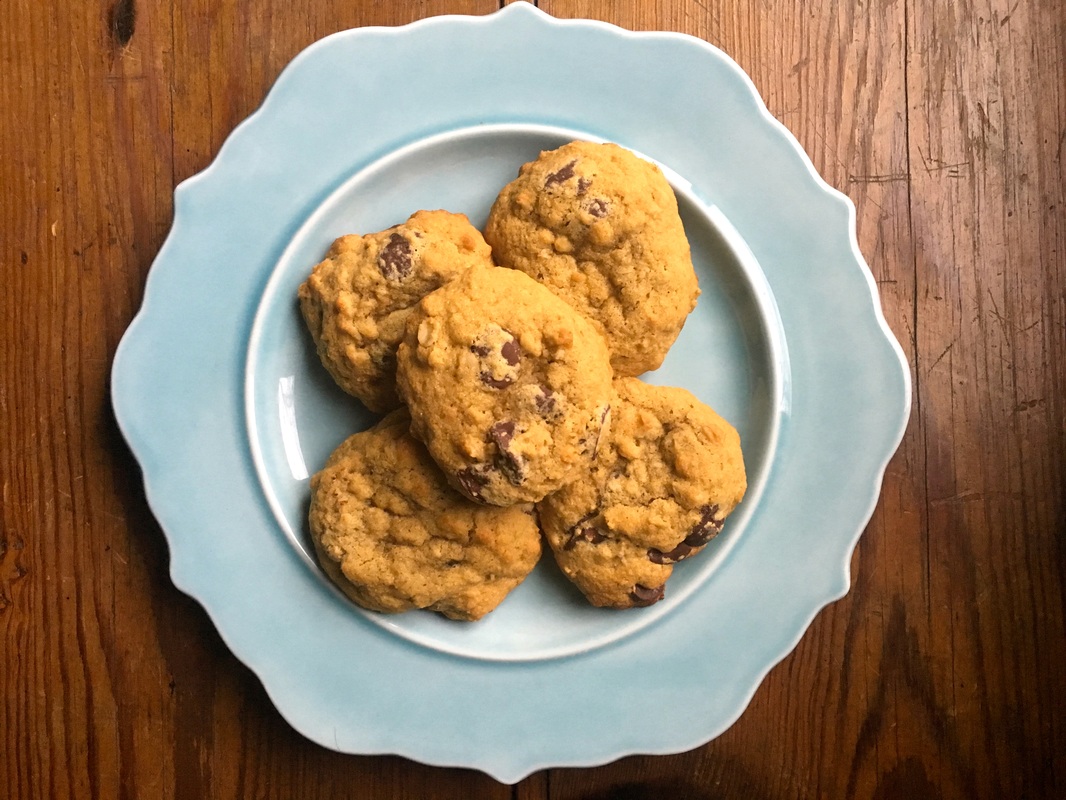 |
New Book!Shining Star 
 Archives
October 2022
Recipe Categories
All
|
 RSS Feed
Home |
About |
Resources |
About Marcy |
Contact |
Copyright © 2015