
 I’m a food nerd. I know everyone is surprised (shocked, really). So, when Caitlynn comes to me with a recipe for a 2000-year-old cake from ancient Rome, well, I’m intrigued.
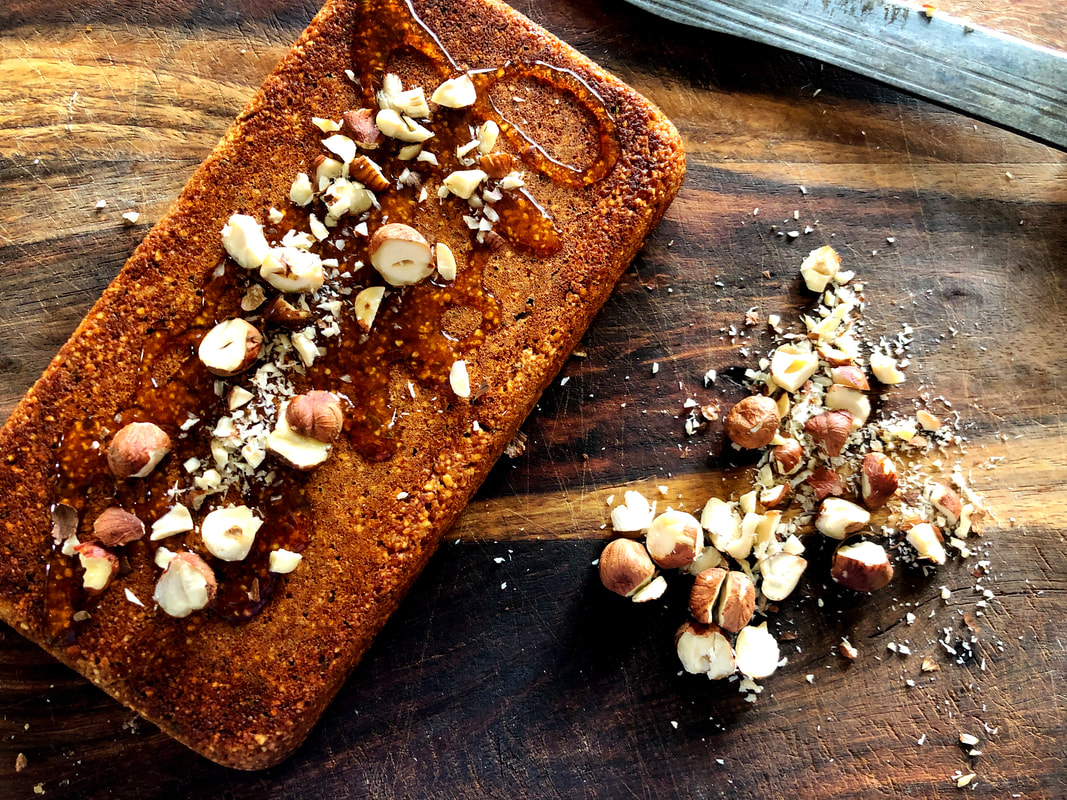
And since I seem to have more time on my hands these days due to the that pesky virus invading the planet, she and I spent an afternoon trying two different versions of this cake. I’ll be honest, this recipe is not mine (obviously, since I’m not an ancient Roman). We took a cue from this site: https://www.howtocookthat.net/public_html/2000-year-old-cake-recipe-ancient-rome/. If you watch through the video, you’ll see that the cook tried three different versions of the cake and ended up liking the one with yeast the most. Yeast in cake. This makes total sense as there weren’t many options for creating leavening in cakes back then and it got me thinking. I’m not convinced they would have had dried yeast back then. They likely would have had a sourdough starter. And they may have had wine with some fizziness, like Moscato. In the absence of a chemical leavening agent like baking soda or baking powder, perhaps they used a fizzy wine, along with a sourdough starter to make their cakes. Or maybe they didn’t use the starter at all and just used the wine. All this speculation makes me want to travel back in time to find out for sure. Me in ancient Rome? What a sight to behold! All this leads me to my version of the cake. I chose not to use yeast but to use Moscato Wine either by itself or with my trusty sourdough starter. And… since everyone is baking at home these days, finding whole wheat flour is impossible (really, people? All the flour?). In my hunt for whole wheat flour, I found the next best thing – whole farro, which happens to be an ancient grain. Yeah, it went old school real quick. Our verdict: the version with the Moscato was the winner. Fair warning -- the cake is not that sweet. It’s dense with savory notes and a hint of sweetness. It’s actually quite delicious with a glass of Moscato. I baked the cake in a 9x5 loaf pan but you could certainly bake this in a smaller cake or loaf pan. And you can make this cake however you see fit – all Moscato or using a blend of Moscato and sourdough starter, or maybe you want to use instant yeast with the Moscato. You can also use whole wheat flour if that’s what you have. In that case, can I borrow some? Anyway… Note the quantities for the recipe are in metric (grams, milliliters). If you have a scale, this will be perfect for you. Dolica Piperata Yield: 1 cake
Notes: ^We used a food processor to grind the wheat berries and almonds (separately). OR you can use whole wheat flour if you have it. *For sourdough use these quantities for the Moscato wine:
*With yeast:
Preheat the oven to 375ºF. Generously grease a small cake or loaf pan. In a small bowl, whisk together the ground wheat, almonds, rosemary, and cinnamon. Set aside. In another small bowl, whisk together the wine, honey, grape juice concentrate, and milk. Pour the wine mixture into the dry ingredients. Let sit for 15 minutes at room temperature. Bake for 20-35 minutes, depending on the depth of the pan or until the cake starts to pull away from the sides of the pan. In a 9x5 loaf pan, the cake baked for 23-25 minutes. Remove cake from pan. Drizzle with honey and sprinkle with hazelnuts. Serve at room temperature.
0 Comments
 If you are looking for a recipe that is easy to put together, gluten free, and extremely delicious, then look no further. This is a classic recipe for a flourless cake. The best part -- you don't need to have a bunch of gluten free flours sitting around. All you need are eggs and chocolate. Seriously simple ingredients.
I paired this with a raspberry chocolate sauce. It isn't necessary but it sure is delicious. The sauce would work great with ice cream, too. Flourless Chocolate Cake with Raspberry Chocolate Sauce Makes 1 9-inch cake Cake:
Sauce:
Preheat the oven to 275ºF. Grease the bottom and sides a 9-inch cake pan. Line the bottom with parchment paper. Butter the paper. Set aside. Melt the butter and chocolate together in a microwave or in a pan on the stove set on low heat. Stir until melted. Cool the mixture until it's lukewarm, about 5 minutes. Pour into a large mixing bowl. Whisk in the egg yolks, vanilla, and Kahlua. Set aside while you whip the egg whites. In a mixing bowl, whip the egg whites on high speed until soft peaks form. Gradually add the sugar. Whip the whites until stiff peaks form. Add one cup of the egg whites to the chocolate mixture. Stir to mix well. With a large spatula, gently fold in the rest of the egg whites into the chocolate mixture, making sure to completely incorporate the whites into the chocolate. To fold properly, do not stir the mixture. Move the spatula in the same direction, gently flipping the batter and whites over each other until it's homogenized. Pour batter into the prepared cake pan. Bake for 45-50 minutes or until the cake feels firm in the center and begins to pull away from the sides of the pan. Cool completely. Dust with powdered sugar. Sauce: Heat the cream, raspberries and sugar over a medium heat until the berries have broken down and become mushy. Add the chocolate chips; stir until melted. Remove from heat and pour mixture through a fine mesh strainer. Refrigerate sauce until ready to serve. If sauce is too thick, stir in a little water to thin it out slightly. 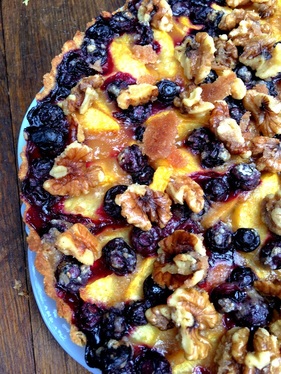 I've been baking a lot lately. I didn't intend for this to happen, but with all the delicious fresh fruit hanging out at the farmers market, tarts, pies, and cakes have been entering my mind lately. I see fresh, ripe peaches and before you know it, I'm making a tart.
I love pie, but tart is a perfect way to show off fresh fruit like peaches. Pies can be heavy and sugar-laden. Tarts are lighter and typically contain less sugar, making them a perfect end to any summer meal. This tart in particular utilizes both fresh blueberries and peaches. You can purchase store-bought crust, or make your own. I offer a simple recipe below. The star of the show is the fruit, so pick ripe peaches (ones that are sweet and juicy) and big, plump blueberries. Peach and Blueberry Tart with Candied Walnuts Makes 11-inch tart Tart Crust:
Tart:
Candied Walnuts:
Preheat oven to 425ºF. Make the Tart Crust: In a mixing bowl, stir together both flours, salt, and sugar. Stir in the olive oil and milk. Mix until just combined. Transfer dough to an 11-inch tart pan with removable bottom. Press the dough into the pan covering the bottom and sides of the pan. Fill in any holes with excess dough. Make the Tart: Combine the peaches, blueberries, sugar, flour, orange zest, and salt in a large mixing bowl. Pour the mixture into the crust. You can try to decoratively arrange the peaches and blueberries around the crust or just leave it more free-form. Dot the tart with the butter. Bake for 35-45 minutes or until golden brown and bubbly. Sprinkle with candied walnuts. Cool completely. Serve with whipped cream or vanilla ice cream. Make the Candied Walnuts: Melt the butter in a skillet set over medium heat. Add the walnuts, sugar, and cinnamon. Stir and cook for 5 minutes or until the sugar is melted and the walnuts are coated in the mixture. Spread the walnuts onto a baking sheet. Cool completely before breaking apart. 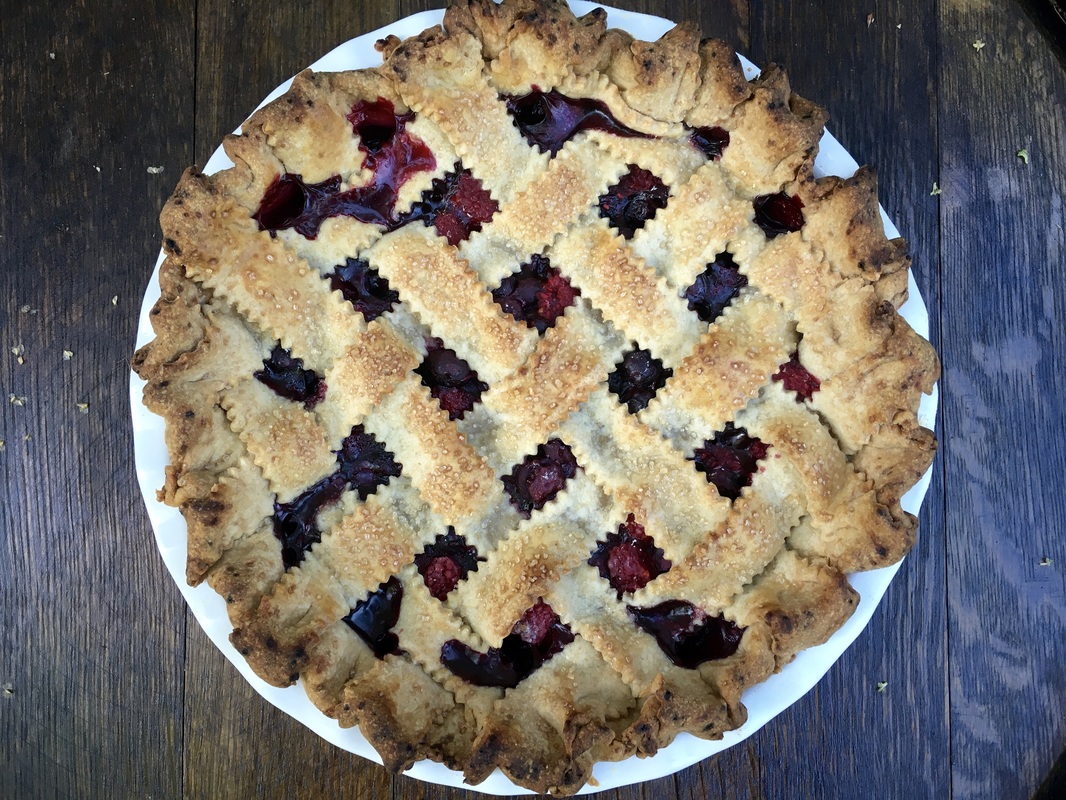 The berries are here! The berries are here! The berries are here! This is what I want to scream each time I visit my local farmer's market. I might get strange looks but I don't care. I love fresh local berries. For the past few weeks we've had the pleasure of eating fresh cherries (my favorite), but now raspberries and blueberries (and other berries) are making their debut. Every time I see lots of fresh berries, I feel the need to bake a pie or tart. With the plethora of fresh berries right now, I will have to find many uses for them since I cannot eat pie every day. Well, I could eat pie every day but I don't think I should do so. Until I find the time to make jam (lavender blueberry jam is in the works), I decided to bake a pie. I love 3 pies -- Apple pie, Cherry pie, and Mixed berry pie. What I love about this recipe, is that you can use whatever berries you have available. I used blueberries and raspberries for this recipe but you can use blackberries and black raspberries as well. It's up to you. And ... you need to make a crust. Or you can purchase a ready made pie crust. Even though I won't tell on you (people are busy, I know), I will say that a homemade pie crust is much better than store bought. The recipe for the crust is below. Mixed Berry Pie Yield: 1 10-inch pie
Preheat the oven to 400ºF. On a lightly floured surface, roll one pie crust out into a 12-inch circle. Carefully transfer crust to the pie plate. Gently tuck it in to the plate. Place the berries in a large mixing bowl. In a small bowl, whisk together the sugar, cornstarch, and salt. Add the mixture to the berries. Toss to coat well. Add the orange zest and juice. Toss mixture to combine well. Pour mixture into the pie crust. Roll out the other pie crust on a lightly floured surface. You can either cut strips to make a lattice design or simply transfer the crust to the pie. If choosing the latter, be sure to cut for slits in the top of the crust (for vent holes). Trim the edges of the crust to make about a 1-inch overhang. Fold the crust under to create a seal with the bottom crust. Brush the top with the heavy cream and sprinkle with sugar. Bake for 25 minutes at 400ºF. Reduce heat to 350ºF and bake for another 25-30 minutes or until the filling starts bubbling through and the crust is golden brown. Allow the pie to cool on a wire rack for 1 hour. Refrigerate for about 2 hours before serving. The pie is good warm or cold and best served with vanilla ice cream. Double Pie Crust
Place the white whole wheat flour, all purpose flour, sugar, and salt in the bowl of a food processor. Pulse for 10 seconds to combine ingredients. Add the butter; pulse several times until the mixture resembles coarse meal. With the processor motor running, slowly pour in the cold water. Pulse until the mixture starts to come together and form a ball of dough. Divide the dough half. Flatten each piece slightly. Cover with plastic wrap. Refrigerate for at least 1 hour, preferably up to 2-3 hours. Dough can be made 1-2 days ahead of time.  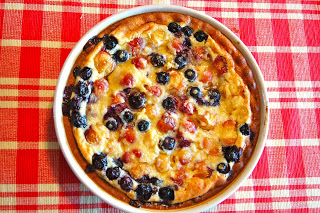 A clafoutis is an egg custard typically made with cherries. In this version, I used Rainier cherries and blueberries but you can use Bing or sweet cherries instead. Or you can even use plums or blackberries. You know, the sky's the limit!
Serve this with brunch or as a dessert to a nice meal. Rainier Cherry and Blueberry Clafoutis
Preheat the oven to 375ºF. Lightly butter an 10-inch pie or quiche dish. Spread the cherries and blueberries on the bottom of the dish. Whisk together the eggs, half-n-half, mascarpone cheese, sugar, orange zest, vanilla, and flour until well combined. Pour the batter over the cherries and blueberries. Sprinkle the top with raw sugar and scatter the butter slices over the top. Bake until puffed and golden around the edges, about 40 minutes. If the center seems too runny, bake for another 10 minutes or so. Cool for 30 minutes at room temperature. Cover and refrigerate until cold and set. Dust with powdered sugar before serving. 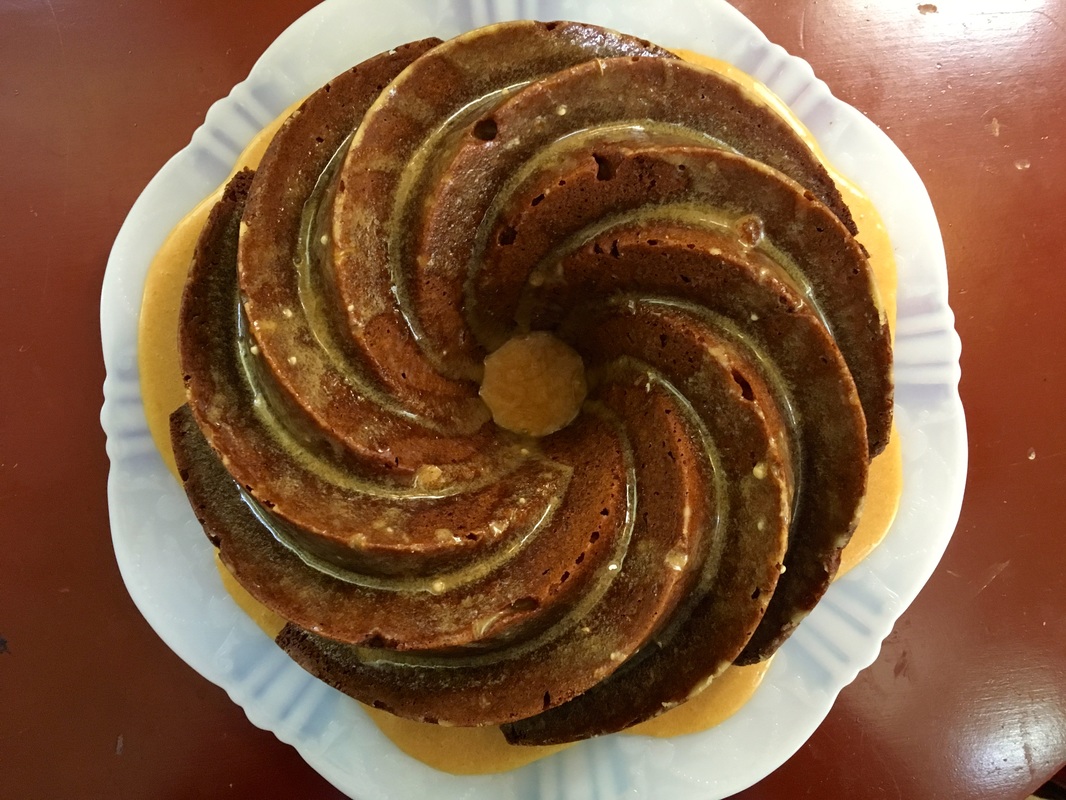 A while back, I was shopping in a little market that specialized in Mediterranean products. As I perused the shelves, I found a jar of date syrup. Intrigued, I purchased it and took it home. And then it sat in my cupboard for a few months until I decided that I needed to use it. But how exactly, I didn't know.
There aren't many recipes floating around on the web using date syrup (or date molasses), so I had to piece together a couple different recipes to make my own. I realized that this syrup can be used like regular molasses and it gave me the idea to make a spice cake. Date syrup differs in flavor compared to molasses. It is fruitier and lighter in flavor. Even though I use it in a cake, it would also be good in a sauce served with meat or poultry. From what I can tell, it has many uses, much like molasses. You can find date syrup in specialty grocery stores or on Amazon. You can also make your own if you have dates and sugar. I encourage you to go out and find a jar. You won't be disappointed. Date Syrup Spice Cake
Glaze:
Preheat the oven to 350ºF. Generously grease and flour a bundt pan. Set aside. In a small bowl, whisk together the flour, baking powder, baking soda, salt, cardamom, and cinnamon. Set aside. In a mixing bowl, cream together the butter, sugar, and date syrup until light and well mixed. Stir in the eggs, sour cream, orange juice, and orange zest. Mix well. Add the dry ingredients and combine well. Pour batter into the prepared pan. Bake for 45-50 minutes or until a toothpick inserted in the center comes out clean. Cool the cake for 10 minutes in the pan. Invert the pan to remove the cake. Allow it to cool completely on a wire rack. Make the glaze: In a small bowl, stir together the orange juice, date syrup, and butter. Add enough powdered sugar to make a thick glaze (not too thick and not too thin). Pour glaze over the cake. Serve. 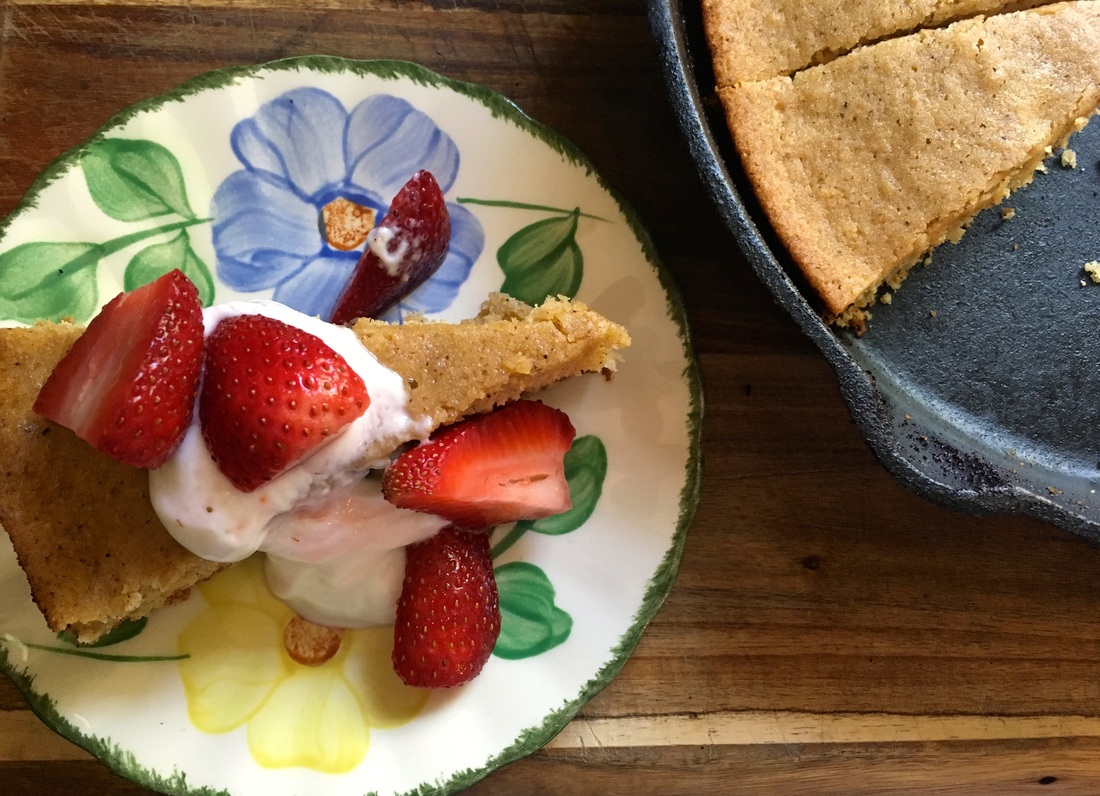 Right now, I'm addicted to anything containing brown butter. Why? Brown butter is just sooooo good, adding a nutty flavor to any recipe. Recently, I made Brown Butter Blondies, which were quickly devoured by my family. While I could have made blondies again, I decided to bake a cake. We had strawberries hanging around just waiting to be served with cake. And who doesn't like cake with strawberries?
This is a simple recipe to put together. However, you need a 10-inch cast iron pan for best results. You can make this recipe without the cast iron skillet, but it just won't be the same. Well, ok, it will still turn out fine, but the pan adds a little something extra to the appeal. Just be sure to grease the pan you are using to bake the cake. Also, I served the cake with lemon Greek yogurt* but you can serve it with whipped cream. Whichever you choose. Brown Butter Cake Yield: 1 10-inch cake
Preheat oven to 350ºF. In a 10-inch cast iron skillet, melt the butter over medium heat. Continue to cook the butter until it turns amber in color. Pour the butter into a mixing bowl. Refrigerate for about 15 minutes while you gather the rest of the ingredients. Set the cast iron pan aside (do not wipe it out). Add the eggs, yogurt, brown sugar, and sugar to the melted butter. Stir to combine well. Add the lemon zest. Stir in the flour, baking powder, and salt. Stir to combine well. Pour batter into the cast iron skillet. Bake for 25-30 minutes or until the cake starts to pull away from the side of the pan and a toothpick inserted in the center comes out clean. Cool cake. Serve with fresh strawberries and sweetened whipped cream or Greek yogurt.* *Lemon Greek Yogurt 1 cup plain Greek yogurt 2 teaspoons fresh lemon juice 1 tablespoon honey 1-2 teaspoons sugar (optional) Stir ingredients together. Refrigerate until ready to use. 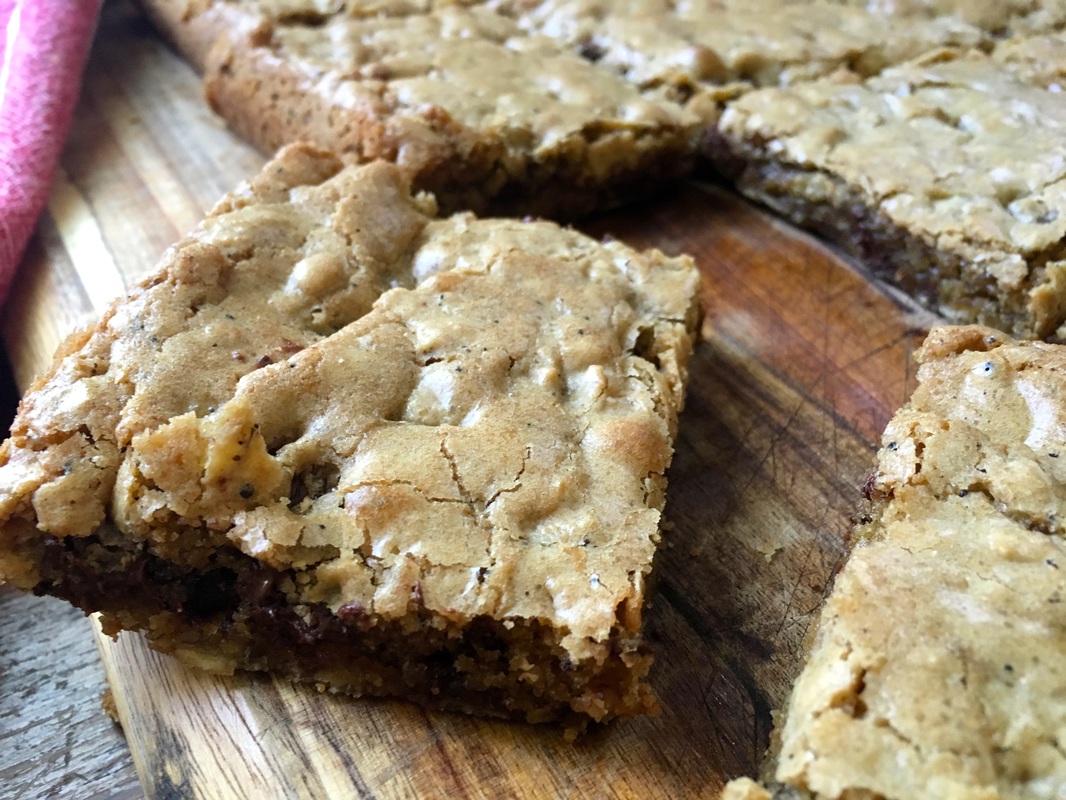 My kids often find me in the kitchen pulling out bowls and measuring cups and ask "What 'cha making, Mama?" After I tell them, they wait around the kitchen waiting for whatever I'm making to be done. It's like being on a cooking show or perhaps on Chopped. I feel a sense of urgency as they stare at me while I stir ingredients together.
Sometimes I get the urge to just bake something. Most of the time I enlist the help of my daughter, who has decided that she now wants to learn how to cook/bake at the age of 14. But the other day, I decided to head off on my own and bake something delicious for the family. After spending the last few months baking with lentils, I felt my family needed a break from the little legume (we've eaten soooo many!). So, why not make brownies? However, I didn't have any cocoa powder, but chocolate chips were staring at me in the pantry. Blondies it is. Brown butter blondies. Browning the butter adds a nuttier flavor to the blondies and is definitely worth the extra step. Brown Butter Blondies Yield: 1 13 x 9 inch pan (about 12 blondies)
Preheat oven to 350ºF. Generously grease a 13x9 inch baking pan. Set aside. In a saucepan, melt the butter over medium heat. Cook the butter until browned, amber in color. Pour into a glass bowl and allow to cool for 15 minutes. In a mixing bowl, combine the butter, sugar, eggs, and vanilla. Stir in the flour, oats, baking powder, and salt. Mix until well combined. Fold in the chocolate chips. Spread batter into the prepared pan. Bake for 20-25 minutes or until lightly golden brown. Cool on a wire rack. Cut into squares. Be sure to share. 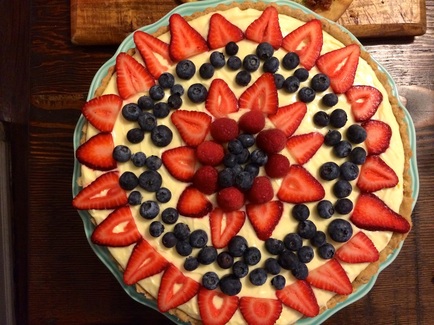 If you are looking to entertain some of your closest, dearest friends at some point this spring, you may want to try out this dessert. It's sweet, tart, and beautiful to look at. I mean, who wouldn't want to eat it?
Tart crust is more forgiving than pie pastry. Meaning, if it rips or tears while you are rolling it out, you can fill in the holes with extra pastry dough and no one will know. The pastry dough is soft and pliable and it might be a little frustrating to work with, but it works well in the end and holds up nicely (which is what you want). Now, if you don't want to make your own crust, you can always purchase one at the store. Don't worry, I won't rat you out. The recipe is done in steps --first, make the lemon curd, then the tart pastry and then put it all together. The lemon curd and tart pastry can be made up to two days ahead of time (keep in the refrigerator). Also, I used an 11-inch tart pan for this. If you have a smaller tart pan, you will have leftover lemon curd cream (oh no!) to use for something else. I'm sure you'll put it to good use. Or you can just eat it. Whichever. Fresh Berry Lemon Tart Yield: one 11-inch tart Lemon Curd
Remove the zest from the lemons using a vegetable peeler. This will give you nice long strands of zest. Be sure to remove just the yellow part and not the white (the pith). Place the sugar and zest in a food processor. Pulse the processor several times to break up the lemon zest. Add the butter to the sugar mixture. Process until combined. Add the lemon juice, eggs, egg yolks, and salt. Process to combine. Pour the mixture into a 2-quart saucepan set over medium low heat. Cook, stirring constantly, until thickened (the mixture should register 170ºF on a thermometer when it is cooked), about 10 minutes. Remove from the heat and pour into a glass bowl. Allow it to cool for 20 minutes on the counter and then cover with plastic wrap and refrigerate for at least 2 hours. This can be made up to 2 days ahead of time. It will continue to set as it cools. Tart Pastry
You can make this by hand with a pastry blender or with a food processor. By processor: Combine the flour, almond meal, sugar, and salt in the bowl of a processor. Add the butter and pulse until the mixture resembles coarse meal. With the motor running, pour the water through the lid and pulse until the pastry forms a ball in the bowl of the processor. The pastry maybe a little on the wet or soft side. That's ok. Brush your hands with flour and gather the pasty in a ball. Press into a disk and wrap in plastic wrap. Place in the refrigerator for at least 1 hour. This can be made up to 2 days ahead of time. Fresh Berry Tart
Preheat the oven to 350ºF. Place the tart pan in a baking sheet (this will help keep it steady as you move it to/from the oven). Roll out the tart pastry on a well-floured surface. Sprinkle the top of the pastry with flour, too. It should be rolled out to about a 12-inch circle. If the pastry is tearing and being unmanageable, that's ok. Gather up the pastry and press it into the bottom and sides of the tart pan (cutting off any excess), filling in any gaps or holes with leftover pastry dough. Once the pastry is covering the inside of the tart pan, prick the bottom with a fork. Line the pastry with foil - make sure it meets the edge of pastry and fill the foil with pie weights, dried beans, or dry rice (I use beans). Be sure you fill the foil to the edges of the pan. This will help prevent the pastry from shrinking down. Bake for 10-12 minutes. Remove the foil and beans (or pie weights). Bake for an additional 12-13 minutes or until golden brown. Remove from the oven and cool completely. In a bowl, whip together the heavy cream and mascarpone cheese until the mixture forms soft peaks. Add the powdered sugar. Place the lemon curd in a large bowl. Stir it up to loosen the curd. Add about a 1/4 of the cream mixture to the lemon curd and mix well. Fold in the remaining cream mixture, being sure not to over mix. Pour the mixture into the tart shell and smooth off the top. Refrigerate the tart for at least 1 hour before decorating the top with berries. When ready, decorate the top with berries and cut into pieces to serve. 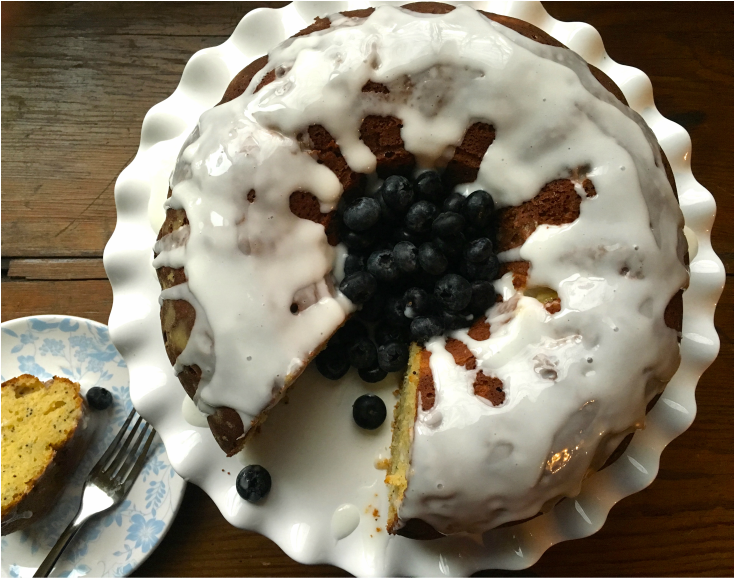 I love replacing butter in recipes with olive oil. Even though I'm a fan of butter, extra virgin olive oil brings a nice fruity flavor to cakes and other recipes. Butter can be heavy at times in flavor and texture. By using olive oil, this cake is light and the perfect end to a meal. Aside from cutting the lemon into segments (pictures below), this recipe is relatively easy to put together. Serve with fresh berries and you have a nice, lovely cake to be enjoyed any time. Note about the olive oil: Use extra virgin olive oil for the best flavor. Extra virgin is the first pressing of the olives resulting in the most fruity, fresh flavor of all the olive oils. Subsequent olive oils (virgin, pomace, etc) are made by pressing the olives a second or third time to extract the oil. I baked this in a bundt cake pan but you can use any cake pans you want or even use muffin tins. Lemon Olive Oil Cake Yield: 1 10-inch bundt cake (or 1 9 or 10-inch cake) Cake:
Icing:
Supreme or segment the lemons (pictures below): Remove the zest (the yellow skin) of the lemons with a fine grater. You should have about 1-2 tablespoons lemon zest. Set the zest aside. Cut each end of the lemon enough to revel the flesh. Cut between the pith (the white part) and the flesh of the lemon to fully remove the outer skin. Hold the lemon over a bowl. Cut out each segment of flesh between the membranes and place in a bowl. When all the lemon segments have been removed, squeeze the lemon over the bowl; discard any seeds. In all, you should have about 1/2 cup lemon segments and juice. Set aside until ready to use. Make the Cake:
Preheat the oven to 350ºF. Grease and flour a bundt pan, cake pans, or muffin tins. Set aside. In a food processor, combine the lemon zest and sugar. Pulse for 10-15 seconds to blend together. Place the sugar in a mixing bowl. Add the olive oil, honey, eggs, and yogurt. Whisk to thoroughly combine. Stir in the lemons and juice. In a small bowl, whisk together white whole wheat flour, all-purpose flour, baking powder, salt, and poppy seeds. Add dry ingredients to the olive oil mixture. Stir to combine ingredients well. Pour batter into prepared pans. Baking time will vary depending on the size of the pans. For muffins, bake for about 20 minutes or until a toothpick inserted comes out clean. For bundt or cake pans, bake for about 35-40 minutes or until a toothpick inserted in the center comes out clean. Cool in pans for 10 minutes. Remove from the pans and cool completely on a wire rack. Make the icing by mixing together the powdered sugar and milk to desired consistency. Pour over cooled cake. Serve with fresh berries. |
 Archives
October 2022
Recipe Categories
All
|
 RSS Feed
Home |
About |
Resources |
About Marcy |
Contact |
Copyright © 2015