
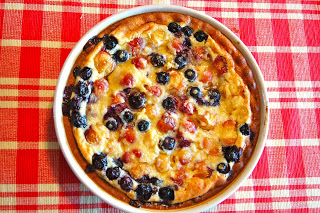
 A clafoutis is an egg custard typically made with cherries. In this version, I used Rainier cherries and blueberries but you can use Bing or sweet cherries instead. Or you can even use plums or blackberries. You know, the sky's the limit!
Serve this with brunch or as a dessert to a nice meal. Rainier Cherry and Blueberry Clafoutis
Preheat the oven to 375ºF. Lightly butter an 10-inch pie or quiche dish. Spread the cherries and blueberries on the bottom of the dish. Whisk together the eggs, half-n-half, mascarpone cheese, sugar, orange zest, vanilla, and flour until well combined. Pour the batter over the cherries and blueberries. Sprinkle the top with raw sugar and scatter the butter slices over the top. Bake until puffed and golden around the edges, about 40 minutes. If the center seems too runny, bake for another 10 minutes or so. Cool for 30 minutes at room temperature. Cover and refrigerate until cold and set. Dust with powdered sugar before serving.
0 Comments
 A while back, I was shopping in a little market that specialized in Mediterranean products. As I perused the shelves, I found a jar of date syrup. Intrigued, I purchased it and took it home. And then it sat in my cupboard for a few months until I decided that I needed to use it. But how exactly, I didn't know.
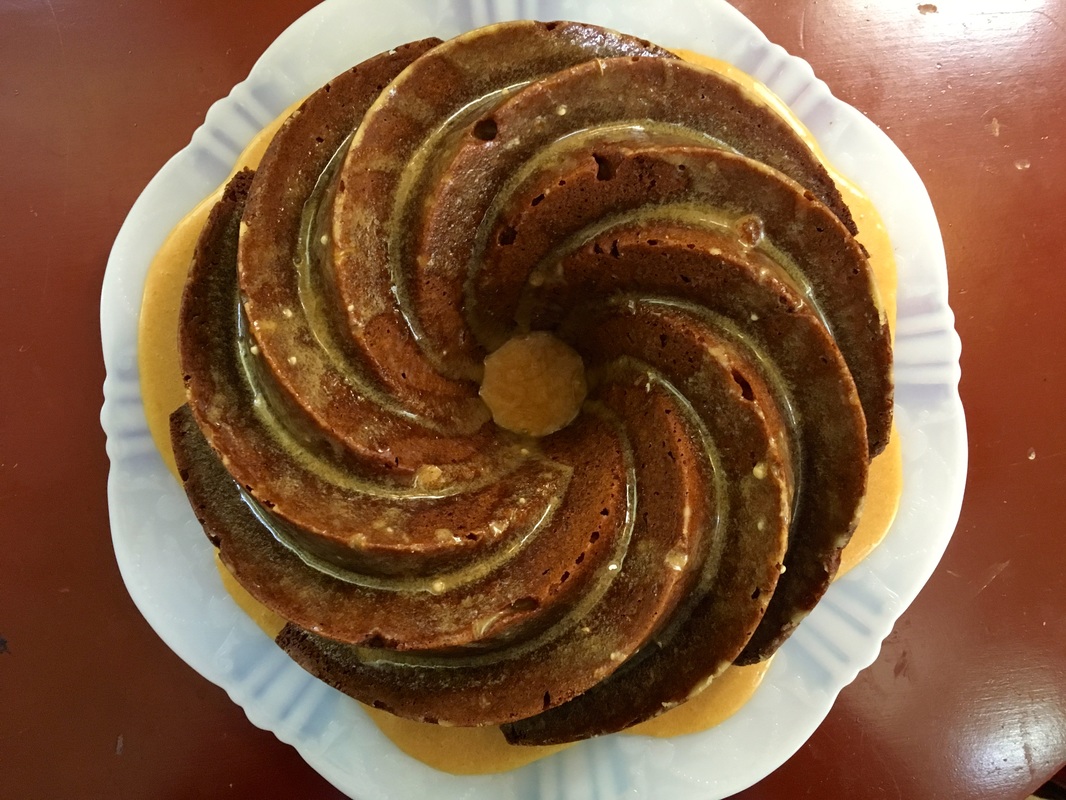
There aren't many recipes floating around on the web using date syrup (or date molasses), so I had to piece together a couple different recipes to make my own. I realized that this syrup can be used like regular molasses and it gave me the idea to make a spice cake. Date syrup differs in flavor compared to molasses. It is fruitier and lighter in flavor. Even though I use it in a cake, it would also be good in a sauce served with meat or poultry. From what I can tell, it has many uses, much like molasses. You can find date syrup in specialty grocery stores or on Amazon. You can also make your own if you have dates and sugar. I encourage you to go out and find a jar. You won't be disappointed. Date Syrup Spice Cake
Glaze:
Preheat the oven to 350ºF. Generously grease and flour a bundt pan. Set aside. In a small bowl, whisk together the flour, baking powder, baking soda, salt, cardamom, and cinnamon. Set aside. In a mixing bowl, cream together the butter, sugar, and date syrup until light and well mixed. Stir in the eggs, sour cream, orange juice, and orange zest. Mix well. Add the dry ingredients and combine well. Pour batter into the prepared pan. Bake for 45-50 minutes or until a toothpick inserted in the center comes out clean. Cool the cake for 10 minutes in the pan. Invert the pan to remove the cake. Allow it to cool completely on a wire rack. Make the glaze: In a small bowl, stir together the orange juice, date syrup, and butter. Add enough powdered sugar to make a thick glaze (not too thick and not too thin). Pour glaze over the cake. Serve. 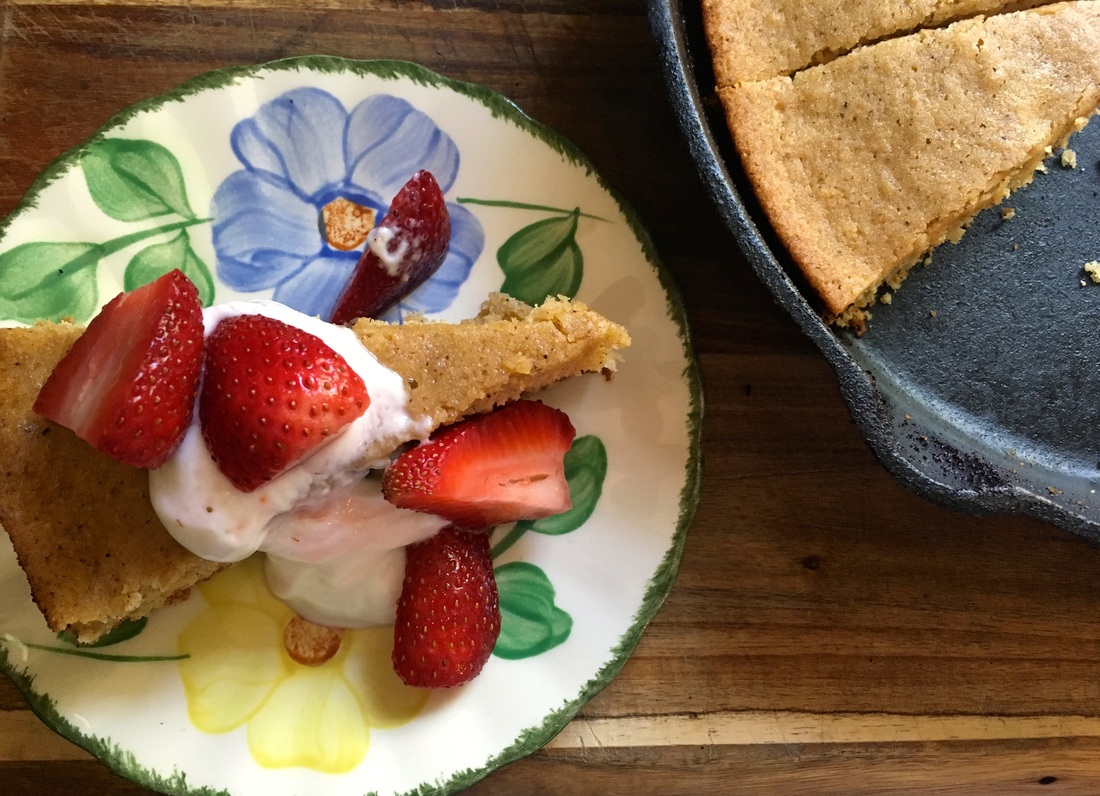 Right now, I'm addicted to anything containing brown butter. Why? Brown butter is just sooooo good, adding a nutty flavor to any recipe. Recently, I made Brown Butter Blondies, which were quickly devoured by my family. While I could have made blondies again, I decided to bake a cake. We had strawberries hanging around just waiting to be served with cake. And who doesn't like cake with strawberries?
This is a simple recipe to put together. However, you need a 10-inch cast iron pan for best results. You can make this recipe without the cast iron skillet, but it just won't be the same. Well, ok, it will still turn out fine, but the pan adds a little something extra to the appeal. Just be sure to grease the pan you are using to bake the cake. Also, I served the cake with lemon Greek yogurt* but you can serve it with whipped cream. Whichever you choose. Brown Butter Cake Yield: 1 10-inch cake
Preheat oven to 350ºF. In a 10-inch cast iron skillet, melt the butter over medium heat. Continue to cook the butter until it turns amber in color. Pour the butter into a mixing bowl. Refrigerate for about 15 minutes while you gather the rest of the ingredients. Set the cast iron pan aside (do not wipe it out). Add the eggs, yogurt, brown sugar, and sugar to the melted butter. Stir to combine well. Add the lemon zest. Stir in the flour, baking powder, and salt. Stir to combine well. Pour batter into the cast iron skillet. Bake for 25-30 minutes or until the cake starts to pull away from the side of the pan and a toothpick inserted in the center comes out clean. Cool cake. Serve with fresh strawberries and sweetened whipped cream or Greek yogurt.* *Lemon Greek Yogurt 1 cup plain Greek yogurt 2 teaspoons fresh lemon juice 1 tablespoon honey 1-2 teaspoons sugar (optional) Stir ingredients together. Refrigerate until ready to use.  It's spring and it's time for us to dust off the grill and start cooking outside! There isn't a better way to break in your grill than to cook up some hamburgers.
Now, I like a good beef (grass-fed, of course) burger, but my family does not always want to eat red meat, leaving me to become creative in which meat I cook. So, I like to use chicken thighs whenever possible. They grind up well and have a lot of flavor (way more than breast meat). To grind up chicken thighs, you will need to use either a food processor or a meat grinder (like the attachment for a KitchenAid Mixer). Otherwise, you will be chopping up chicken thighs with a knife, which will be time consuming. Chipotle peppers in adobo sauce can be found in the Mexican food section of the grocery store. They add a nice smokey flavor to the burgers along with a little bit of heat. Chipotle Chicken Burgers Makes 4-6 burgers
Place the chicken thighs in a food processor. Pulse several times to roughly chop up the meat. Add the garlic, onion, chipotle peppers, salt, and pepper. Pulse several times until blended and the meat is chopped up. If using a meat grinder, run the chicken through the coarse blade. Then mix it with finely chopped garlic, onions, chipotle peppers, salt, and pepper. Form meat into patties. Cook on a grill or on the stove, about 4-5 minutes per side, or until the internal temperature of the burger reaches 165ºF. Add cheese if desired. Serve on a toasted bun with all the regular burger fixings. 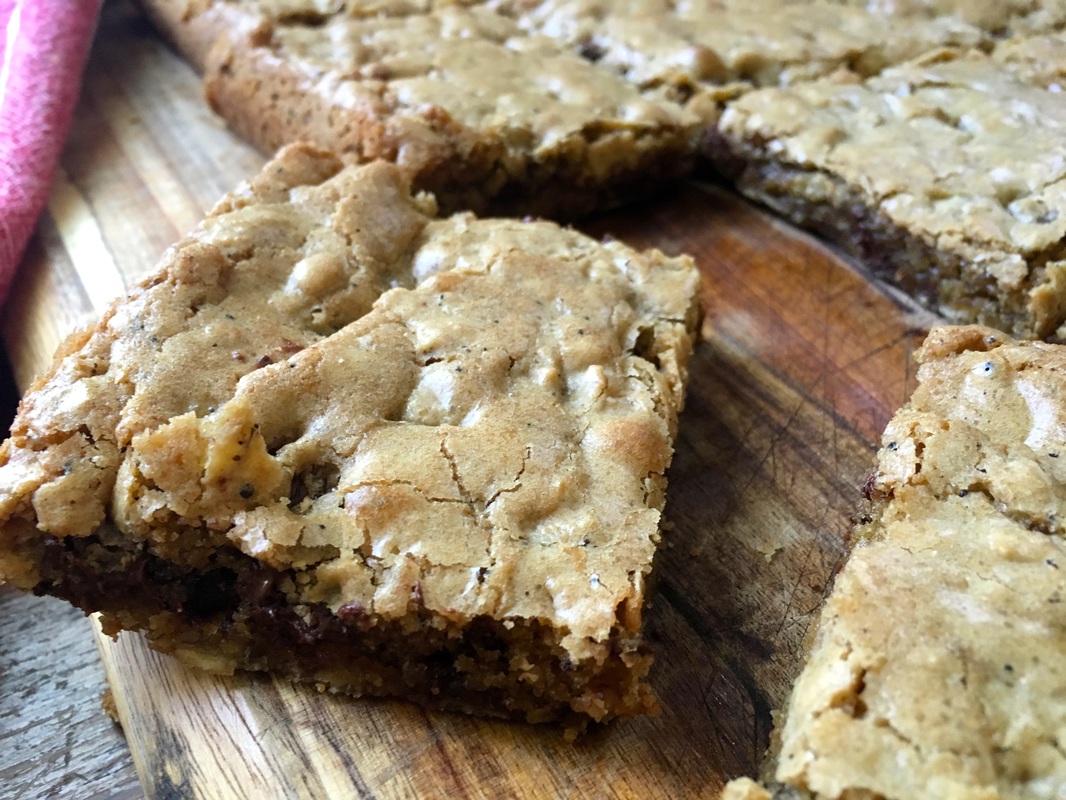 My kids often find me in the kitchen pulling out bowls and measuring cups and ask "What 'cha making, Mama?" After I tell them, they wait around the kitchen waiting for whatever I'm making to be done. It's like being on a cooking show or perhaps on Chopped. I feel a sense of urgency as they stare at me while I stir ingredients together.
Sometimes I get the urge to just bake something. Most of the time I enlist the help of my daughter, who has decided that she now wants to learn how to cook/bake at the age of 14. But the other day, I decided to head off on my own and bake something delicious for the family. After spending the last few months baking with lentils, I felt my family needed a break from the little legume (we've eaten soooo many!). So, why not make brownies? However, I didn't have any cocoa powder, but chocolate chips were staring at me in the pantry. Blondies it is. Brown butter blondies. Browning the butter adds a nuttier flavor to the blondies and is definitely worth the extra step. Brown Butter Blondies Yield: 1 13 x 9 inch pan (about 12 blondies)
Preheat oven to 350ºF. Generously grease a 13x9 inch baking pan. Set aside. In a saucepan, melt the butter over medium heat. Cook the butter until browned, amber in color. Pour into a glass bowl and allow to cool for 15 minutes. In a mixing bowl, combine the butter, sugar, eggs, and vanilla. Stir in the flour, oats, baking powder, and salt. Mix until well combined. Fold in the chocolate chips. Spread batter into the prepared pan. Bake for 20-25 minutes or until lightly golden brown. Cool on a wire rack. Cut into squares. Be sure to share. 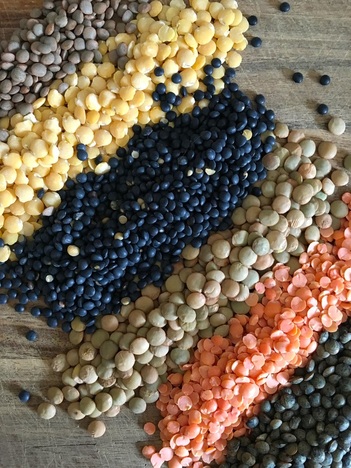 Lentils: Pantry Gems available on iBooks So, I wrote a cookbook. Not just any cookbook. This one has one main theme: Lentils. Yep, lentils. I know what you are thinking. Just lentils? You aren't including the other pulses? Why oh why would you devote a whole cookbook to lentils? Well, why not? I'm mean, really. They are an inexpensive form of plant protein. They are full of fiber and very nutritious. Honestly, we should all be eating more lentils (and other pulses). But this just isn't a cookbook with a bunch of soup an stew recipes. No, I actually bake with lentils. And sprout them. Brine them. Put them in salads. Cake. Cookies. And discuss them in detail -- give you the full nitty gritty about this little legume that is found in cuisines around the world. If you are looking for ways to incorporate more vegetarian cuisine or recipes into your repertoire, then you need this book. I amassed over 40 recipes featuring lentils. But I still have more recipes and ideas for them, so perhaps there will be a part 2 in the future. Maybe I'll even bring in some of their pulse cousins, like chickpeas. To get you started, here is a great cookie recipe that I make often for my kiddos. Oatmeal Chocolate Chip Cookies Makes 2-3 dozen cookies
Place the lentils in a saucepan. Cover with water by 2 inches. Bring to a boil. Cover and reduce heat to low. Simmer until soft, about 20-25 minutes. Drain off the liquid. Let the lentils cool for 10-15 minutes. Place them in a food processor and pulse until smooth. Save 3/4 cup of the lentil puree for the recipe. Any remaining puree can be refrigerated (for up to 4 days) or frozen (for up to 6 months) for later use. Preheat oven to 350ºF. In a small bowl, whisk together the flour, oats, baking soda, and salt. Set aside. In a mixing bowl, cream together the butter, brown sugar, and granulated sugar until light and fluffy. Add the eggs and vanilla. Mix well to combine. Stir in the lentil puree. Add the flour mixture and mix until well combined. Drop by spoonfuls onto a baking sheet. Bake for 10-13 minutes. Remove from pan and cool cookies on a wire rack. Be sure to share. 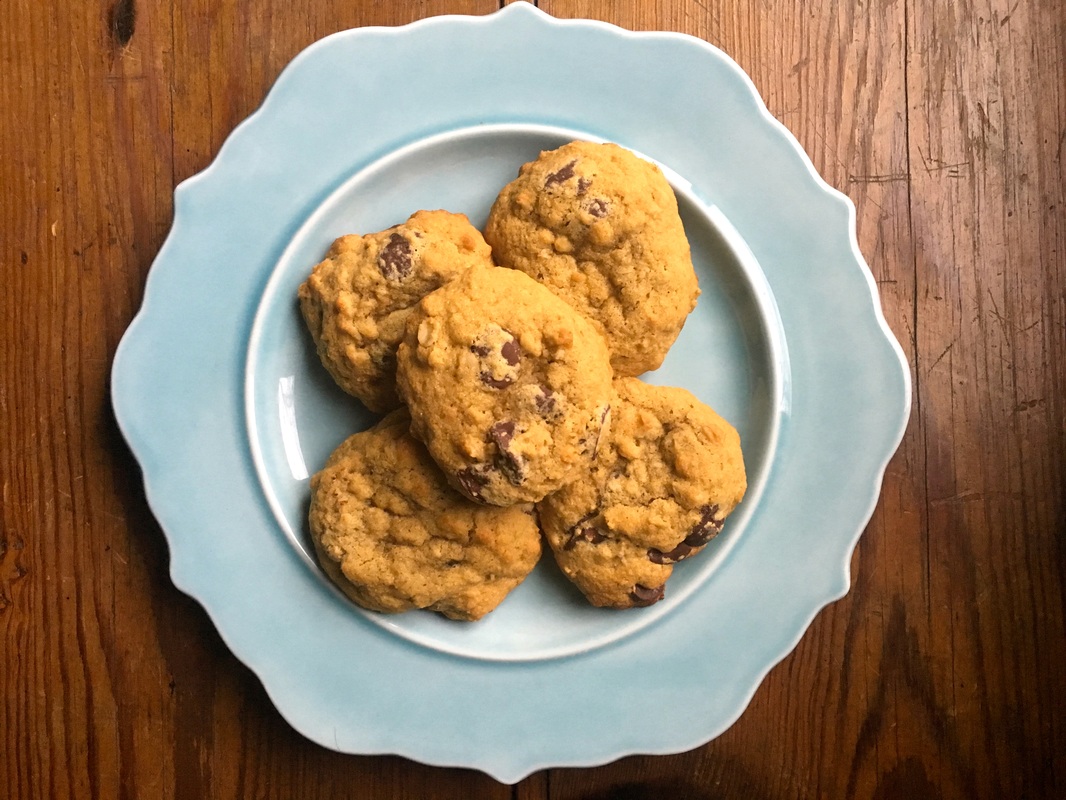 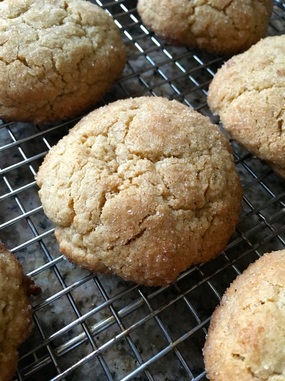 Snickerdoodles Snickerdoodles Ok, so some people like to bake. Some just like to cook. I happen to be one of those that enjoys doing both. Baking (especially bread) provides me a sense of accomplishment that I do not get from making a simple dish like spaghetti. Maybe it's because it does not take much for me to make a plate of pasta but with baking, I have to think in ratios and how the ingredients work together. It takes patience and I have to measure ingredients (most of the time). It's more precise than making meatloaf or soup.
However, if you are new to this whole "baking" thing, I have some tips for you: Baking is a science, more so than cooking. Treating it like a science will definitely improve your baking skills. Know your chemical leavening agents, which are acids and bases (Oh no! Chemistry!!):
Preheat the oven This seems like a no-brainer but it must be repeated. Preheat the oven prior to baking. This is especially important for cakes, muffins, or breads where it is important that the immediate heat of the hot oven starts the baking process right away (like getting those chemical reactions to occur rapidly). Room temperature ingredients Unless you are making pastries, you need room temperature ingredients. For instance, if you are making cakes, cookies, or muffins, let all the butter, eggs, and milk come to room temperature before mixing together. If the butter is at room temperature and you’ve carefully creamed it together with the sugar, adding cold eggs and milk will start to solidify the butter. Your end product will turn out greasy. Creaming fat/sugar Nearly every cookie or cake recipe calls for creaming together the butter and sugar. What does this even mean? Well, it means thoroughly mixing together the butter and sugar until it is one homogenized mixture, light, and fluffy. Muffins (and pancakes) Do not over mix muffin or pancake batter. Why? Over mixing the batter will make a tough, flat pancake and causing tunneling (air pockets) in muffins. Mix the wet and dry ingredients separately before combining. Add the wet ingredients to the dry and then stir the mixture until just combined. Some tiny lumps are ok. The batter should not be smooth. Master a simple cake recipe, cookie recipe, and muffin recipe like the one below. Below is my grandmother's snickerdoodle recipe and happens to be my kids' favorite cookie. I will be posting more cake, cookie, and muffin recipes over the next few months. Stay tuned! Snickerdoodles
Topping:
Preheat oven to 350ºF. Cream together the shortening, sugars, eggs, and cream. Add the vanilla. In a bowl, stir together the flour, baking soda, cream of tartar, and salt. Add to the butter mixture and mix thoroughly to combine well. The cookie dough will be quite stiff. In a small bowl, mix together the 1/2 cup sugar and teaspoon of cinnamon. Roll the dough into 1-inch balls and roll in the cinnamon and sugar. Place on a baking sheet and bake for 10-12 minutes or until lightly golden brown. Cool on a wire rack. *You can use white whole wheat flour. 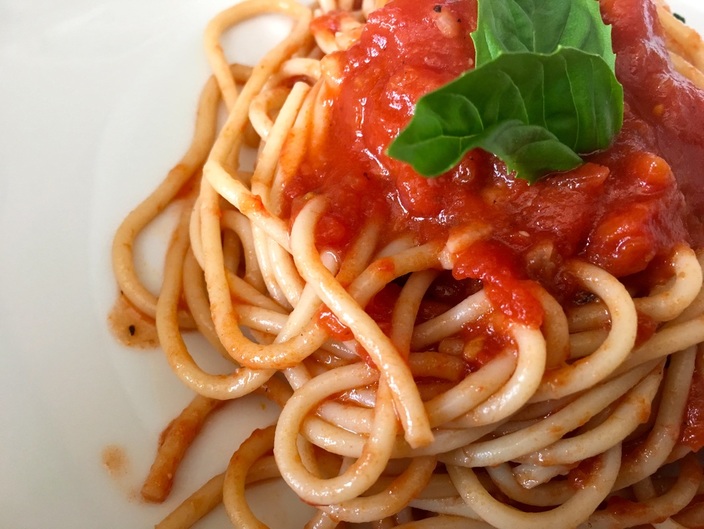 Ok, so this more than just boiling water. It's about making spaghetti with homemade marinara sauce. My assumption is, you probably already know how to boil water and cook pasta. However, there might be someone in the crowd who doesn't understand the process, so let me break it down for you. Here are some simple tips for boiling water and pasta
Pasta with Marinara Sauce Serves 3-4
Bring a pot of water to a boil. As you are waiting for the water to boil, begin making the sauce. Place the olive oil, red pepper flakes, and garlic in a cold sauté pan or skillet. Place the pan on the stove over medium heat. Doing this helps infuse the flavors of the red pepper flakes and garlic into the oil. Once the garlic begins to sizzle, add the tomato paste. Stir it around and cook for 1 minute. Add the red wine; cook for 1 minute. About half of the wine will cook off. Add the tomatoes and season with salt and pepper (about ½ teaspoon of each). Reduce heat to medium low and simmer for 10-15 minutes. Taste and adjust the seasonings. At this point, you have a choice to leave the sauce chunky or puree it for a smoother sauce. I chose to puree half of the sauce using a hand blender (do this in a deep bowl, to prevent wearing the sauce). You can also use a regular blender or food processor. Once I pureed the sauce, I returned it back to the pan and added the basil. Once the water begins to boil, add a hefty pinch of salt to the water and add the pasta. Cook pasta according to package directions, but reduce the cooking time by 1 minute. Drain the pasta, reserving a ½ cup pasta water. Add the pasta and pasta water to the sauce. Cook for 2-3 minutes over medium low heat. Serve with bread and parmesan cheese. Enjoy! I take cooking and baking for granted. I’ve been doing this for so long, that I usually don’t use recipes and I write many of my own recipes or usually just throw things together without thinking about it. But, how did I get to this place? Was I a natural in the kitchen?
Sort of but most importantly, I was blessed with an encouraging family. My grandmother taught me how to bake cookies but when it came to actually cooking a meal, it was a lot of trial and error. I’ve made my fair share of mistakes over the years. At the tender age of 14, I decided to bake my first loaf of bread - a French baguette using Julia Child’s recipe. You know, why not start at the top? Well, it was my first foray into baking yeast bread and it turned out like a baseball bat. A baguette bat, so-to-speak. Over the years, I practiced and learned. I went to culinary school. Practiced and learned some more. Worked in kitchens. Kept practicing and learning. And now here I am, a confident chef. But… still practicing and learning. Some things are easier to master than others, but you have to start somewhere. If you find cooking (or baking) intimidating, start small. Find an easy recipe and master it. Then, move on to another recipe and master that one. As you grow comfortable working in the kitchen, the easier it gets and the more confidence you will gain. You don’t have to be a “natural” for this whole cooking thing. Sure, some people are blessed with a natural ability to throw food together and create amazing meals. However, when it comes down to it, cooking is a skill. You need to master a few skills and then you can make nearly anything. You may need someone to show you the proper way to chop an onion, but you can get started on your own by experimenting with recipes. One of the most important things to do when you start cooking, is to remember to season your food. You need to train yourself to season food (and taste it) as it cooks, so you understand how flavors work together. Salt and pepper are your friends, so use them wisely. Utilizing proper seasoning techniques will help develop your palate and make you a better cook. The last thing I will say is to have fun with cooking. It should not be treated as a chore. Think of it as a way to connect with the food that is providing you nourishment. You are turning a simple recipe, like leek and potato soup, into a delicious and healthy meal that didn't break the bank or take all day to prepare. The reason we are fascinated by celebrity chefs and cooking shows is that they transform simple ingredients into amazing meals (or so we think). There is no reason you cannot do the same thing in your kitchen. This blog offers many basic recipes -- from pie to roasting chicken. Over the next few months, I will provide even more “basic” recipes, tips, and skills for you to master.  Instant-read thermometers Instant-read thermometers Long ago and far away, I was once a novice cook learning the ins and outs of working in a kitchen. Over the years, after watching endless hours of TV cooking shows on PBS and the Food Network and working as a chef, I have gotten very selective in which tools I actually use in the kitchen.
Until recently, the kitchens I've worked in (at home or in a job) were small and compact. I never had much storage space, let alone much counter space to work on. So, I had to be selective in the kitchen equipment I kept around. I found that I could make a great meal in any size kitchen and the bigger the kitchen I cooked in, meant more places for me to make a mess (and clean up later). My home kitchen now is laid out well, but I still only use maybe a third of it when I'm cooking. Over the past couple of years, I have gotten rid of many pieces of equipment that I do not find necessary and am now down to pieces that I actually use. If you are just starting out and learning how this whole cooking thing works, I compiled a list of equipment that you actually need to set up a basic kitchen. Of course, you can always add to it as you gain confidence in your cooking skills and expand your culinary repertoire, but this list will get you started. And ... I encourage you to look for some of these items in thrift stores, on eBay, or local garage sales because you might find what you need for a lot less money. Pots and Pans:
As a general rule, I do not use non-stick cookware. Instead, I use cast iron in place of non-stick. When it comes to the pots and pans, I will not promote any one brand over another. Look for pans that are stainless steel or anodized aluminum (or a combination of both). Utensils:
Electric Equipment:
Knives:
Baking:
Other:
Later on, you can add more equipment as you see fit. The next step would be to add a stand mixer, a hand blender (very handy tool), and a few more pots and pans as you see fit. Stocking a kitchen can be pricy, but if you have the right equipment and tools, many of these things should last a long time (or a lifetime in some cases). My most trusted piece of equipment is a food processor that I've had for nearly 20 years. I also have an odd attachment to my chef's knife, but that's common with many professional cooks. Or at least I hope it is. Anyway... I hope this list is helpful for those just starting out. Cooking can be fun and does not need to be a chore. Having the right equipment in place will help you succeed in making any recipe. |
 Archives
October 2022
Recipe Categories
All
|
 RSS Feed
Home |
About |
Resources |
About Marcy |
Contact |
Copyright © 2015